SOTA outings by KØMOS and contributors

Tag: Estes Park

  • WØC/FR-Ø7Ø (Castle Mountain) – 2693 M / 8834 ft

    WØC/FR-Ø7Ø
    Castle Mountain
    2693 M / 8834 ft
    Nov 09, 2013
    First Activation
    Apr 25, 2014

    by KXØR

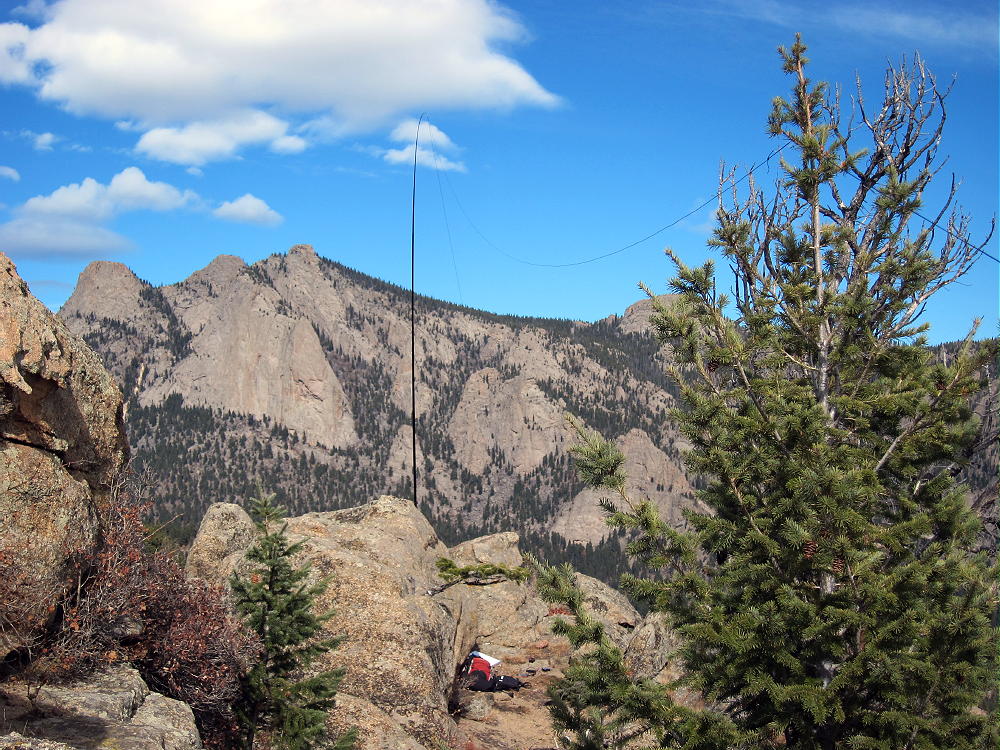
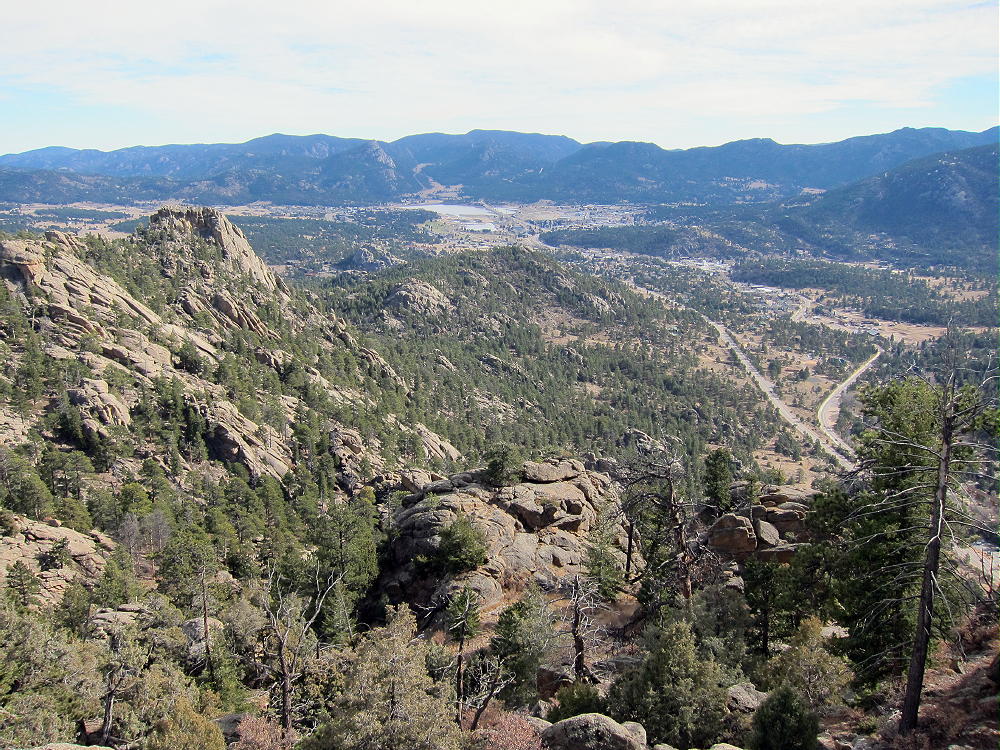
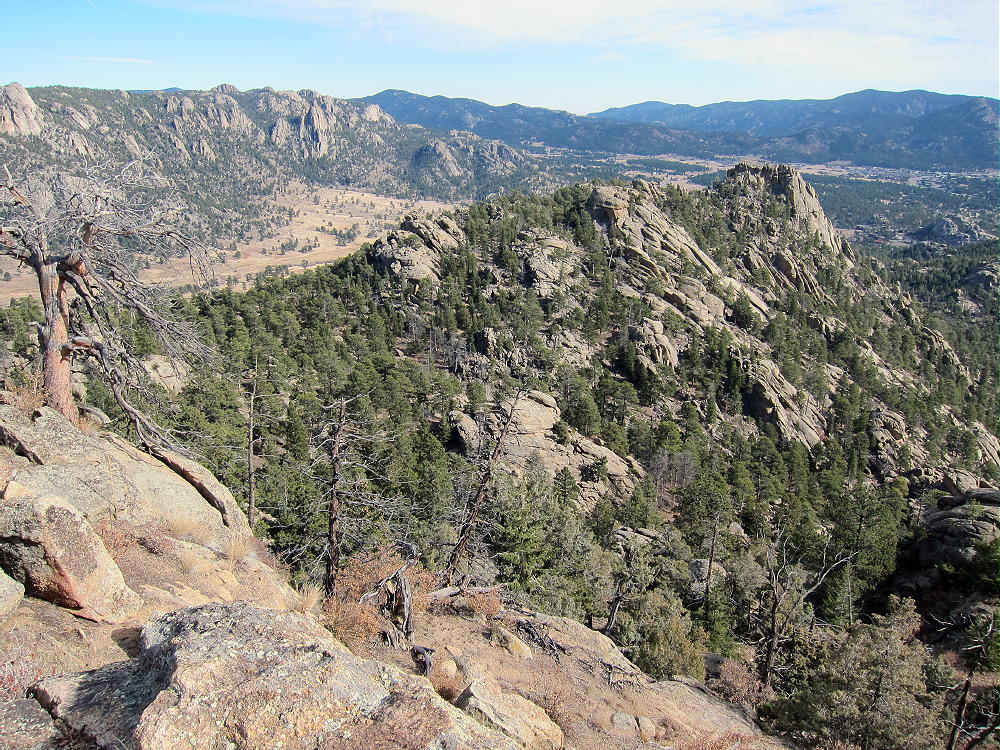
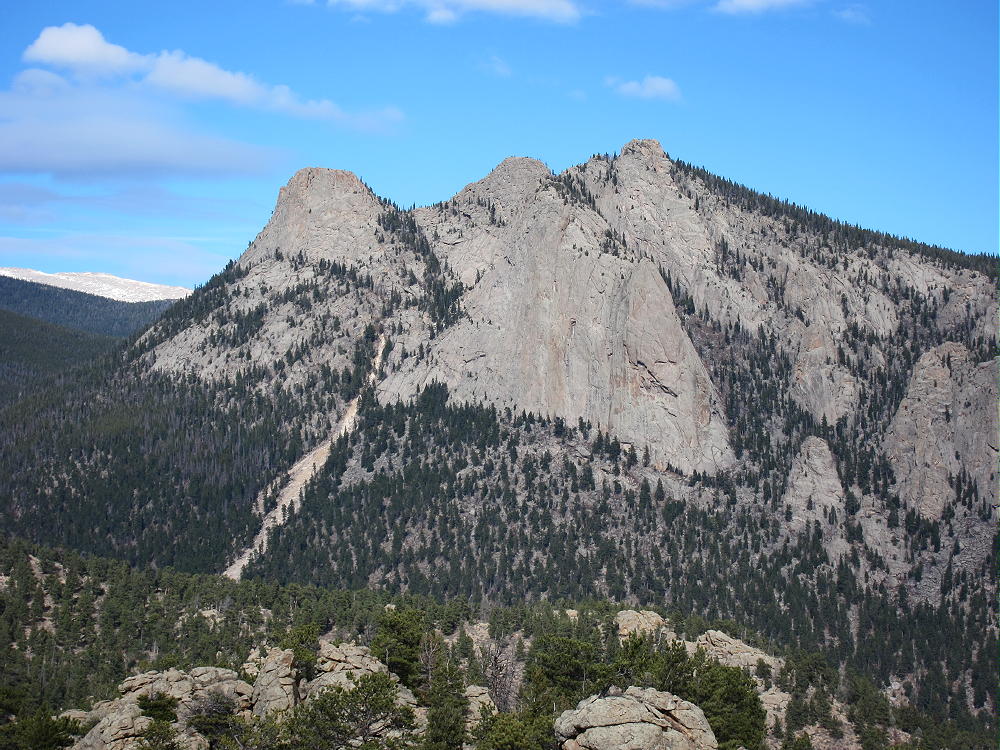
    Castle Mountain is an interesting minor summit in the eastern part of Rocky Mountain National Park, right above the town of Estes Park. It provides a fun SOTA activation.
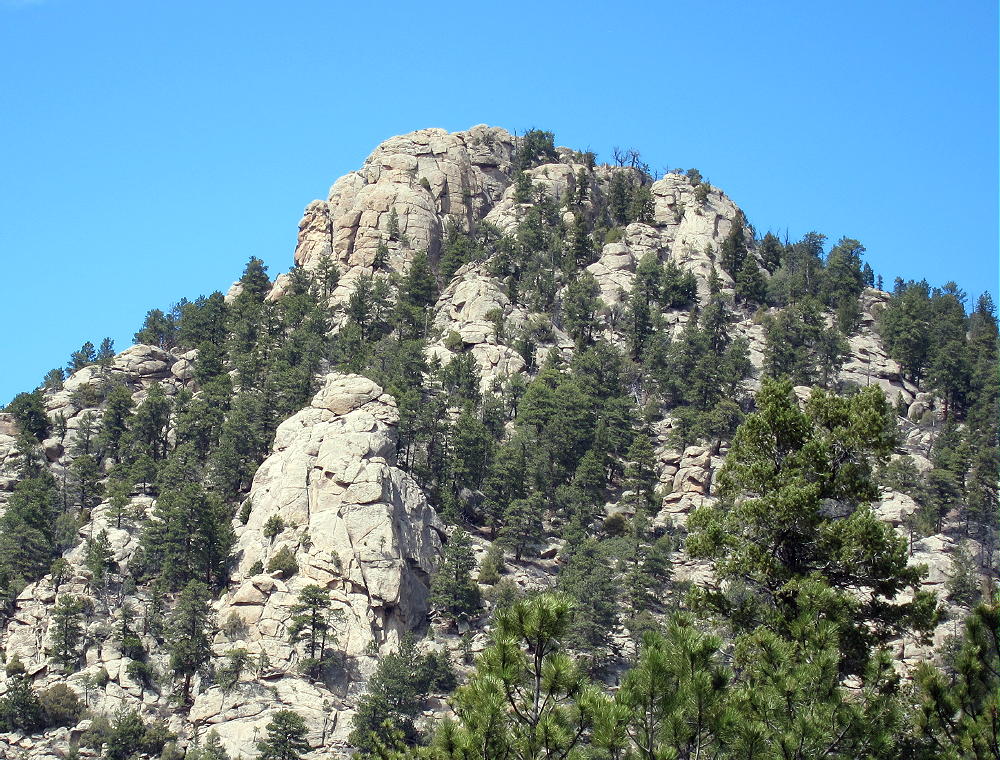
    Castle Mountain
    Castle Mountain

    Since this trip has no marked route, and the terrain is steep, good navigation is required. Study the route, take a topographic map, and follow the directions here to stay on National Park land. The key to Castle is to know where to start the hike.

    Drive to Estes Park, take the Highway 34 Bypass north (W. Wonderview Ave), drive past the Stanley Hotel and west about 1-1/2 miles, almost to the junction where W Elkhorn Avenue (also Route 34) meets the Highway 34 Bypass west of town. A convenient paved parking spot is on the south side of the Route 34 Bypass, just east of the junction.
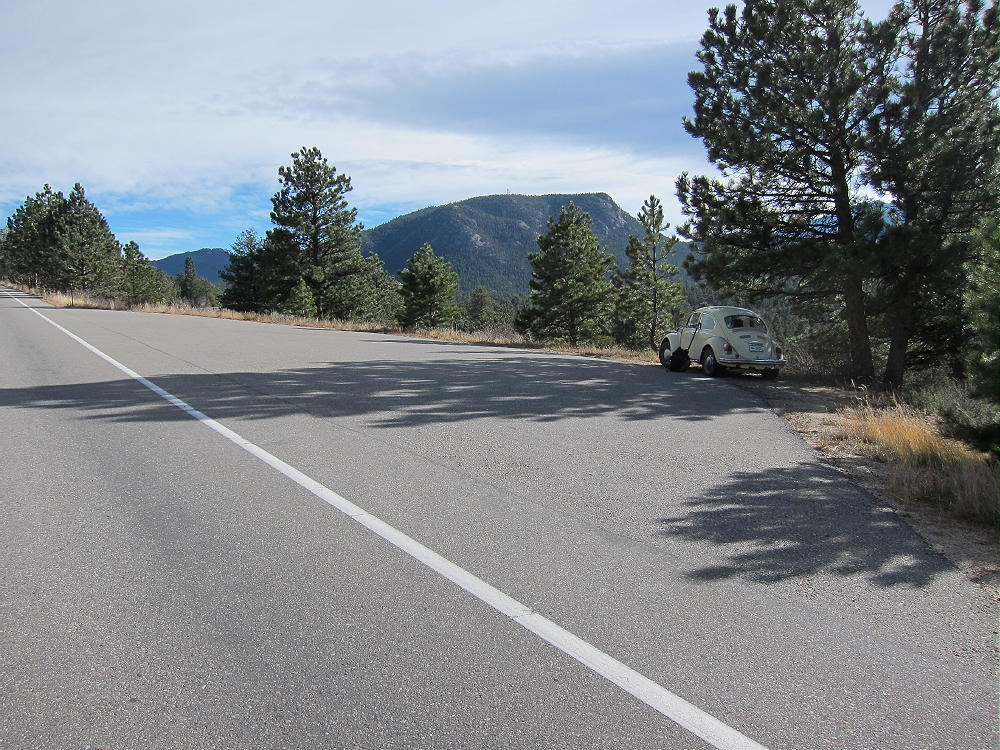
    Castle Mountain Parking on 34 Bypass
    Castle Mountain Parking on 34 Bypass
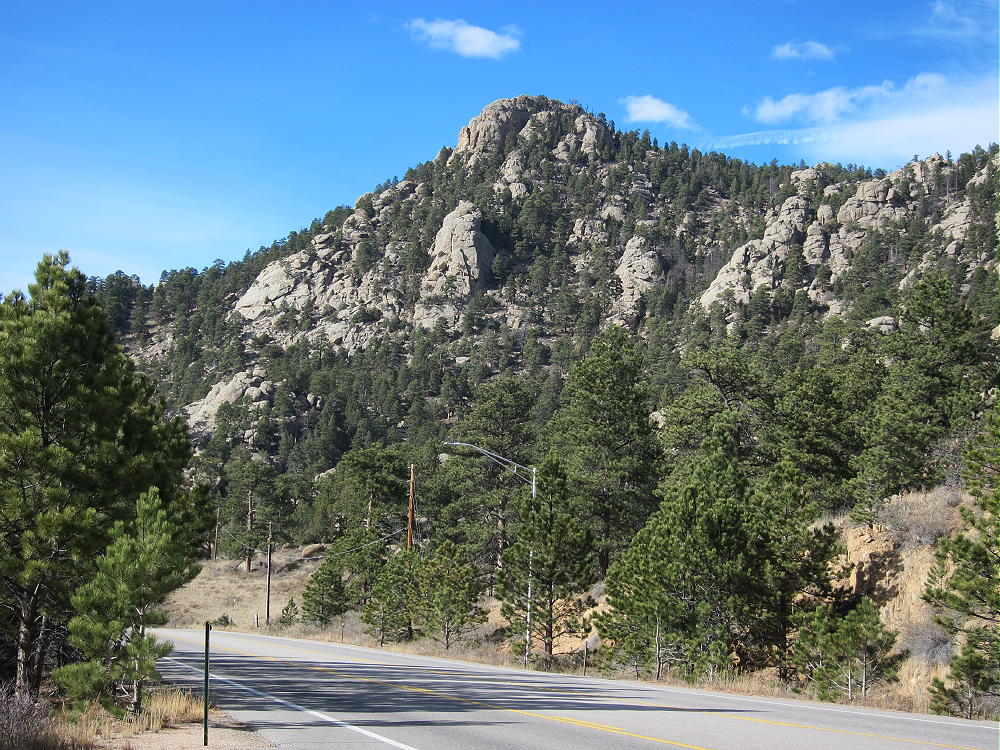
    Castle from Highway 34 Bypass
    Castle from Highway 34 Bypass

    Right across the highway you can see the NPS signs on posts. The land from the highway to the top of the Mountain is part of Rocky Mountain National Park (RMNP). No fee or pass is required for this adventure!
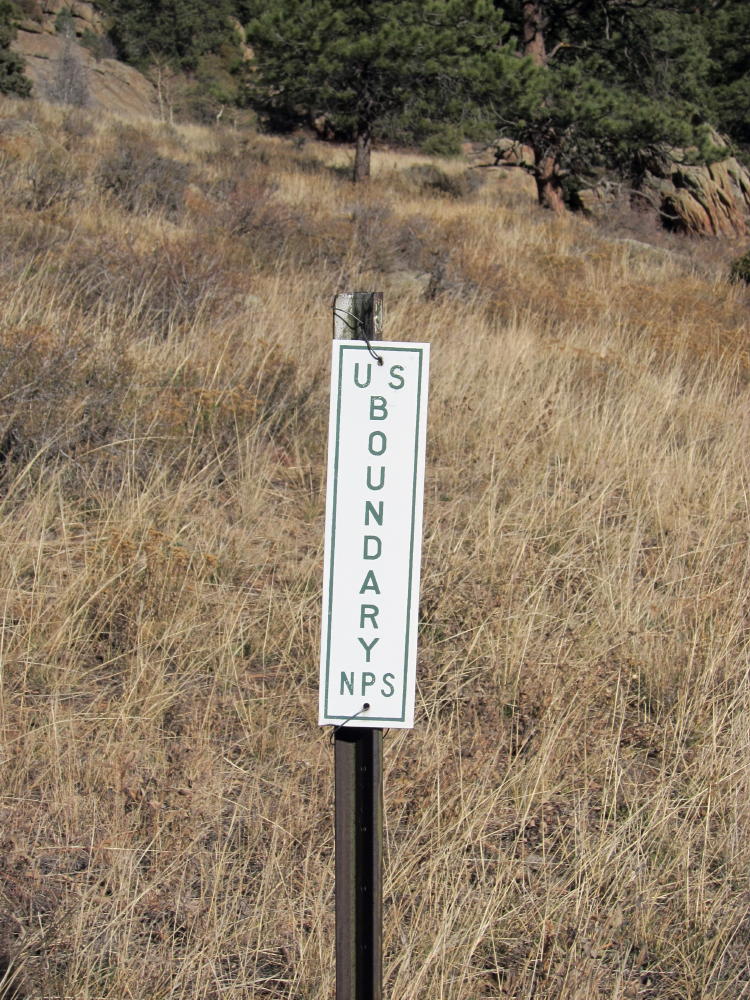
    Castle NPS Marker near Highway
    Castle Mountain NPS Marker near Highway

    Cross the highway and head up a faint path in the gully north of the parking spot. Stay on the west side of the draw to avoid private land just to the east. After about ½ mile, the gully ends at a saddle near 8000 feet. From this saddle, head first northwest, and then west up the steep ridge toward Castle – there is nothing to follow except bits of game trails. No rock climbing is required – just head up the slope to the rocky ridge leading west toward Castle. On the ridge, stay slightly south to keep inside RMNP. Drop down slightly to a saddle east of the Summit, and continue west up to the easy summit ridge. Climb south toward the obvious peak, and then do a few easy class 3 moves to ascend the prominent summit. Right below the top is a good place to set up and operate. The Needles, McGregor Mountain, Deer Mountain, etc., are close to Castle. Estes Park is over a thousand feet right below. This is a super radio site – like being on a tower! I worked 2 G’s and an EA on 15M CW – 30 Q’s in all.
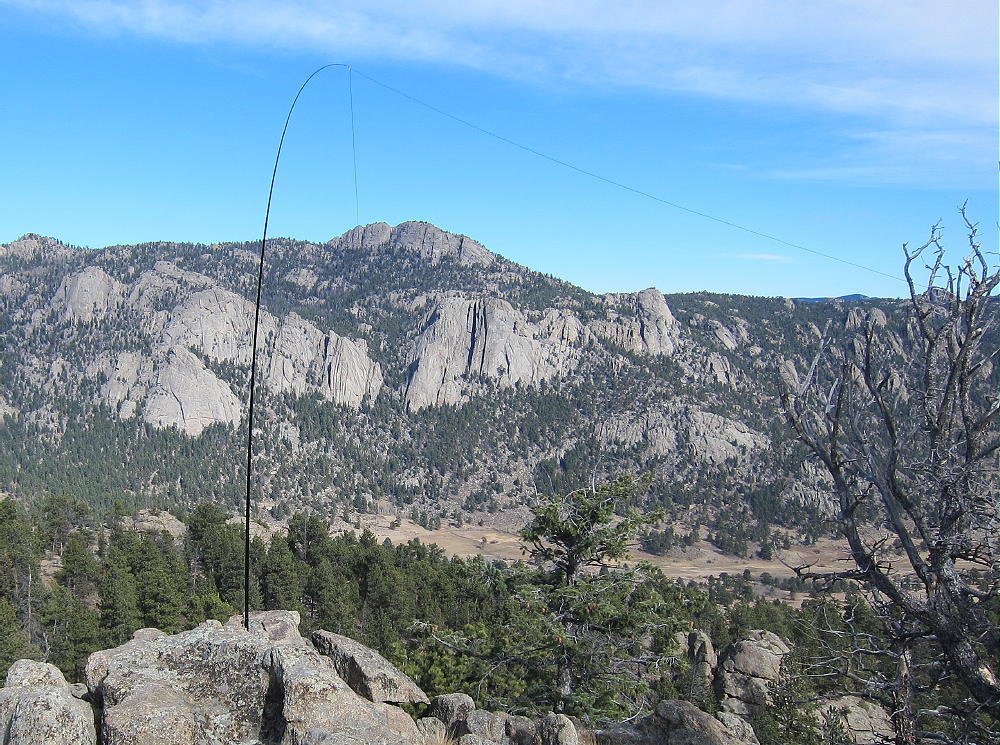
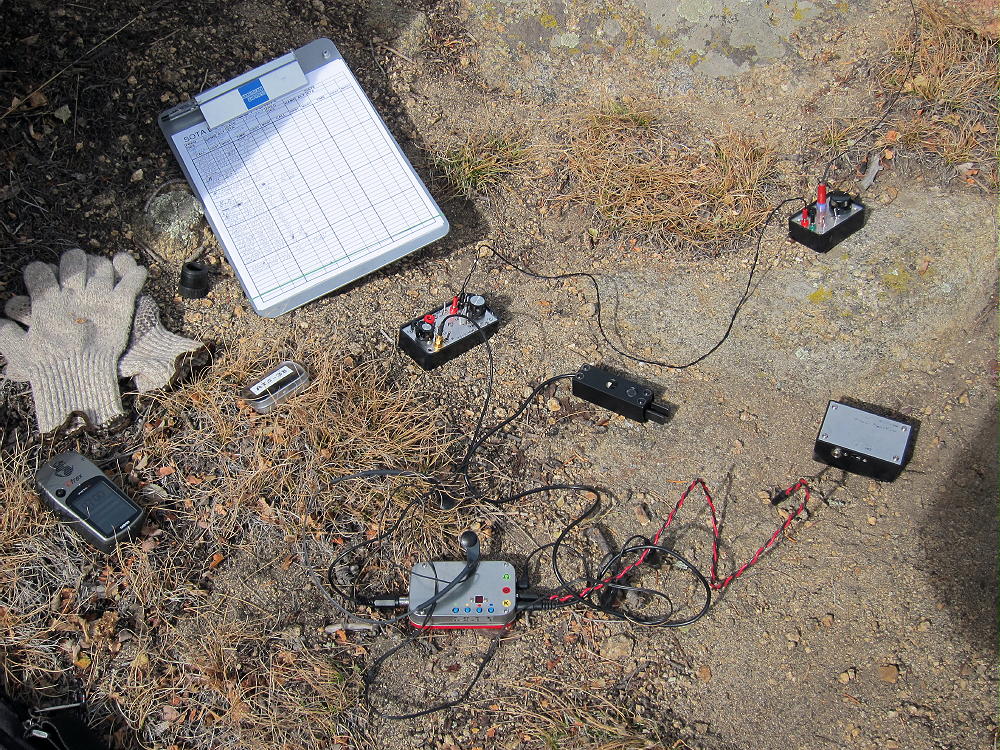
    There is an alternate shorter route up Castle: from the parking spot, cross the highway, and hike a couple hundred yards northwest – avoid private land near the highway. Find an old road leading toward a major gulch southeast of Castle Mountain – follow the road a short distance up.
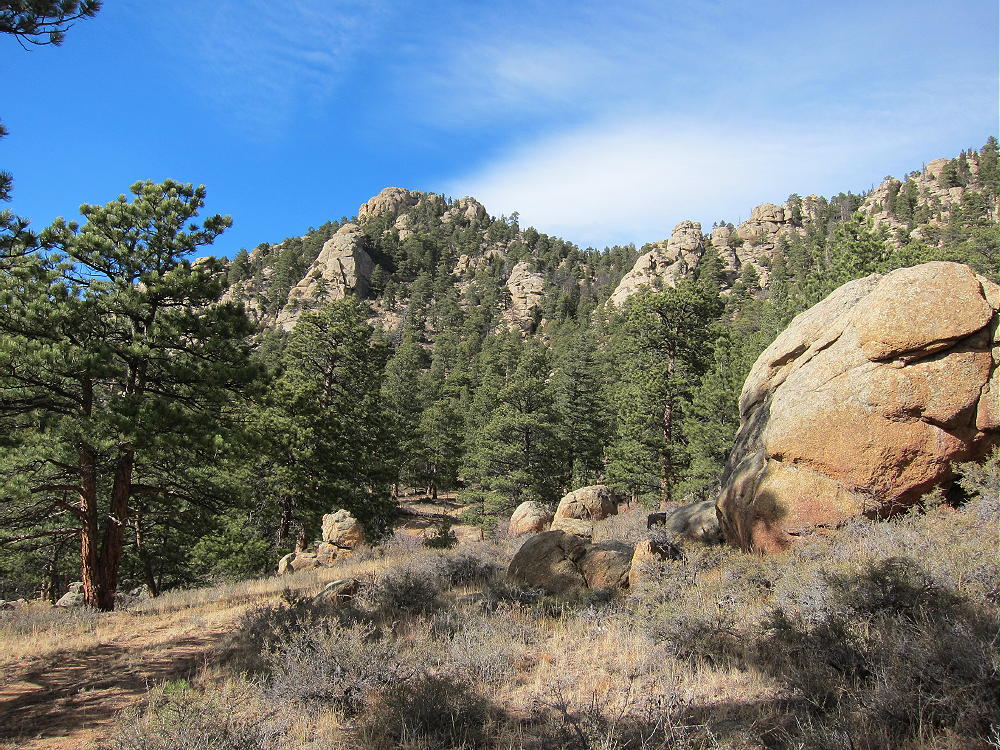
    Castle Mountain and Old Road to Gulch East of Summit
    Castle Mountain and Old Road to Gulch East of Summit

    At the end of the road, just head up into the gulch, and climb up a steep, washed-out trail all the way to the saddle east of Castle. It’s steepest midway up.
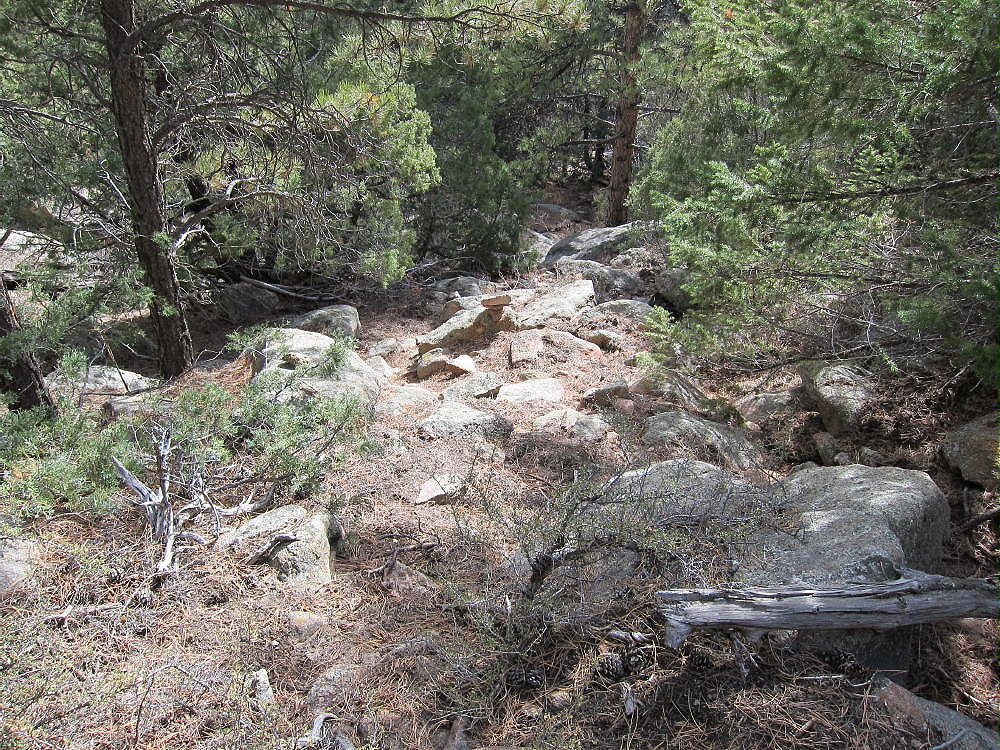
    Castle Route in Main Gulch
    Castle Mountain Route in Main Gulch

    From the saddle, continue west and then south to the summit as described above. Be sure to descend the same way to avoid cliffs and crags.

    Castle Mountain can easily be combined with other SOTA peaks near Estes Park for a dual or multiple activation.

    73

    George Carey Fuller
    KXØR

    ATTENTION !! WARNING !! There are old mountaineers, and bold mountaineers… there are no old-bold mountaineers. Hiking and mountain climbing are potentially hazardous activities particularly in Colorado with its extreme elevations. I am not accepting responsibility for any death or injury resulting from activations based on my trip reports. Proper training, experience, and personal capability assessment is required – enjoy!
  • WØC/FR-Ø72 (Mt. Olympus) – 2679 M / 8808 ft

    W0C/FR-072 (Mt. Olympus) 2679 M / 8808 ft
    May 3rd, 2014

    by KØMOS

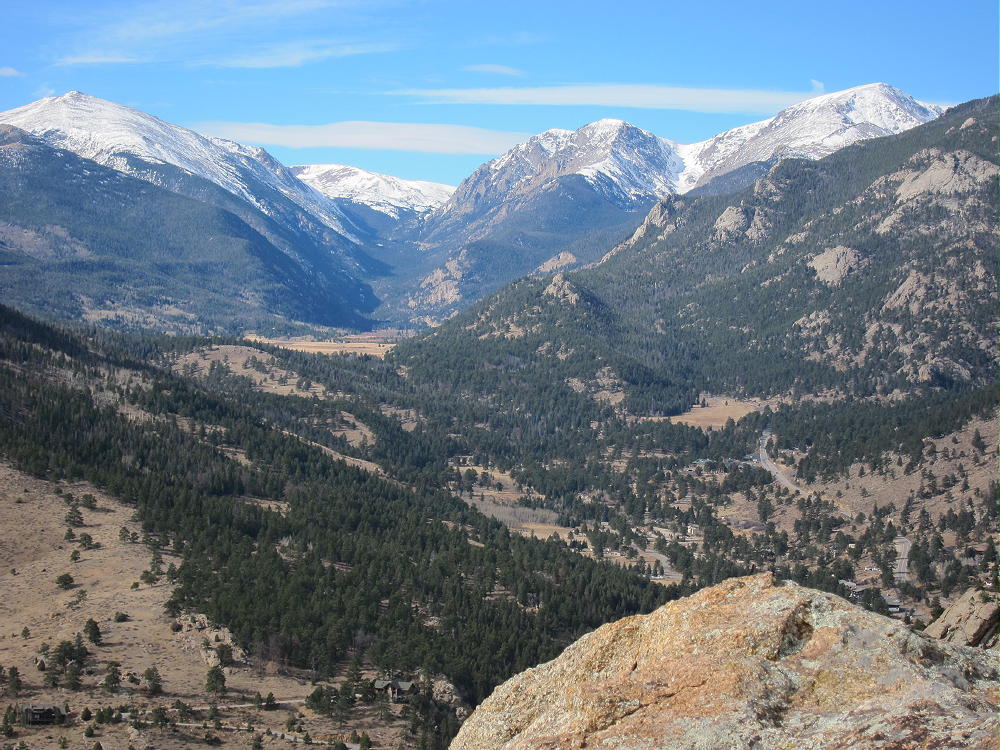
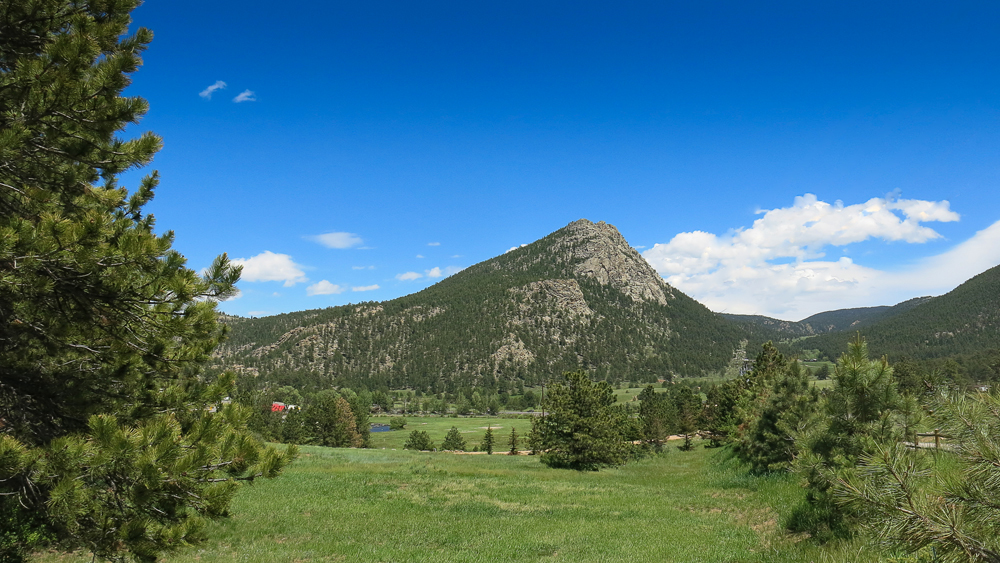
    Mount Olympus stands tall right between Big Thompson Canyon (US34) and Little Thompson Canyon (US36) on the east side of Estes Park (CO). It’s a stunning mountain even though it’s elevation is not even 9000 ft (~2800 m) – and therefore only a two pointer in the WØC association.

    Mt. Olympus - 2679 m / 8808 ft
    Mt. Olympus – 2679 m / 8808 ft

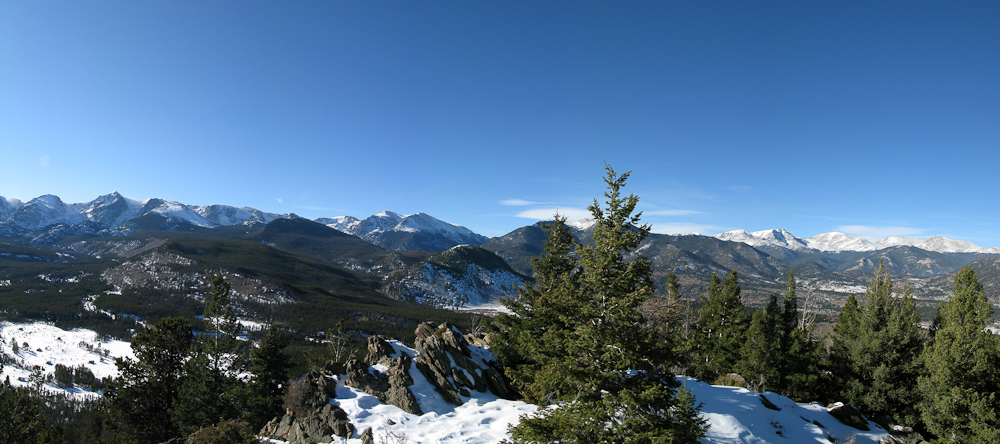
    I have driven by this mountain numerous times in the past but since it is all bushwhacking to the top and only rewards two SOTA points it had lingered on my ‘to-do’ list… for way too long in turns out. The hike is prettier than expected and the summit provides some unusual views towards the continental divide and Rocky Mountain National Park. Definitely recommended – if you have the necessary route finding skills.

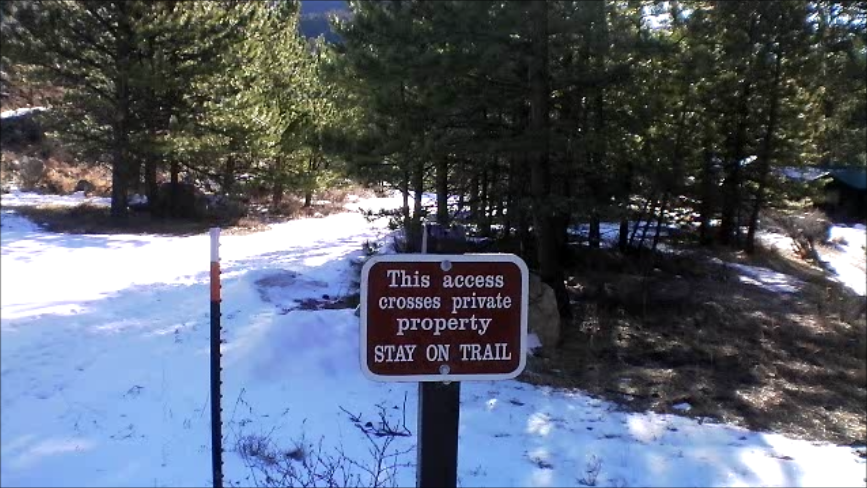
    The approach from the south (US36) is difficult since this side belongs to the Crocker Ranch and is therefore private property. So is the actual summit (according to the USGS map) but it is possible to get into the activation zone on NF land from the north. There are no signs,  barbed wire fences or any other indication that the summit is on private property. It seems that the owner does not mind hikers reaching the very top.

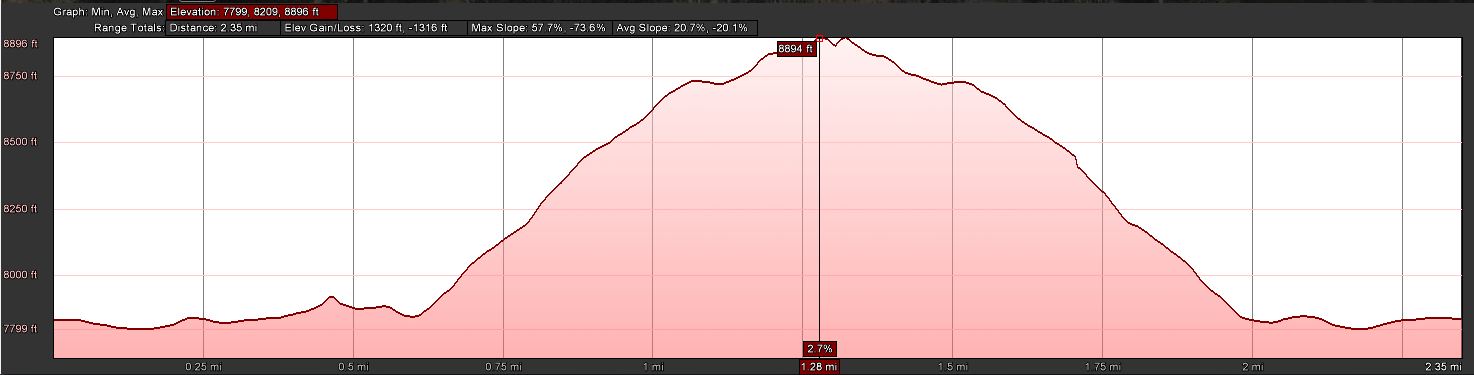
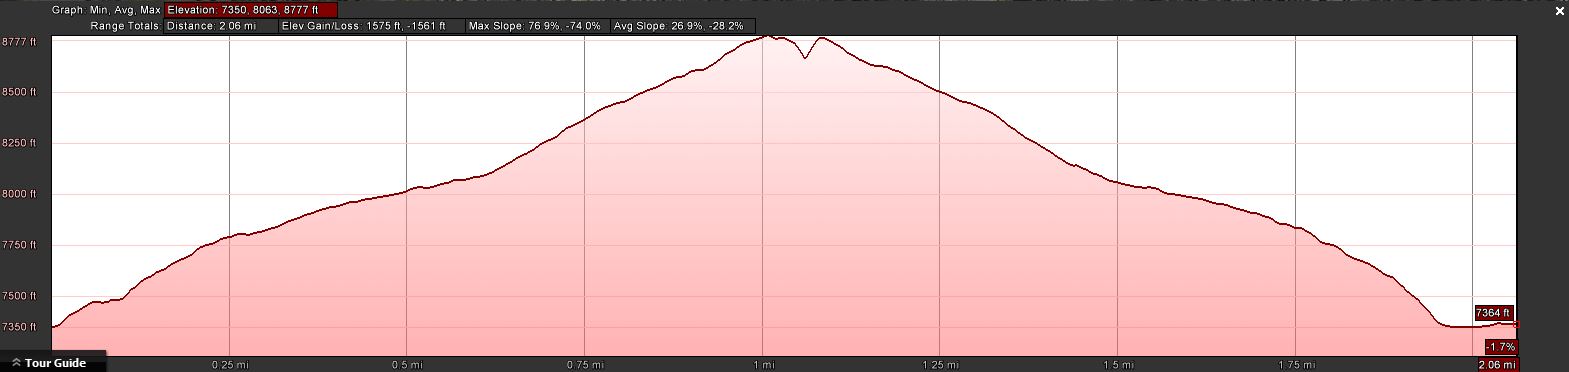
     Trailhead:  7351 ft / 2241 m
     Summit:     8808 ft / 2679 m 
     Elev. gain: 1575 ft /  480 m
     Roundtrip:  2.1  mi /  3.4 km


    Compare this summit with my other activated summits

    How to get there:

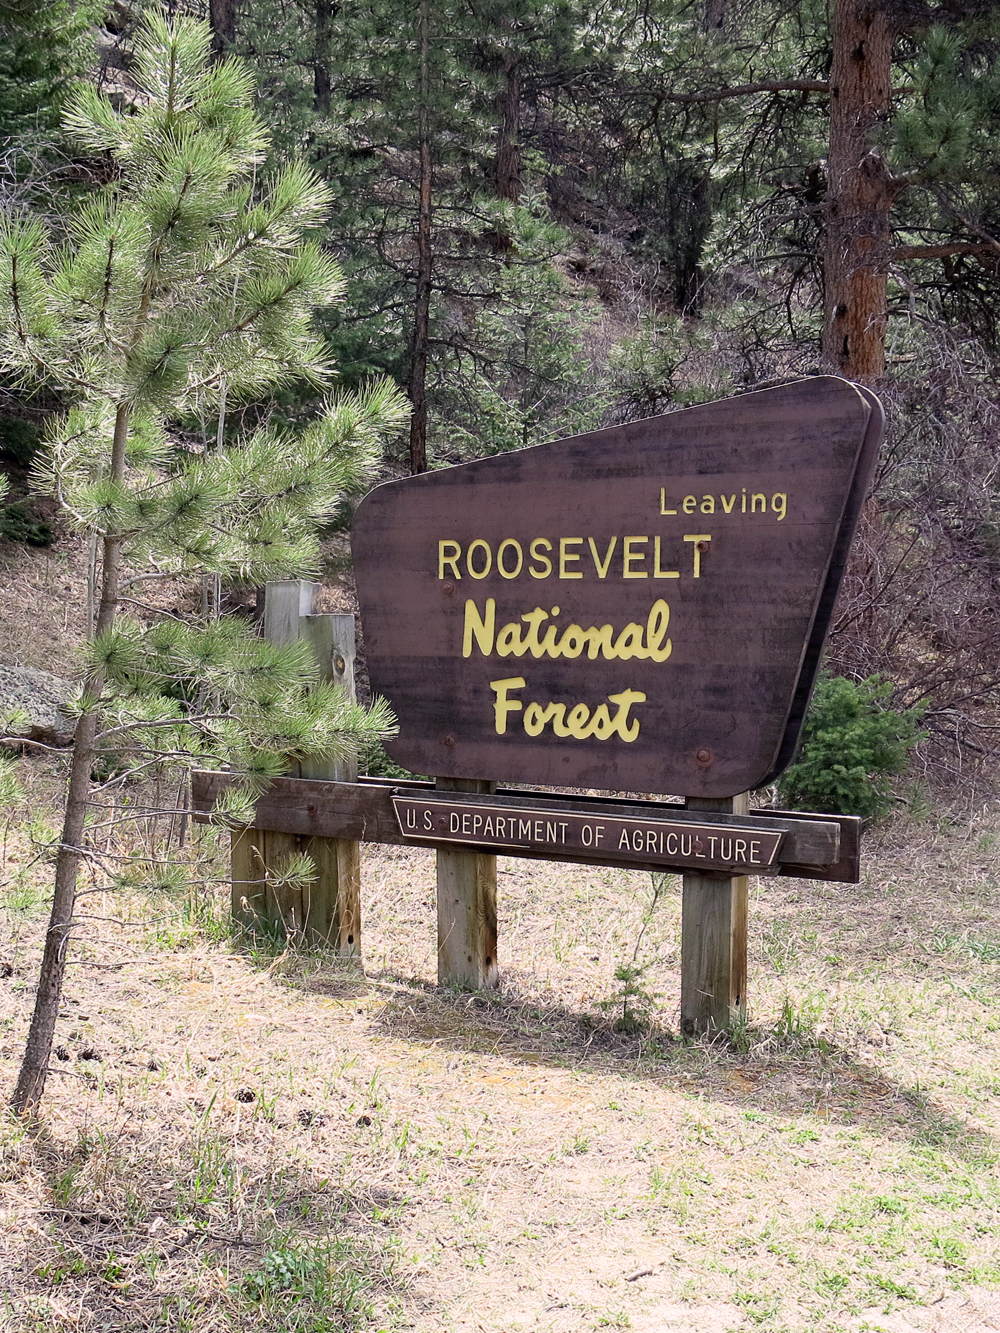
    Drive east from Estes Park towards Loveland on US34. After passing Lake Estes, the road goes into the Canyon. There is a little gravel pullout on your right with a NF sign, indicating that you are entering Roosevelt National Forest. That’s your best bet to leave your car.

    Parking/Trailhead

    Red Tape:
    Keep in mind that the summit is on private property, but as mentioned above, there is no indication that the owner has any issue with you climbing to the top.

    The Ascent:

    The elevation profile
    The elevation profile
    Park at the sign
    Park at the sign

    I climbed up the steep slope just behind the sign, keeping my route to the NE (downriver).  I traversed numerous rock outcroppings and stayed way left of the steep couloir. Eventually the terrain became less steep and the forest opened up a bit. Plenty of rock outcroppings everywhere, giving you a chance to climb up and take a peek towards the Continental Divide. I ignored the stone cairns here and there since they they did not indicate a clear path and just followed my gut and navigational instincts.
    About half way up the terrain flattens out even further, making for a nice hike through the woods. The cairns became more numerous and they seemed to lead into the right direction.  I started to follow them, a wise decision since the slope became steeper and the underbrush more dense. Following the cairns led me comfortably through some really thick stuff right to the summit.

    The Summit:

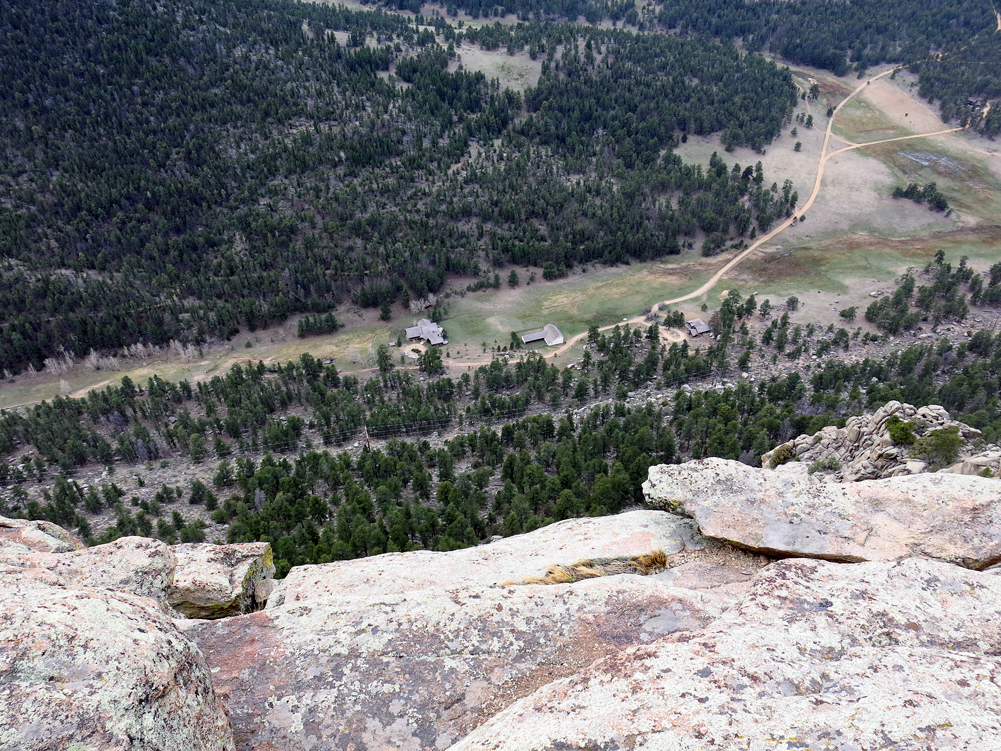
    The Crocker Ranch below
    The Crocker Ranch below

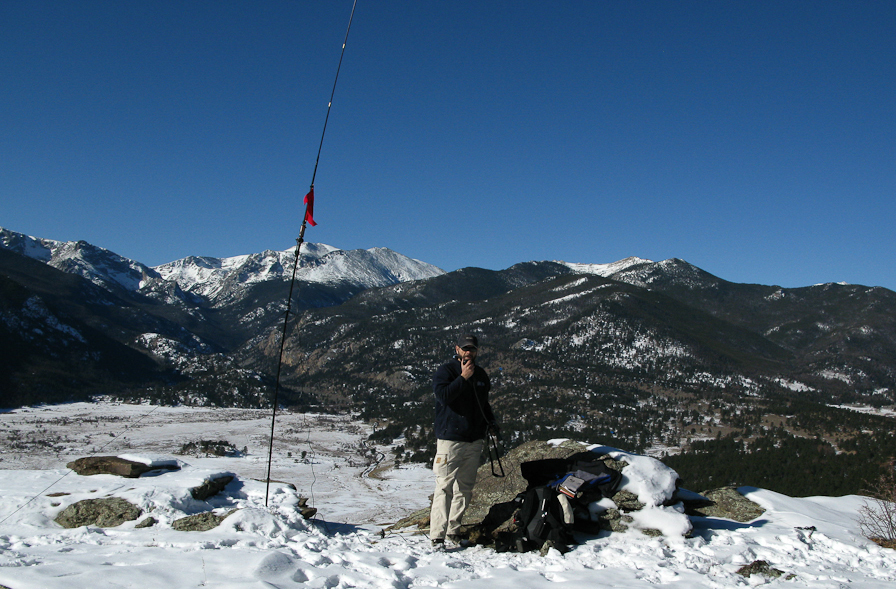
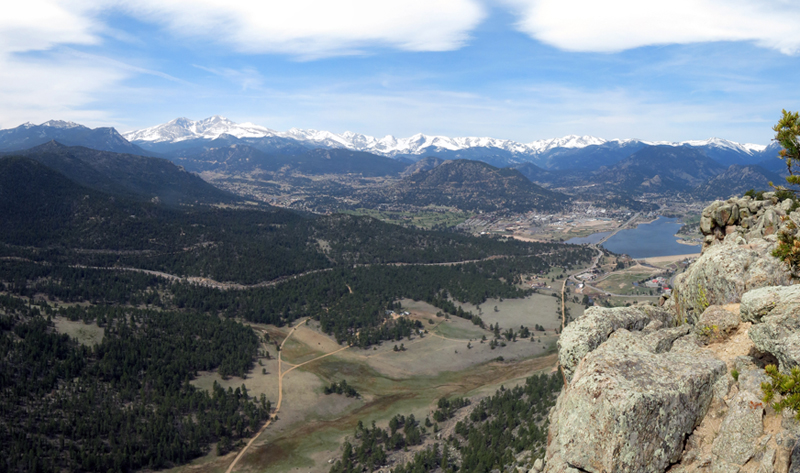
    If you look at the profile of the summit it looks as if somebody took a knife and cut off a piece at the highest point. The south face is very steep and more inclined towards rock-climbing. It allows some great views toward Estes Park, Rocky Mountain N.P and the Continental Divide as well as to the Crocker Ranch just below the rocky face.
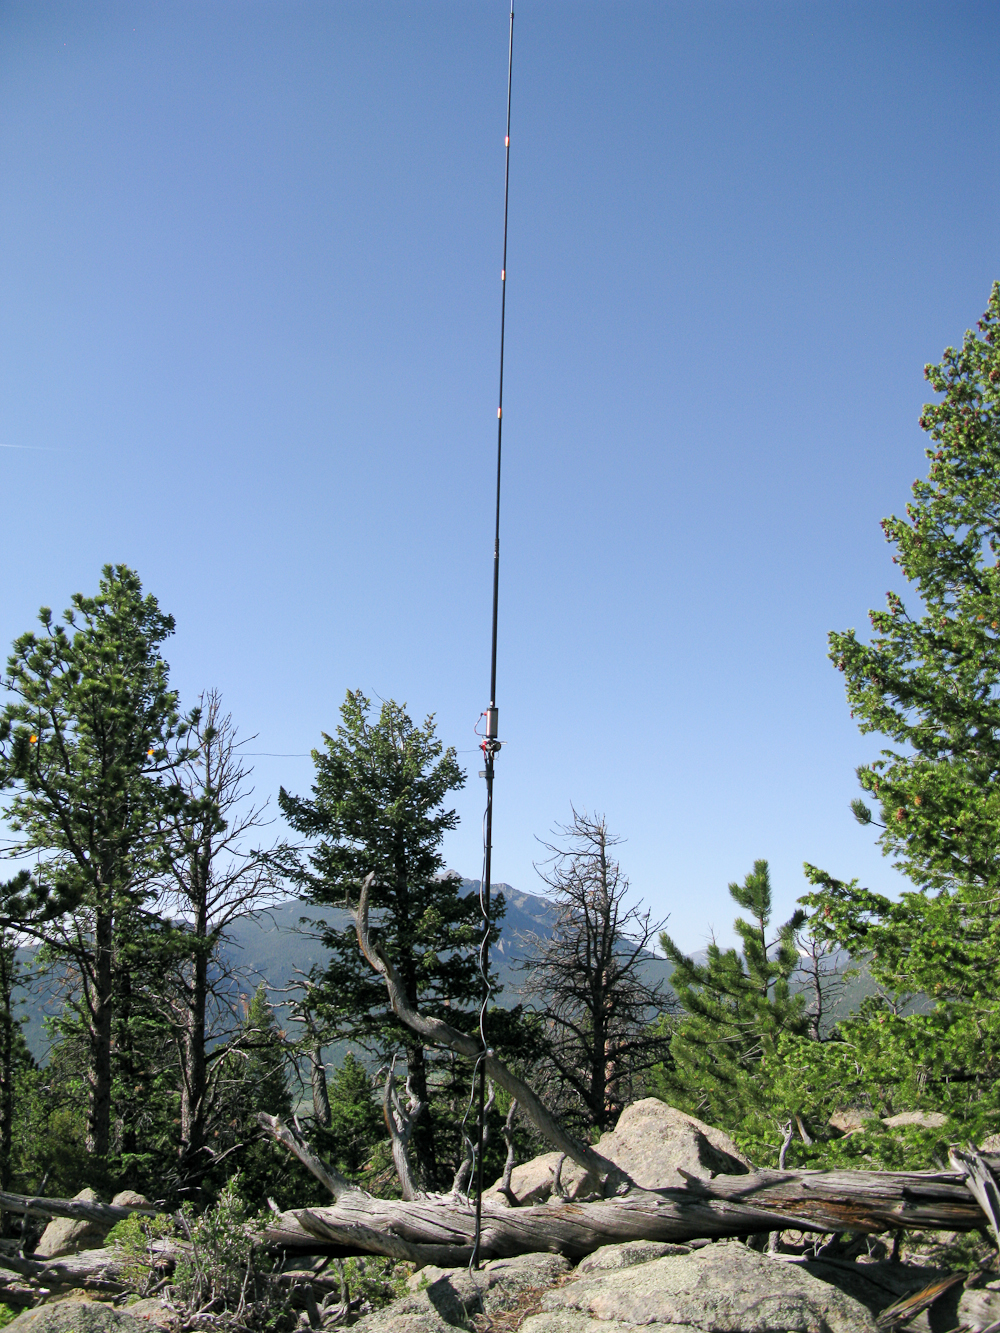
    The summit is rocky, quite small with a few ‘trees’ to tie your mast to, and a steep drop-off to the south. I was carrying a 16ft fishing pole with a linked EFHW which I wedged between the rocks at the highest point – perfect. With hardly any wind and mostly sunny skies the activation was very pleasant. The rocks even provided some nice options to sit on.

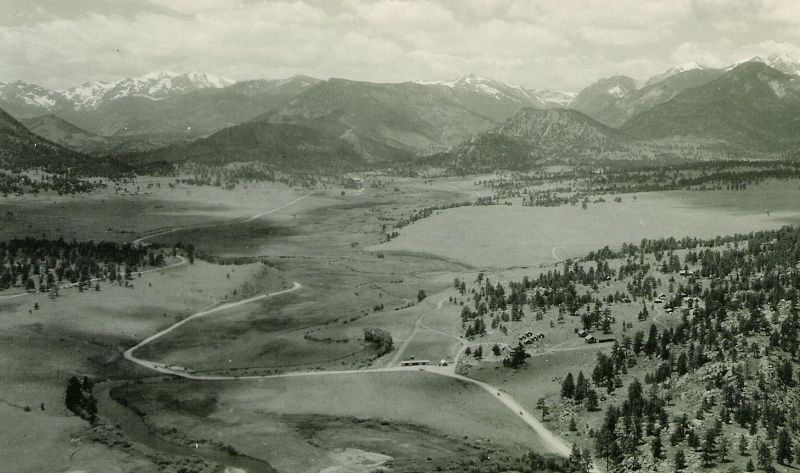
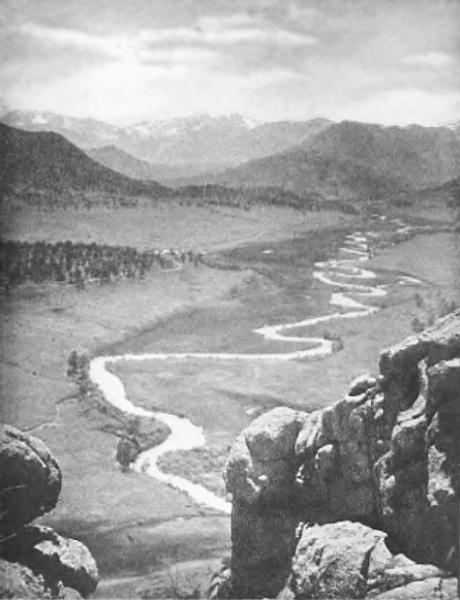
    I found two historical photos taken from about the same spot. Take a closer look at the three pictures below… interesting to see the huge changes over time:

    The Descent:
    I followed the cairns on my way down. At some stage I missed some of them and just followed the general direction to the TH. I missed the car by ~50ft.

    Some video impressions:

    [weaver_youtube http://youtu.be/M8BhegARSmU id=M8BhegARSmU sd=0  percent=100 ratio=0.5625 center=1 rel=0 https=0 privacy=0]


    If you would like to leave questions or comments, please do so through Youtube.


    ATTENTION !! WARNING !! There are old mountaineers, and bold mountaineers… there are no old-bold mountaineers. Hiking and mountain climbing are potentially hazardous activities particularly in Colorado with its extreme elevations. I am not accepting responsibility for any death or injury resulting from activations based on my trip reports. Proper training, experience, and personal capability assessment is required – enjoy!
  • WØ/FR-15Ø (Thunder Peak) – Timing is Everything

    W0C/FR-150 (Thunder Peak) – 3083 m / 10134 ft
    May 7, 2014

    by KØMOS

    According to the WX forecast, today was the best chance to bag another summit for the remainder of the week. After a nice thunderstorm over night, more thunderstorms were in the forecast starting at noon, and even some snow was forecast over night. Getting on the trail early was key. So was to travel light and I therefore exchanged my 30′ mast with a lightweight 16′ fishing rod and the Bazooka and J-Pole antennas with a linked EFHW before I left my QTH.

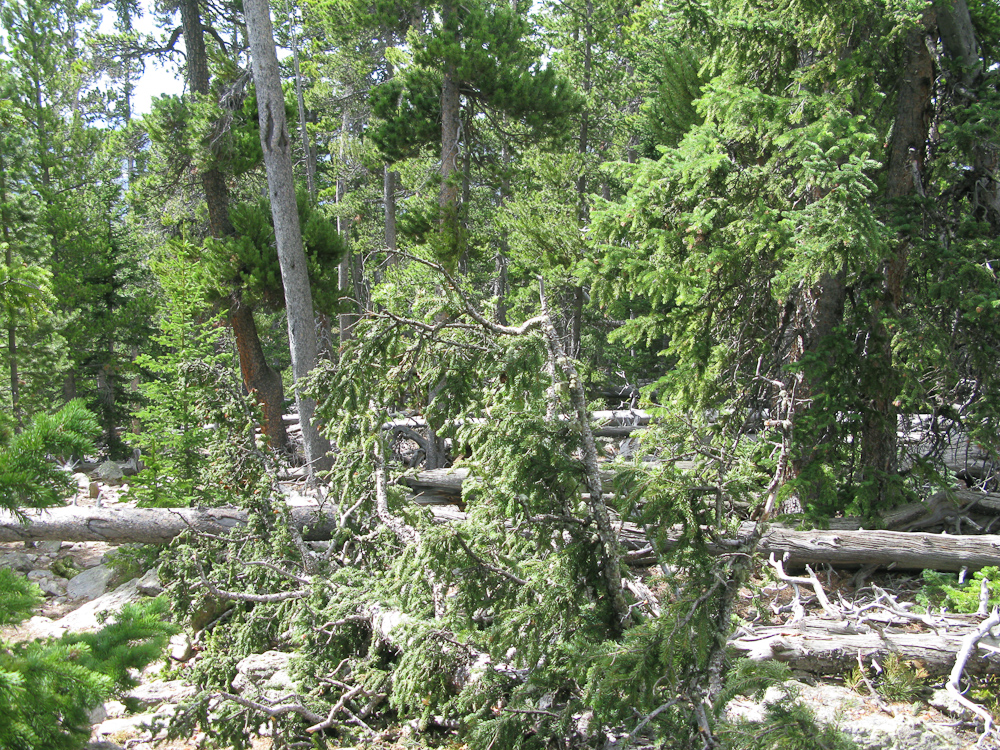
    Thanks to some fresh intell from KX0R/Carey (who activated this summit two days ago) I took a new route which shaved off ~0.5 miles – not much but if you are competing against the clock, every bit helps. I hit the trail under blue skies and not a cloud in sight. I bushwhacked my way up through dense forest  and was greeted on the summit by dark clouds all around . Thanks to the abundance of dead trees on the summit, the antenna was up in no time and I got my QRP signal out just in in time to correspond with my posted SOTA alert.

    W7RV/Tom picked up my signal on 20m and posted a spot (thanks Tom). Within nine minutes I had 10 contacts and no more takers on 20m when I switched to 15m – just to take a peak… clouds were moving in fast and a cold breeze had me add a new layer of clothing.

    My CQs on 15m were answered by M1DXU and shortly after by G2YT/Peter near London (UK). G2YK is a call sign originally issued to ‘Marconi’s Wireless Telegraph Company Limited’ at the Poldhu Radio Station in Cornwall (you can read more about it here) – pretty cool :)

    After this short QSO it was definitely time to pack up my radio and head downhills. The activation only lasted 17 minutes and with ice pellets falling from the sky I slid down the steep and sandy slopes of Thunder Peak, trying to reach the forest to get some protection. By the time I arrived at the TH, the ice pellets morphed into a nice rain shower… exactly what we currently need here in N-Colorado.

    Thanks for all the contacts

    73, Matt/KØMOS

    Complete trip report with photos and elevation profile etc. from an earlier Activation.


    ATTENTION !! WARNING !! There are old mountaineers, and bold mountaineers… there are no old-bold mountaineers. Hiking and mountain climbing are potentially hazardous activities particularly in Colorado with its extreme elevations. I am not accepting responsibility for any death or injury resulting from activations based on my trip reports. Proper training, experience, and personal capability assessment is required – enjoy!
  • WØC/FR-Ø69 (Prospect Mountain) – 2707 m / 8900 ft

    ATTENTION: This trip report is outdated. The City of Estes Park implemented a (new) trail up the mountain. You cannot access the summit legally from the new trail. Reports say you can get into the AZ.

    Prospect Mountain is a prominent landmark in downtown Estes Park, the gateway to the  Rocky Mountain National Park (RMNP). It is easily accessible by a short but enjoyable hike up the south side or even with a tramway from the north. The actual summit is about 300 ft above the tramway summit station and can be reached by walking along a gravel road. The summit hosts a bunch of communication equipment, which is visible from most of Estes Park. I have chosen to hike up the south side, an approximately 30 minute hike.

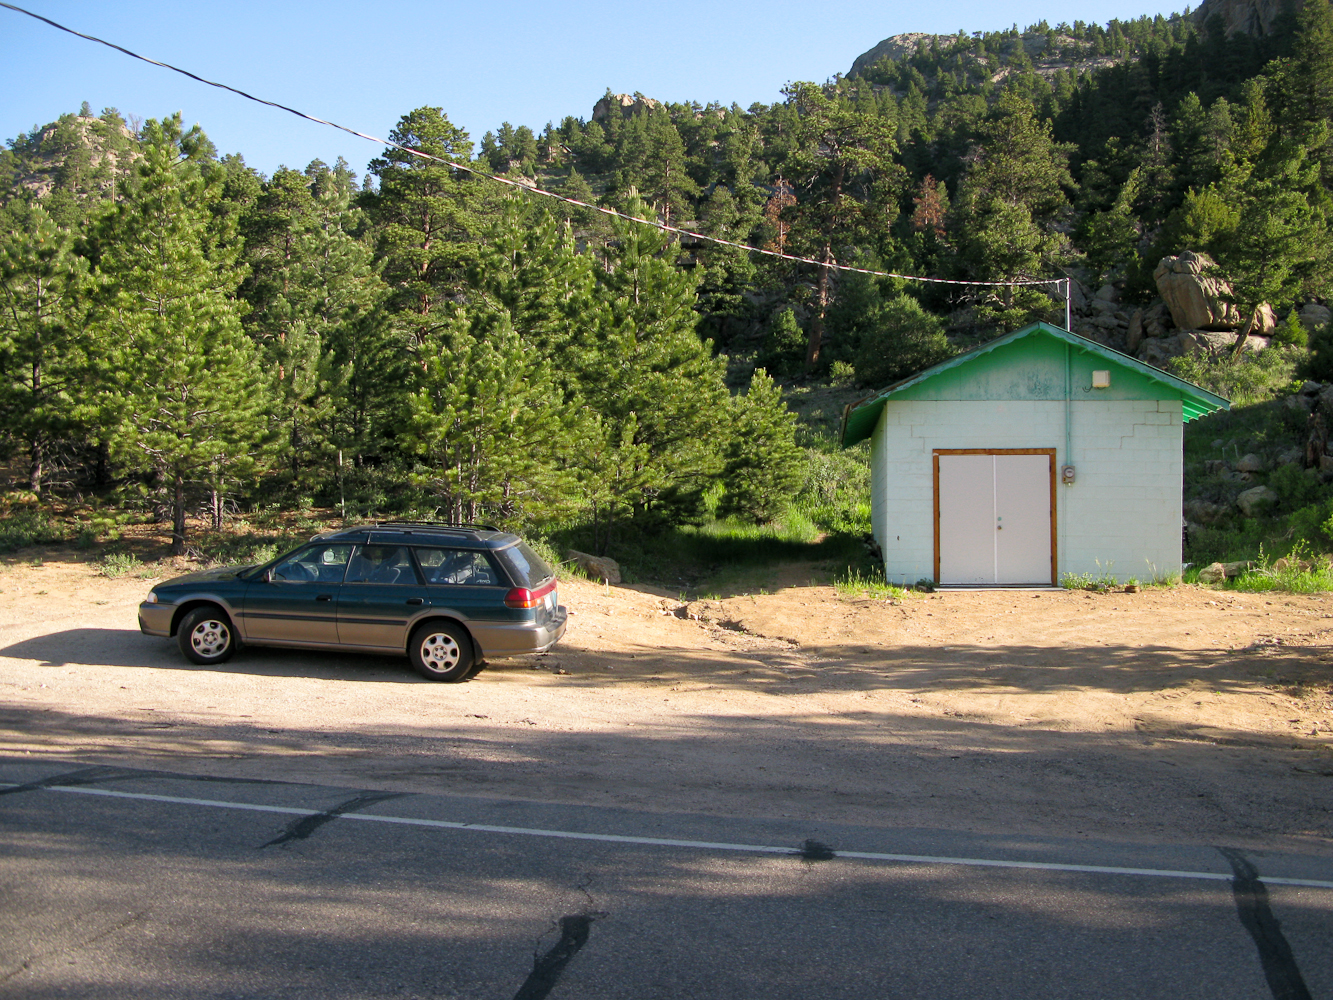
    The Trailhead
    The Trailhead

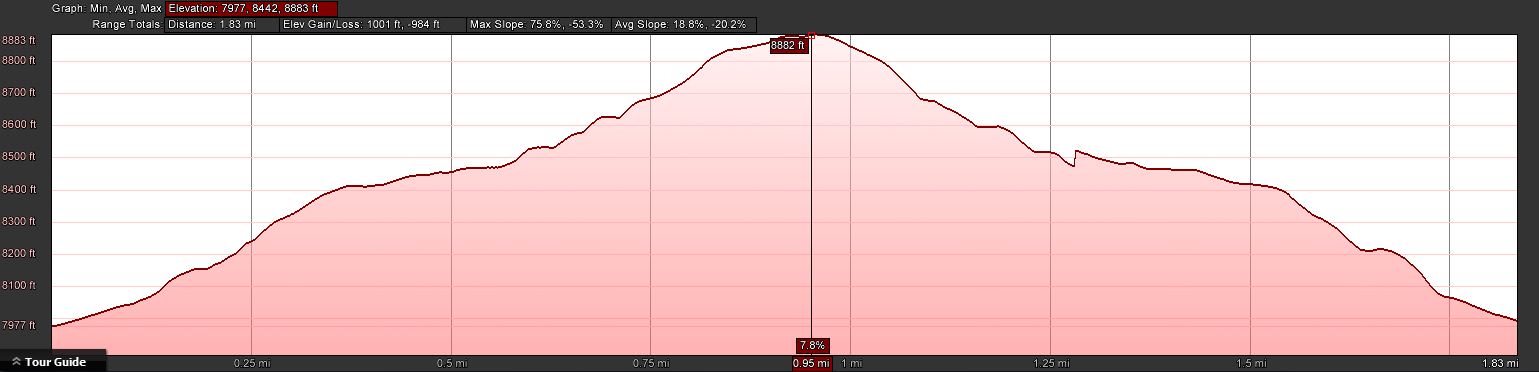
    Trailhead:  7977 ft/ 2431 m
    Summit:     8900 ft / 2713 m
    Elev. gain:  1001 ft / 305 m
    Roundtrip: 1.8   mi / 2.9 km

    Compare this summit with my other activated summits

    How to get there:
    From downtown Estes Park, take S. St. Vrain Avenue (US 7) towards Allenspark. Take a right onto Peak View Drive after about 2 miles (there is a wind turbine on the left, just before Peak View Drive). After about 1.1 miles, park you car at a small pull out with a cinder block structure on the right (see picture above) . The trail starts behind the cinder block structure.

    Parking/Trailhead

    View Larger Map

    Red Tape:
    There is some private property along the trail.

    The Ascent:

    Prospect Mtn - Elevation Profile
    Prospect Mtn – Elevation Profile
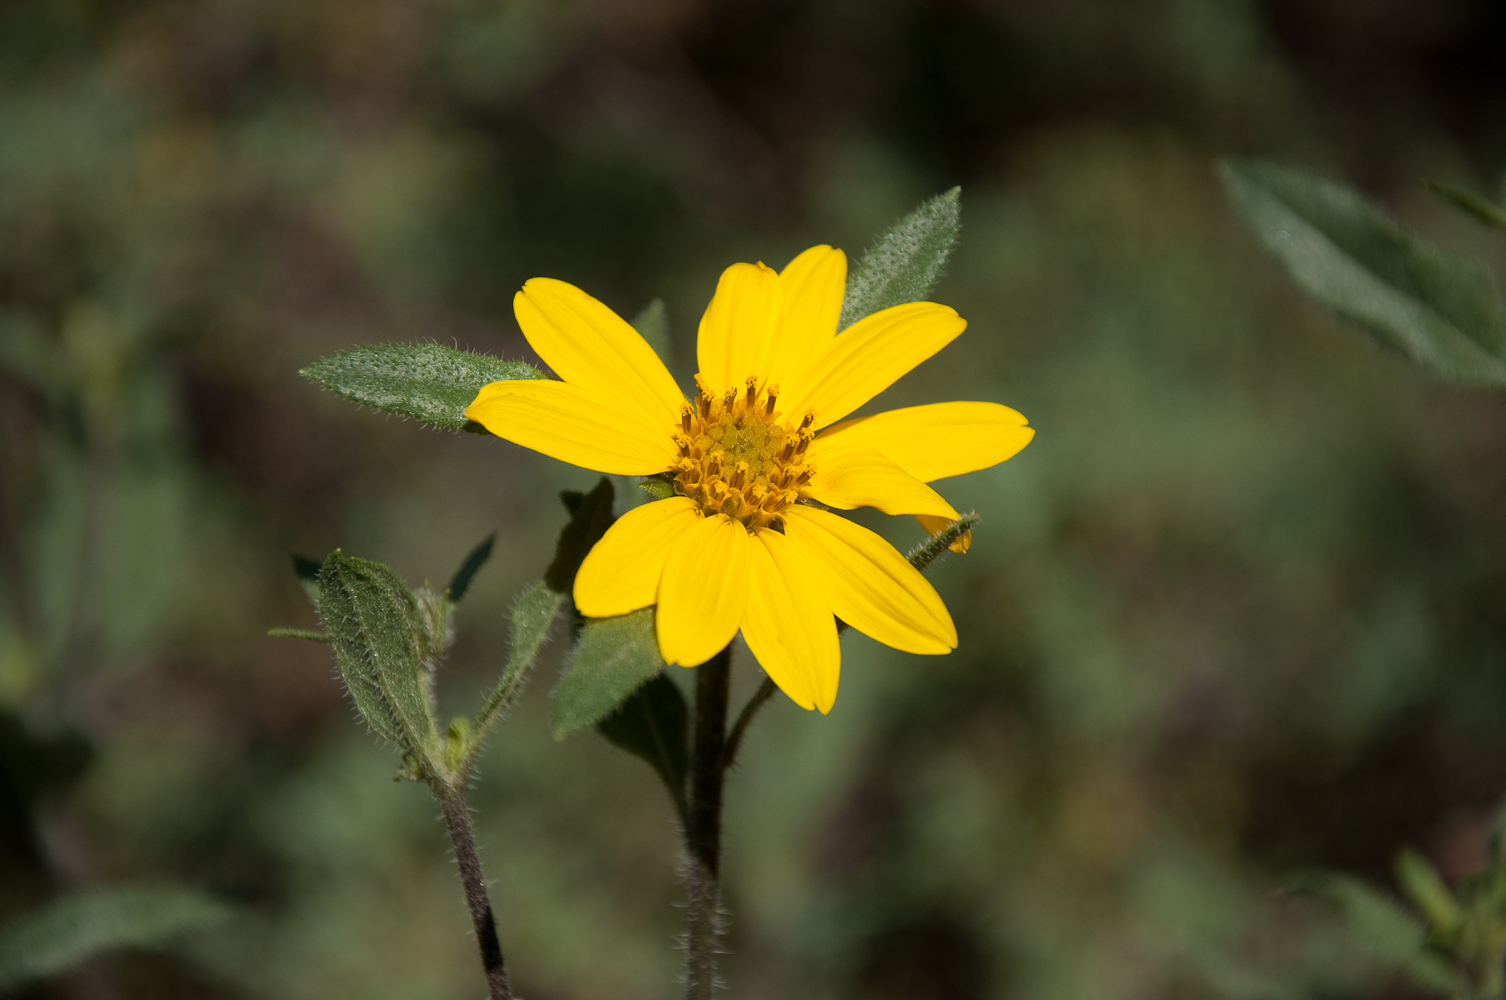
    Wildflowers along the way
    Wildflowers along the way

    The ascent does not present any challenges. The well established trail follows along private property before turning north east. Every now and then you will find stone cairns to help with navigation, increasingly towards the summit. It continues to meander through Pines and rock outcroppings before reaching the flat and rather large summit. Since we had some late moisture this year, wildflowers and Cacti are blooming everywhere and hummingbirds were buzzing around my head.

    The Summit:
    There is plenty of space to setup the equipment on the rather large summit, even for larger groups of activators. Many trees, dead and alive to strap you mast or antenna to.

    Buddipole on the summit
    Buddipole on the summit

    I have chosen a large dead tree with one of it’s branches sticking up in the air to bungee my mast for the Buddipole  to. With all the commercial antennas up on the mountain, it was no surprise that my SWR meter went bonkers. The FT-817 was fine though and I was calling CQ on 20 m in no time. Since this was only the first of several activations planned for today, I spent only a short time on the summit, packing up after I did no longer get any responses to my calls.

    The Descent:
    Descent is straight forwards, following the same route I cam up.

    Some video impressions:
    http://www.youtube.com/watch?v=QSL8PRR1MNo

    If you would like to leave questions or comments, please do so through Youtube.


    ATTENTION !! WARNING !! There are old mountaineers, and bold mountaineers… there are no old-bold mountaineers. Hiking and mountain climbing are potentially hazardous activities particularly in Colorado with its extreme elevations. I am not accepting responsibility for any death or injury resulting from activations based on my trip reports. Proper training, experience, and personal capability assessment is required – enjoy!
  • WØC/FR-Ø36 (Bighorn Mountain) – 3487 m / 11463 ft – Activation attempt

    Bryan/NØBCB and I attempted to activate Bighorn Mountain for the TTF/SOTA event on Saturday. The summit (3487 M / 11463 ft) is in beautiful Rocky Mountain N.P., the weather forecast was excellent with temperatures in the 70s (~20 C) and the amount of ALERTS posted on SOTAwach promised a very busy activation with tons of S2S possibilities.

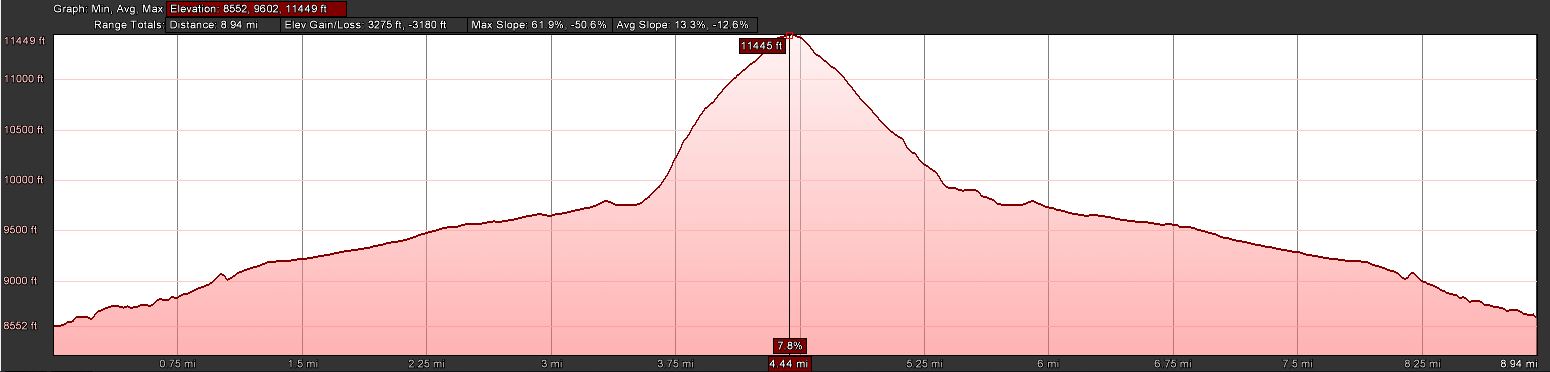
    Bighorn Mtn. - ElevationProfile
    Bighorn Mtn. – ElevationProfile

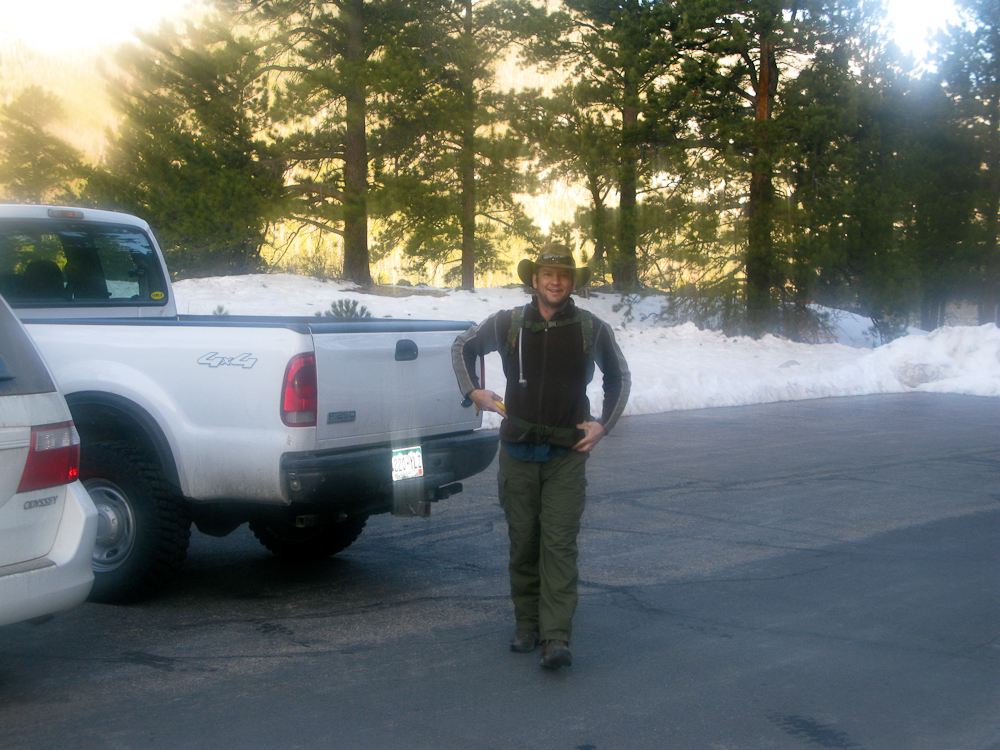
    Bryan/NØBCBat the Trailhead of Bighorn Mtn.
    Bryan/NØBCB at the Trailhead of Bighorn Mtn.

    We started early at the Lawn Lake trail-head to have enough time available on the summit. We headed up at 7:00 AM with temperatures around 30F (~0 C). The snow on the ground was hard and crunchy. The first three miles of the trip climbs rather steadily along the banks of Roaring River on an established trail. Thanks to the fresh snow we received last week, the trail was snow covered and soon became a major obstacle on our way up. Snow-depth was around 2-3+ feet and we had to take turns to break the trail. It got increasingly difficult and we made very little progress, on occasions sinking in all the way to out belly-buttons.

    Bryan/NØBC breaking trail
    Bryan/NØBC breaking trail

    Upon reaching the point where we would have to turn SE, leaving the trail and bushwhack our way up the steep slopes, we assessed our situation and options. So far we had only covered 3 miles in 2.5h and we estimated at least another 2h of ascent in deep snow. That would have put us on the summit at least 2h late of our plans and therefor we opted to head back to the TH, and to setup our radios to at least participate in  the TTF event.

    It took us almost 2.5h to reach the TH and we logged our first QSO around 18:15 (UTC). Band conditions and our location (surrounded by mountains) were less than ideal. All bands we tried (10/15/20/40) were pretty quiet, even Megawatt stations barely copyable.  The only SOTA/TTF station I was able to contact was Jeremy/NH6Z in Oregon and a few stations in Florida.

    Overall a disappointing SOTA/TTF day for us but a nice outing in the RMNP. More snow is in the forecast for tomorrow, looks like the snowshoes have to stick around for a little while longer.

    Since we had no chance to take pictures on the summit, check out last years trip-report with video footage.

    73, Matt/KØMOS


    ATTENTION

    !! WARNING !! There are old mountaineers, and
    bold mountaineers… there are no old-bold mountaineers.
    Hiking and mountain climbing are potentially hazardous activities particularly in Colorado with its extreme elevations. I am not accepting responsibility for any death or injury resulting from activations based on my trip reports. Proper training, experience, and personal capability assessment is required – enjoy!
  • WØC/FR-Ø36 (Bighorn Mtn.) – 3487 M / 11463 ft

    It was a ‘last minute’ decision to go on this activation. WØC/FR-Ø36 or Bighorn Mtn.  is located within Rocky Mountain National Park (RMNP), just east of the Mummy Range (Continental Divide). Yesterday we got some snow/rain in the mountains and the road to Mt. Evans is already closed for the season. Trail-ridge road was temporarily closed as well. The weather forecast for today was excellent (at least until later in the afternoon). However, I woke up to thick fog so I could not even see the road, let alone the mountains. The drive up to Estes Park was slow, thanks to the fog and to some heavy trucks in the canyon. I arrived ten minutes later than planned at Lawn Lake trail-head to a beautiful blue sky, bugling elks  and pleasant temperatures.

    Bighorn Mtn. – Trailhead

    Trailhead: 8552 ft/ 2565 m
    Summit:   11463 ft / 3847 m
    Elev. gain: 3280 ft / 1000 m
    Roundtrip: 9.0 mi / 14.5 km

    Compare this summit with my other activated summits

    How to get there:
    Take US34 from Loveland towards Estes Park through Big Thompson Canyon. Enter RMNP through the Fall River Entrance Station and take a right at the Lawn Lake trail-head sign. A rather large parking lot which can be found shortly after.

    Parking/Trailhead

    View Larger Map

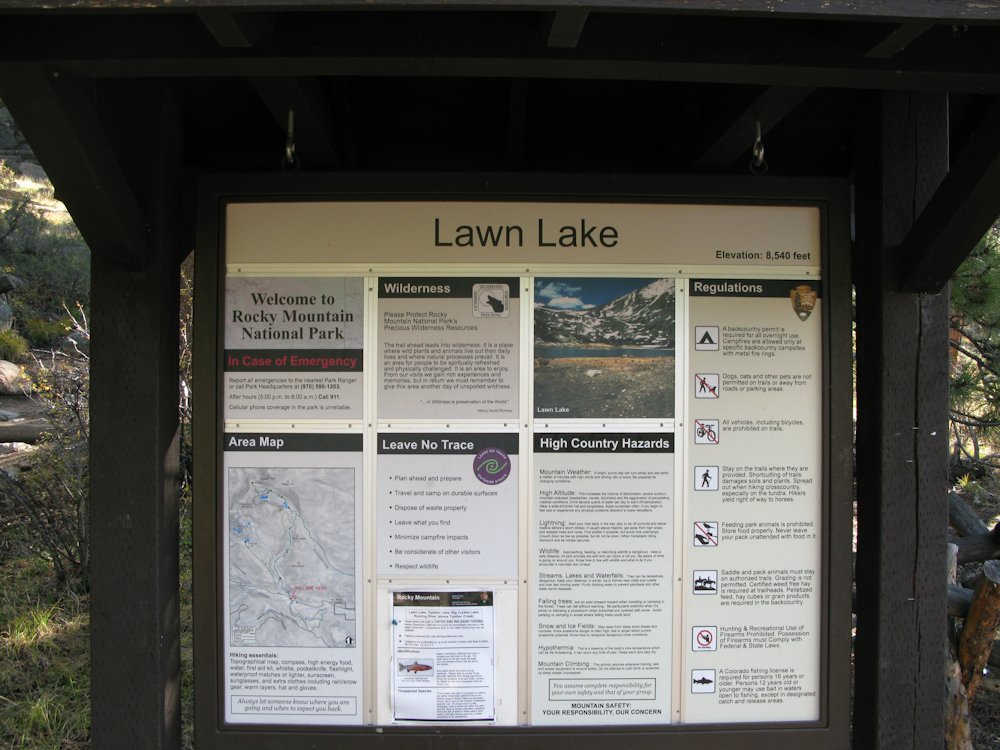
    The trail-head provides toilets and the usual information kiosk.

    Red Tape:
    – RMNP is a federal fee area

    The Ascent:

    bla
    Bighorn Mtn. – ElevationProfile

    Bighorn Mtn – Views from the river banks

    Since there is no established trail to Bighorn Mtn., I consulted Google Earth to find a suitable route. An approach from the west seemed to be a good solution because I could follow the Lawn-Lake Trail for about 3.5 miles before turning east, bushwhacking my way up to the summit. The Lawn-Lake trail follows the Roaring River through a gorgeous forest, mainly pines but with a few Aspens groves which sparkled yellow and golden already. On several occasions along the the river you get an idea of the massive flood that occurred here in 1982, killing several hikers/campers. Huge boulders were swept down-rivers like marbles.  The steep banks of the river also allow some very scenic views of the northern Mummy Range. Shortly after passing the sign to the Cutbank and Golden Banner camp areas, I left the comfortable trail and started the steep and unpleasant bushwhacking part. I tried to aim for the saddle between Bighorn and Tileson. It was very slow going. Thick forest, steep terrain and slippery boulders (thanks to the rain, the lichens on the boulders were very slick) hampered my progress. Every now and then, I could get a glimpse through the trees to the Mummy Range – a spectacular view from the summit seemed very likely.

    The Summit:

    Bighorn Mtn – The Summit?

    After breaking through the tree-line, I could finally see where I was heading. There were several rock-outcroppings at the top to choose from. The first one I climbed was of course not the summit, but the second one was the highest point and I found a summit book which confirmed that I had indeed reached the top of Bighorn Mtn. The summit is rather large, ideal for multiple activators at the same time. The views are spectacular, one of the best in this area for sure. My initial calls on 2m were unanswered but the HF antenna was up and tuned in no time. Phil/NS7P was the first who answered on 14.343 and thanks to his spot the summit was activated successfully in no time.

    The Descent:
    I tried to find a gentler and easier way down, heading more towards the saddle. The fact that I could actually see where I am going helped quite a bit. The first part was just fine but I ended up in similarly steep terrain, trying to find the Lawn Lake trail. I hit the trail at the same location I had left it, thanks to GPS technology :)

    Some video impressions:
    httpvh://www.youtube.com/watch?v=f4DjZ5q9cj0

    If you would like to leave questions or comments, please do so through Youtube.


    ATTENTION

    !! WARNING !! There are old mountaineers, and
    bold mountaineers… there are no old-bold mountaineers.
    Hiking and mountain climbing are potentially hazardous activities particularly in Colorado with its extreme elevations. I am not accepting responsibility for any death or injury resulting from activations based on my trip reports. Proper training, experience, and personal capability assessment is required – enjoy!
  • WØC/FR-127 (Signal Mountain) – 2nd activation

    This was a re-activation for me. If you are looking for all the details on how to get there and other useful info, you can find the original trip-report with the necessary details right here. This post has only a few specifics from today’s activation.

    Signal Mtn. – View from the summit

    From my prior activation in September 2011, I knew that it was going to be a long hike (11.7 mi/18.8 km – 4064 ft / 1239 m) mostly within the tree-zone. The two summits (Signal Mtn and South Signal) are just pushing their ‘heads’ above the treeline providing some amazing views.

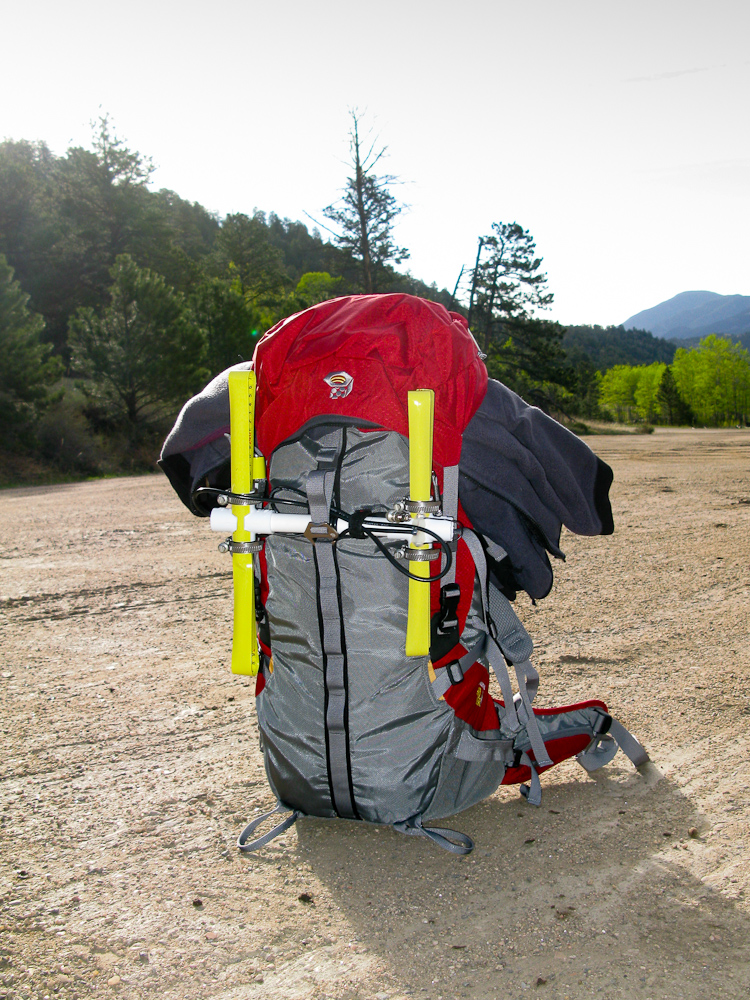
    My backpack with Yagi

    Besides my normal gear, I also carried a ‘tape-measure’ Yagi antenna I wanted to test on the summit. The first two miles of my hike went as expected but the following 2-3 miles through the forest were extremely difficult. A winter-storm must have destroyed large parts of the Bulwark Ridge. Trees were lying around everywhere. And I am not just talking about dead-trees… large and healthy trees were broken apart like tooth-picks, blocking the way to the summit. It was a very time-consuming and exhausting hike, climbing over trees or trying to find a way around it. Often I

    Devastated Forest

    had a difficult time finding the trail again. Finally, the last 1-2 miles above the tree-line provided more challenges in form of big, soft, and deep snow-fields. Without having any ‘floatation-devices’, I was post-holing through approx. 3-4 ft of snow. Luckily I brought my gators – keeping at least my feet dry. It took me almost 4 hours to reach the summit (compared to 3’10” in September). The view from the summit was worth it though. After setting up my antenna, I  was hiding from the wind behind the small stone-shelter on the top. The wind behaved kind of strangely… completely calm for several minutes, followed by very strong gusts for a couple of minutes and back to complete calmness again. One of the stronger gusts took my antenna down (again), just after switching from 20m to 17m. Unfortunately the stinger of my shock-corded whip got bent during the process . I guess its time to use some of those spare parts. I took it as a sign to leave and packed-up my gear, knowing that it would take me quite a while for the ~6 miles climbing over all the trees again. At least it was downhill this time. I have to admit that I was pretty tired by the time I reached my car.

    Thanks for all the contacts and spots.

    Some video impressions:

    Please post comments or questions through YouTube.


    ATTENTION

    !! WARNING !! There are old mountaineers, and
    bold mountaineers… there are no old-bold mountaineers.
    Hiking and mountain climbing are potentially hazardous activities particularly in Colorado with its extreme elevations. I am not accepting responsibility for any death or injury resulting from activations based on my trip reports. Proper training, experience, and personal capability assessment is required – enjoy!
  • WØC/FR-15Ø (Thunder Peak) – 3083 m / 10134 ft

    I had planned a double activation for today. Thunder Peak or WØC/FR-15Ø was the first on the list.The weather forecast was great for the Estes Park area and a friend of mine joined me for the hike. We drove into Estes Park and were surprised to see how much snow the mountains got during the week. Dark clouds were hanging in the Mummy Range (Continental Divide). A stiff wind greeted us when we left the car at the trail-head. Light snow-flurries were present for the first part of the hike, even though we had blue skies above us.

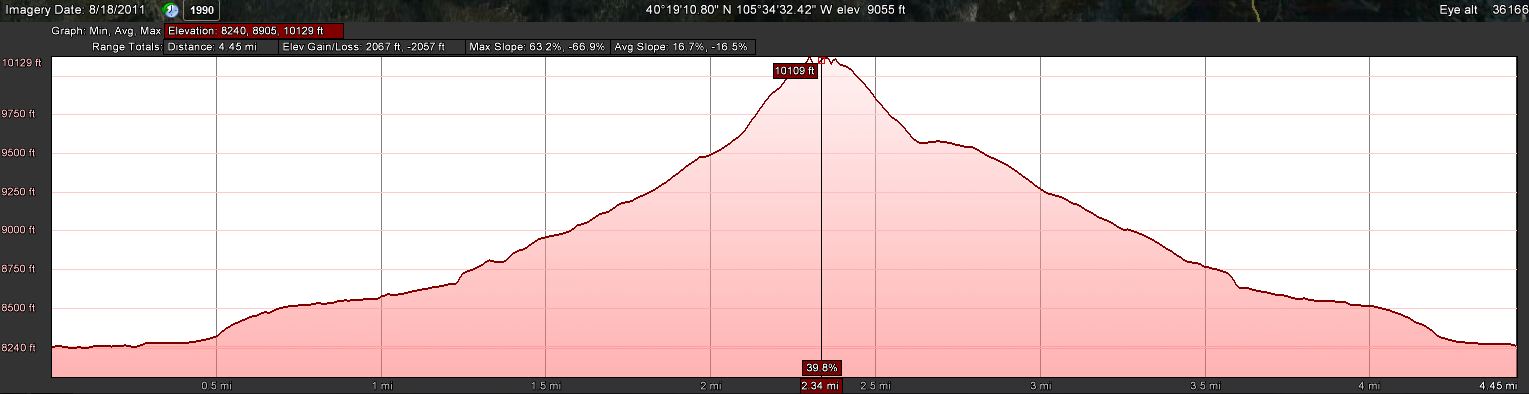
    Trailhead: 8244 ft / 2513 m
    Summit:   10134 ft / 3083 m
    Elev. gain: 2051 ft / 625 m
    Roundtrip: 4.5  mi / 7.2 km

    Compare this summit with my other activated summits

    How to get there:
    Take US34 from Loveland towards Estes Park through Big Thompson Canyon. Thunder Peak is on the south-west side of Estes Park. Stay on US34 towards Rocky Mountain NP. Go left on County Road 66 (or Tunnel Road), following the signs to the YMCA campus. Follow the road all the way to the end. There is a campground at the very end – as well as the East Portal of the Big Thompson Project Pipeline. Park your car at the loop of the road (there is room for about 10 cars on a gravel strip at the south side of the loop.

    Parking/Trailhead

    View Larger Map

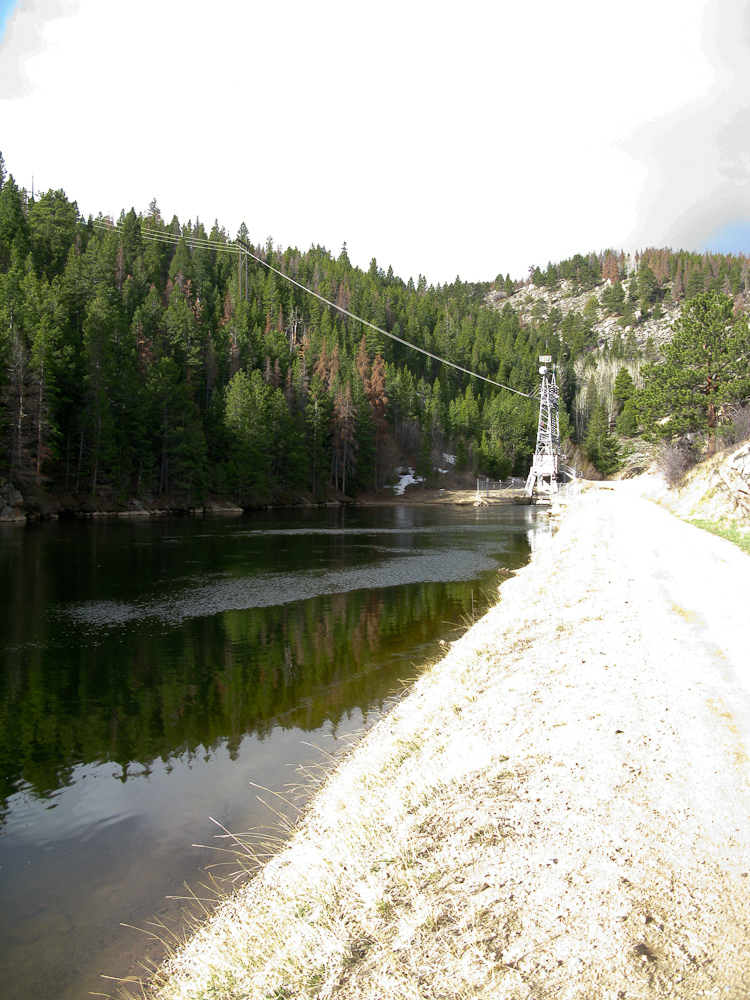
    East Portal with Reservoir

    Follow the dirt road at the end of the loop (SE) towards the reservoir and East Portal trail-head. The kiosk of the trail-head can be found when you follow the road on the right-side (north) of the reservoir.

    Red Tape:
    At the East Portal of the Adams Tunnel is a small (really small) reservoir – and the surrounding area is Federal property. You are not supposed to park, fish, boat, pee etc. within 100 yards of the dam – Homeland security and such. Thunder Peak is within the RMNP, ergo it is a fee area and their rules apply (no dogs etc.) I am not sure about RMNP entry fees… since the parking lot is outside of the park, I think you are not required to have a NP pass. I have a yearly pass anyway and therefore did not look into this further.

    The Ascent:

    Elevation Profile
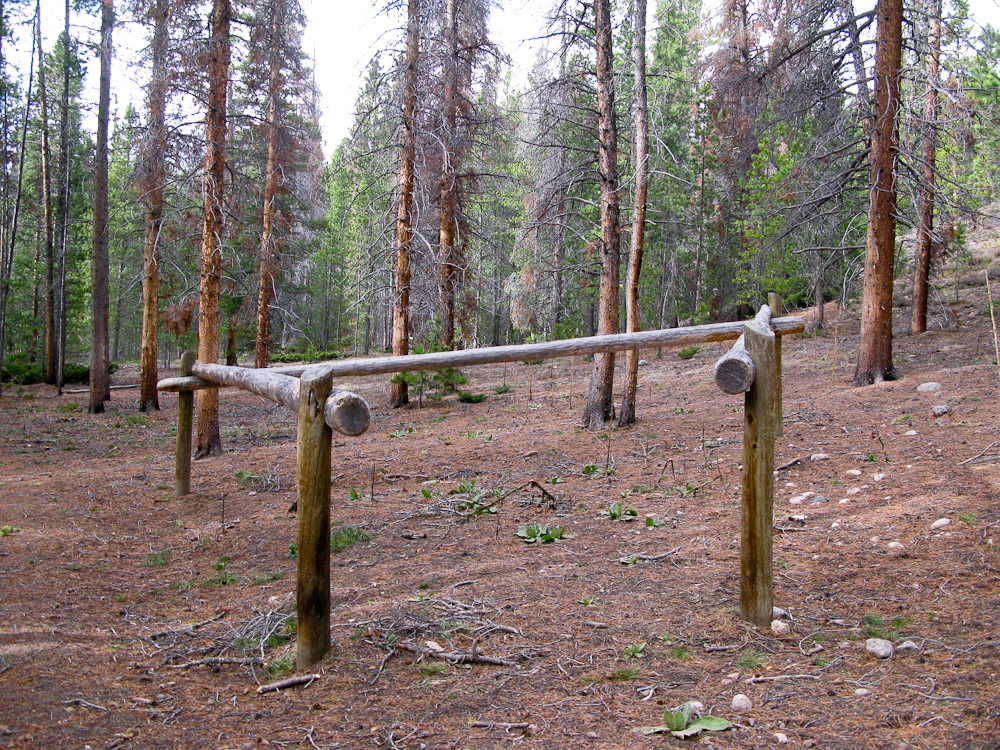
    Turn left after the Horse hitch

    For the first few hundred yards we followed the dirt-road on the north-side of the Reservoir to the kiosk. We continued on the dirt road along Wind River (more like a small creek) to a concrete retention pond. About 20 yards before the pond there is a faint trail to the right which continues to follow the creek. It was hard to see on our way up and we missed it. The result was some bush-whacking until we found the trail again. [UPDATE (3/13/13): There is now a new sign pointing you into the right direction. You cannot miss it.] On the opposite site of the creek are some nice rock-outcroppings. Right around the horse hitch we left the established Wind River trail and turned towards the drainage between Thunder and Lightning Peak.

    See what I found

    First we had to cross the creek which was easy with the current water-level. We kept going along the drainage through lodge-pole pines and areas of aspen groves -always staying on the left (NE) side of the drainage where we encountered more open areas. As a result we made good progress. Interestingly, the soil in the drainage was very soft and sandy – sometimes we found big piles of sand as if a few kids had destroyed their sand-castle. You can’t get lost if you stay in the drainage and keep going all the way up to the saddle between Thunder and

    Where are we?

    Lightning. From there you can see the summit and head up there. We wanted to shave off some time and took a more direct line to the summit since we were aiming for a second activation. Every now and then I verified our position with the GPS to see whether we were still on the plotted track. Heading up the south-west side was quite a work-out… it was rather steep (around 30%) and with the soft and sandy soil it felt like climbing sand-dunes. Having enough momentum was sometimes crucial to overcome a section.

    The Summit:

    On the Summit

    The views from the summit are spectacular. There are quite a few SOTA peaks right in front of you. To the south are Estes Cone (WØC/FR-Ø39), Longs Peak (WØC/FR-11Ø) and Mount Meeker; to the East, Lily Mountain (WØC/FR-Ø50), Twin Sister Peak East (WØC/FR-Ø37) and West. To the north we could see Emerald Mountain (WØC/FR-Ø58 ) and Eagle Cliff Mountain (WØC/FR-Ø68 ) and finally to the west, the Continental Divide and the Mummy Range with too many SOTA summits to list. The summit was very windy but the skies to the west looked a lot friendlier than earlier in the morning. Setting up the equipment was very efficient due to the fact that I had help and Phil/NS7P was my second contact after just a few CQs. His spot posted on SOTAwatch attracted the usual chasers within minutes (thanks guys).

    The Descent:

    Ben running downhills

    The descent was quite fun… the soft and sandy soil allowed us to run/slide downhills towards the saddle and finally turn north into the drainage again, following our ascent route back to the trail-head an car. We only took the time to exchange our empty water bottles with full ones and off we went, heading to the second summit, a ~30 minutes drive.

    Some video impressions:

    If you would like to leave questions or comments, please do so through Youtube.


    ATTENTION !! WARNING !! There are old mountaineers, and bold mountaineers… there are no old-bold mountaineers. Hiking and mountain climbing are potentially hazardous activities particularly in Colorado with its extreme elevations. I am not accepting responsibility for any death or injury resulting from activations based on my trip reports. Proper training, experience, and personal capability assessment is required – enjoy!
  • WØC/FR-Ø68 (Eagle Cliff Mtn.) – 2709 m / 8906 ft

    Eagle Cliff Mountain (WØC/FR-068) is part of the Front Range of the Rocky Mountains – just six miles south of Estes Park, right at the border to Rocky Mountain N.P. (the summit is within RMNP). There is no official trail up to the summit, but it seems to be a popular hike based on the faint network of trails. The ascent can be tackled from either County Road 66 (south slope) or from the RMNP side (NW slope via Moraine Park/Museum parking lot). I have chosen the south side of the mountain because I wanted to activate Emerald Mountain (WØC/FR-Ø58) as well (see separate trip-report) – Emerald Mountain is just a few miles up the road and thus the two make an ideal pair for a double activation. Both hikes are relatively short in terms of miles, but steep. The drive up the Big Thompson Canyon took a little longer than usual due to the fact that the road was still snow-covered with icy spots in some areas. When I exited the canyon near Estes Park, the sky was blue and no cloud was in sight – a welcome indicator for a great day ahead.

    Trailhead: 7836 ft / 2388 m
    Summit:   8906 ft / 2709 m
    Elev. gain: 1216 ft / 371 m
    Roundtrip: 2.3  mi / 3.7 km

    Compare this summit with my other activated summits

    How to get there:
    Take US34 from Loveland towards Estes Park through Big Thompson Canyon. Eagle Cliff Mountain is on the south-west side of Estes Park. Stay on US34 towards Rocky Mountain NP. turn left onto County Road 66 (or Tunnel Road), following the signs to the YMCA campus. The TH is right after you pass the ‘Dunraven Inn‘ on the right side of the road. There is a small dirt road with a metal-gate… you have to be very creative in finding a parking spot for your car (see Red Tape). If you pass the gate to the YMCA, you have gone too far.
    A better option (in terms of parking ) might be to take US-34 into RMNP, then continue towards Moraine Park and park on the Museum parking lot.

    Parking/Trailhead

    View Larger Map

    Red Tape:

    • Eagle Cliff Mtn. is within RMNP – therefore all their rules and regulations apply. RMNP is also a fee area. You don’t have to pay the fee when coming from CR-66 because you will be parking outside of the regular park entrance. If you choose to tackle the summit over the NW-slope, you have to go through the regular entrance and pay the day fee ($20.00).
    • Parking near/along CR66 (Tunnel road) is difficult. All the signs along the gravel strips on the right side of the road are indicating private property, and promise to tow your car.

    The Ascent:

    EagleCliff Mtn – ElevationProfile

    EagleCliff – Sign

    From CR-66 I hiked west, passing the metal gate on the dirt-road. Two bridges lead over two creeks before the path intersects a trail leading into RMNP (Bear Lake Road). There is private property on your left and right, so make sure to respect the signs. As expected and hoped, most of the snow had already melted away and snow-shoes were not necessary. The ascent is straightforward, with hardly any challenges. You can (almost) see the summit from the base of the mountain and you just aim for it. Pick one of the faint trails through the grassy/brushy and steep slope – all of them seem to end up at the same slightly wooded area in the saddle just below the summit. I tried to stay more on the rocky-section of the mountain (south-west). There are a few rock-outcroppings you have to circumnavigate or, if you feel up to it, you can scramble/climb up with a few easy moves. This route provides mostly unobstructed views into RMNP all the way to the summit.

    The Summit:

    EagleCliff Mtn. – Operating from the Summit

    There is a steep cliff (~60 feet / 20 m) on the north-side of the summit, giving you a great take-off angle. The views are really spectacular – I know… I say that a lot… and it is always true but in this case you can not only see the massive mountains of the Mummy Range, Never Summer Mountains etc. but you can also look down into the Moraine Park area of RMNP. A rather unique view, giving a great impression of the power of the ancient glaciers. There are plenty of rocks and trees to guy the antenna (and I needed a well guyed antenna due to the winds), and within a few minutes I was calling CQ. I logged my first QSO with Rick (N4EX) @ 1730 UTC. It was my first time on 15m and my Buddipole antenna (vertical Versatee) seemed to perform well on this band. In addition to my regular chasers, I met a few new SOTA chasers on this band. I changed to 20m a little later on, since not all of  my ‘regulars’ could copy me on 15m.

    The Descent:
    I took basically the same route back to the car, hoping that it hadn’t been towed.  The descent was very enjoyable and I went rather slow to enjoy the views.

    Some video impressions:

    httpvh://www.youtube.com/watch?v=nCHxwXusMvs

    If you would like to leave questions or comments, please do so through Youtube.


    ATTENTION

    !! WARNING !! There are old mountaineers, and
    bold mountaineers… there are no old-bold mountaineers.
    Hiking and mountain climbing are potentially hazardous activities particularly in Colorado with its extreme elevations. I am not accepting responsibility for any death or injury resulting from activations based on my trip reports. Proper training, experience, and personal capability assessment is required – enjoy!
  • WØC/FR-Ø58 (Emerald Mountain) – 2810 M / 9237 ft – 2nd activation

    This was a re-activation for me. If you are looking for all the details on how to get there and other useful info, you can find the original trip-report with the necessary details right here. This post has only a few specifics from today’s activation.

    Emerald Mtn. – View from the summit

    Today’s activation of Emerald Mtn. was my second summit of the day. Earlier I had activated Eagle Cliff Mtn. (WØC/FR-Ø58 ) on 15 and 20m (see separate trip-report) . Since Emerald Mtn. is just a few miles up the road and the weather was gorgeous, a double activation was an obvious choice. With my earlier acquired information about the trail-head and route, the ascent was a breeze. The south slope was almost snow free and snow-shoes were not required. Without the snow I could even find a small stone cairn on the trail to Glacier Basin campground. The cairn is just before you enter an Aspen grove and after a rock outcropping. That’s where I left the trail and headed towards the summit in an (almost) straight line. Distance and elevation gain is almost identical to Eagle Cliff Mountain, making today’s excursion a 4.5 mi (7.2 km) round-trip with a total of ~2500 ft (750 m) accumulated elevation gain.
    Luckily, the S8 noise I experienced last time on this summit was gone – making me believe that it was related to the approaching snow-storm. The winds however were quite strong – even stronger than last time and I had to guy the antenna really well. My extremities started to get cold thanks to the high winds and the fact that I was sitting in the snow  – even-though the sun was out. I packed-up my gear and went QRT after I did not get any further responses to my calls. It was indeed a wonderful day in the mountains.

    Some video impressions:

    httpvh://www.youtube.com/watch?v=pW6KmzYLnOc

    If you would like to leave questions or comments, please do so through Youtube.


    ATTENTION

    !! WARNING !! There are old mountaineers, and
    bold mountaineers… there are no old-bold mountaineers.
    Hiking and mountain climbing are potentially hazardous activities particularly in Colorado with its extreme elevations. I am not accepting responsibility for any death or injury resulting from activations based on my trip reports. Proper training, experience, and personal capability assessment is required – enjoy!