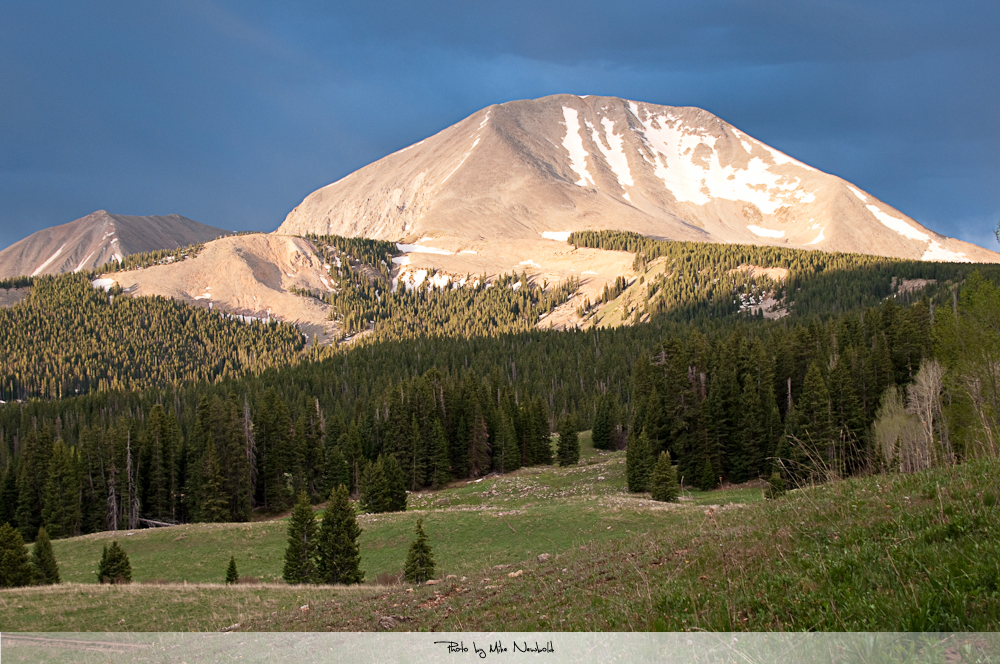
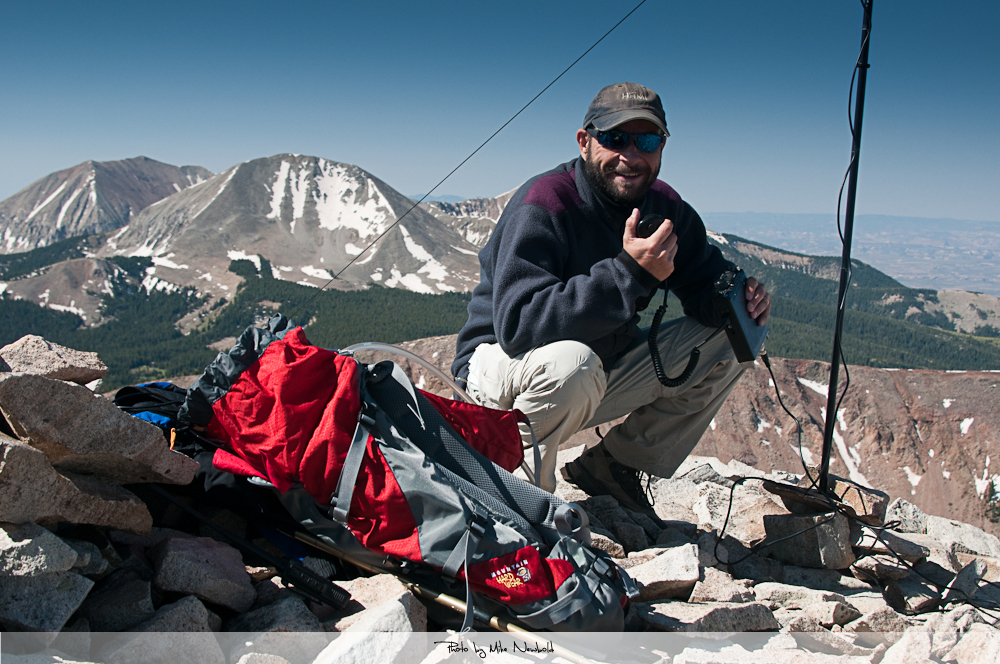
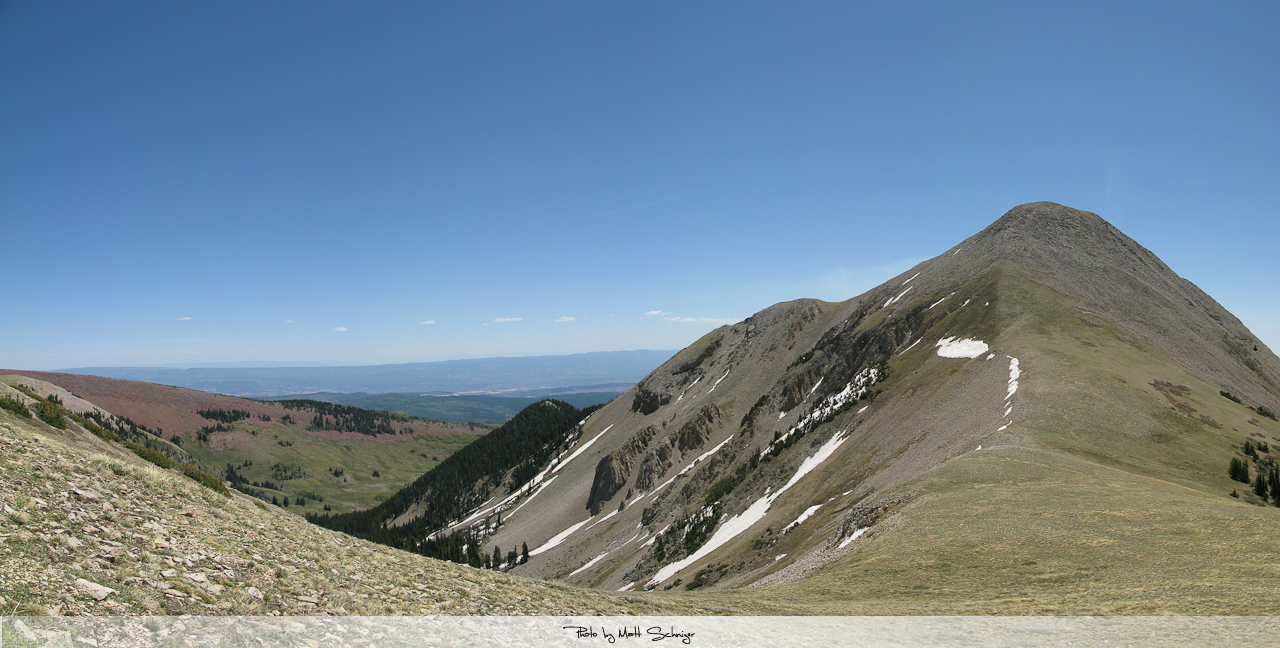
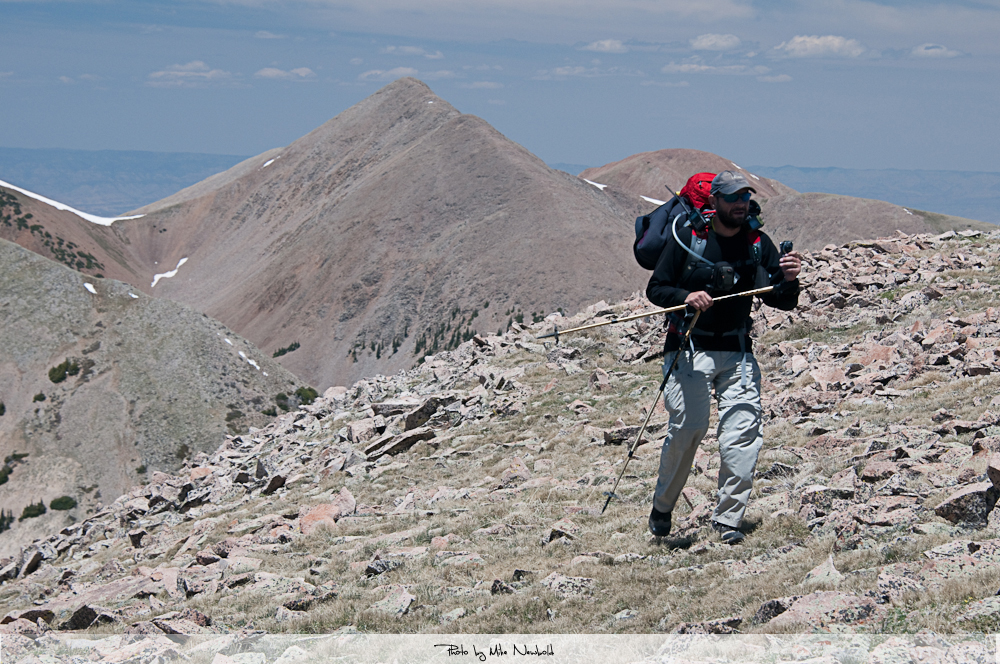
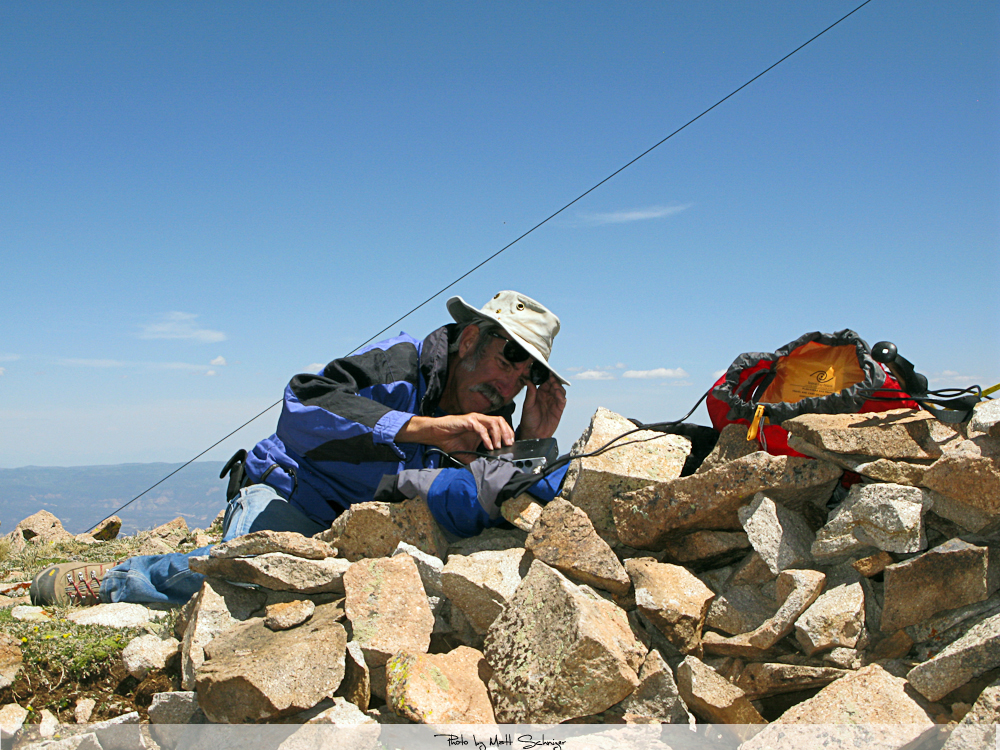
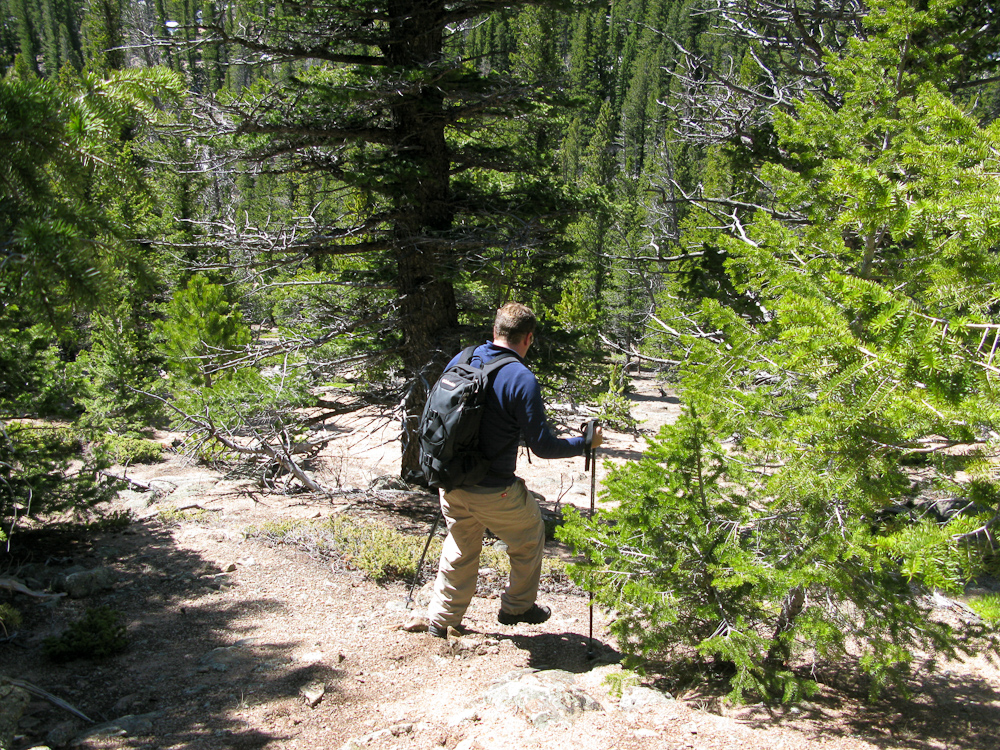
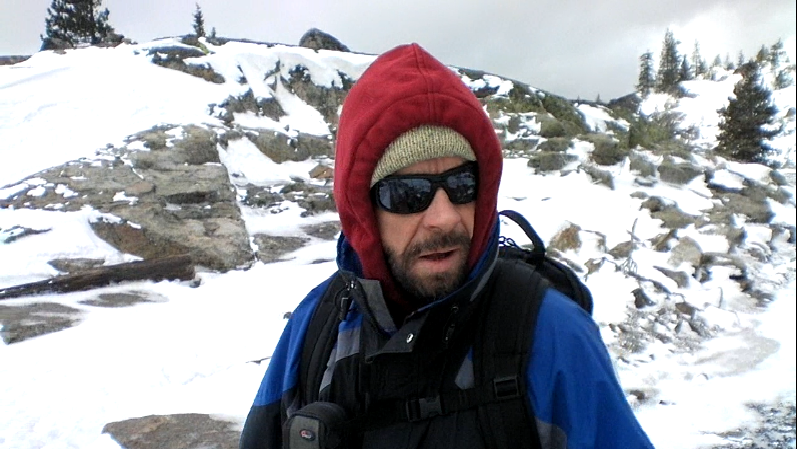
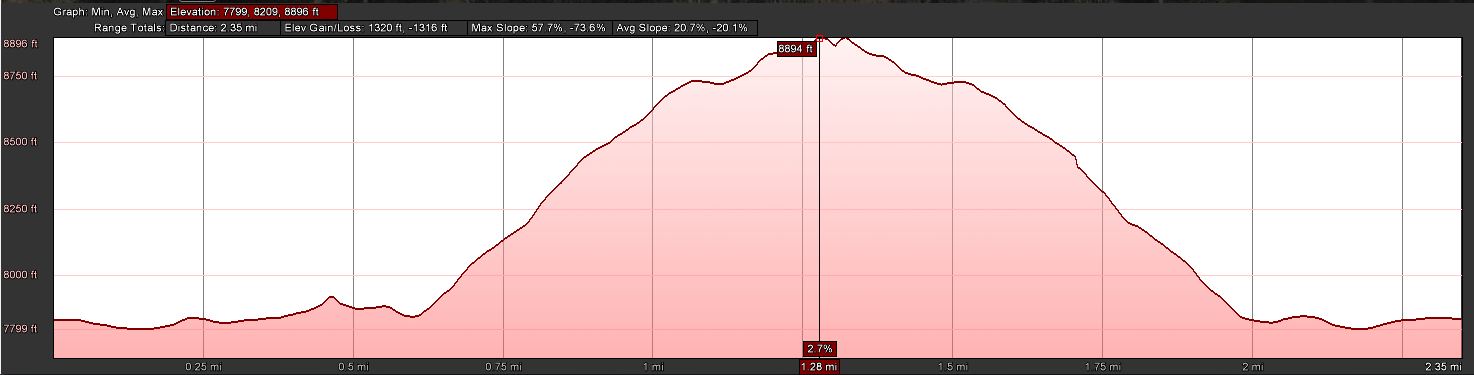
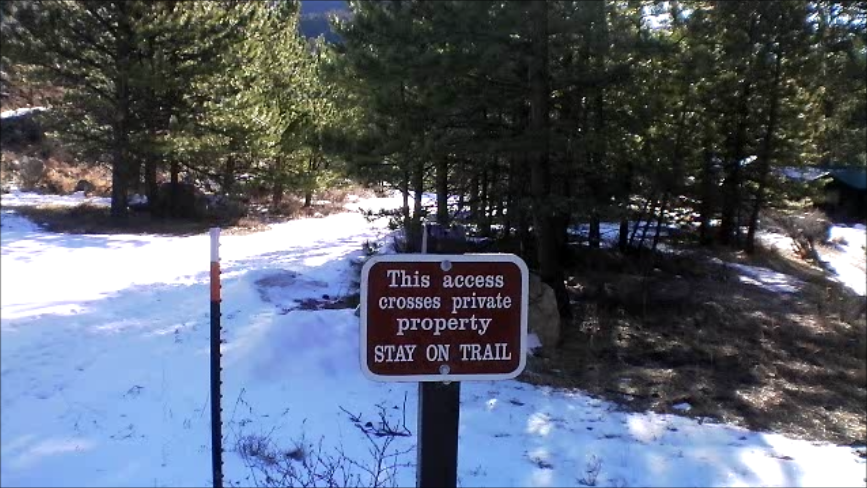
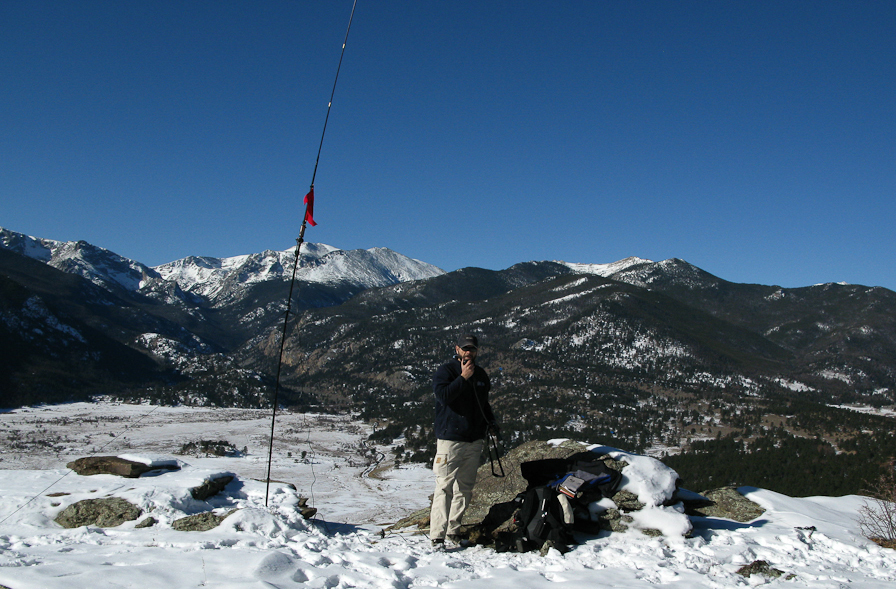
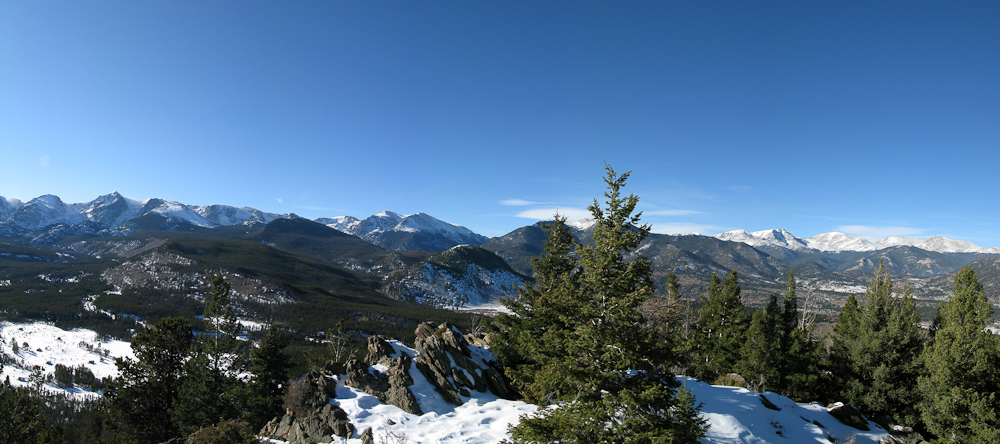
It was a great trip to the La Sal Mountain Range it Utah. Mike/KØYO and I activated four out of the six SOTA peaks. Here a teaser video… full trip report will follow.
httpvh://www.youtube.com/watch?v=mlmn-0oBoVc
!! WARNING !! There are old mountaineers, and
bold mountaineers… there are no old-bold mountaineers.
Hiking and mountain climbing are potentially hazardous activities particularly in Colorado with its extreme elevations. I am not accepting responsibility for any death or injury resulting from activations based on my trip reports. Proper training, experience, and personal capability assessment is required – enjoy!
Mike is not what you call an ‘early bird‘ when it comes to crawling out of a sleeping bag. We compromised on a 6AM wake-up call to get a chance to activate all three summits. After a quick breakfast and a final equipment check we were on our way from our camp at the base of Mt. Tomasaki up to Burros Pass.
Trailhead: 8552 ft/ 2565 m
Summits: Manns – 12272 ft / 3741 m Mt. Tomasaki – 12239 ft / 3730 m
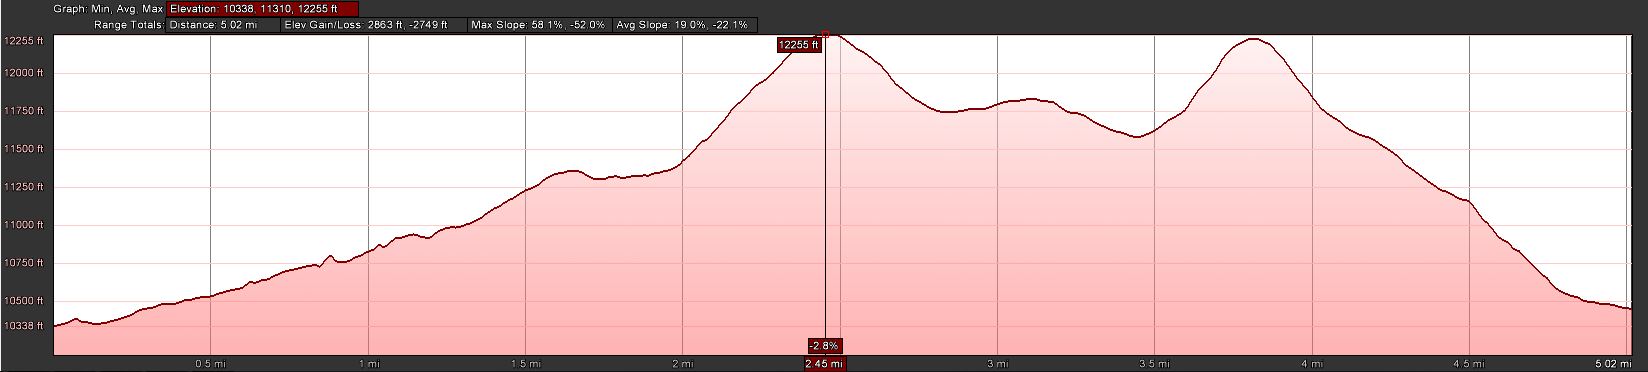
Elev. gain: 2853 ft / 870 m
Roundtrip: 5.0 mi / 8.0 km
Red Tape: The La Sals are withing the Manti La Sal National Forest and thus all their rules apply. It is a remote area and for the most part without cell-phone coverage . VHF/UHF repeaters are also scarce and they can only be reached from very high elevations. If you are traveling off season it’s a lonely place and help in case of an emergency is not available. I was driving a Subaru OUTBACK and had no major issues but I was lucky that the creek we had to cross was quite low. However, for the Subi it was borderline. The ‘roads’ after Geyser Pass are indeed rough for this kind of a car and some help from a second person to navigate critical sections would come in handy. I also recommend taking a chain-saw to avoid being trapped by falling trees – and there are tons of them, sometimes barely enough road to scrape through. Make sure to carry a map with all the NFS roads. Roadsigns are scarce and typically used for target practice or used as floss/toothpicks by Porcupines making them unreadable. Keep that in mind when you travel.
The Ascent:
Manns/Tomasaki – Elevation Profile
We decided to ascent Manns Peak first which is located between Mt. Tomasaki and Mt. Wass. The idea was to get a good look at the route to Mt. Wass and Mt Tomasaki to determine whether snow is still an issue and activate accordingly.
From our base-camp we traveled north and then slightly NW up the gulch towards Burros Pass. After reaching the pass, the trail forks towards the NE and the other continues back down on the other side.
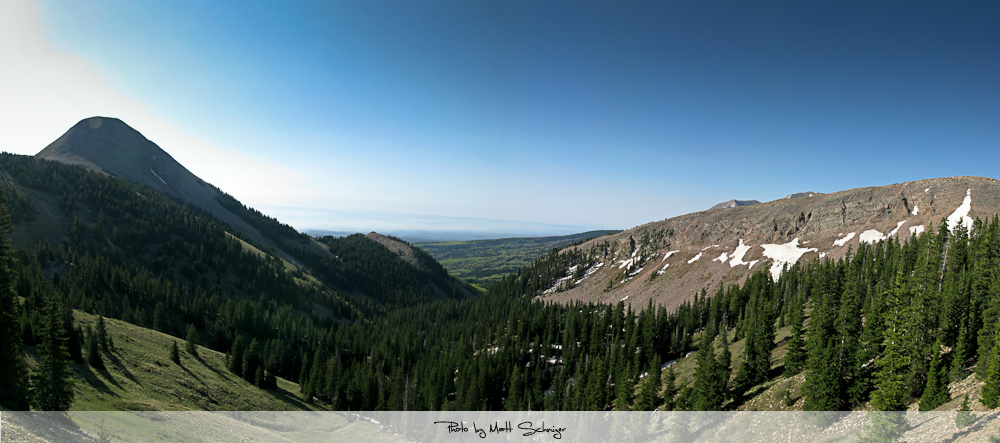
The view from Burros Pass towards our base-campCast Iron ‘something‘
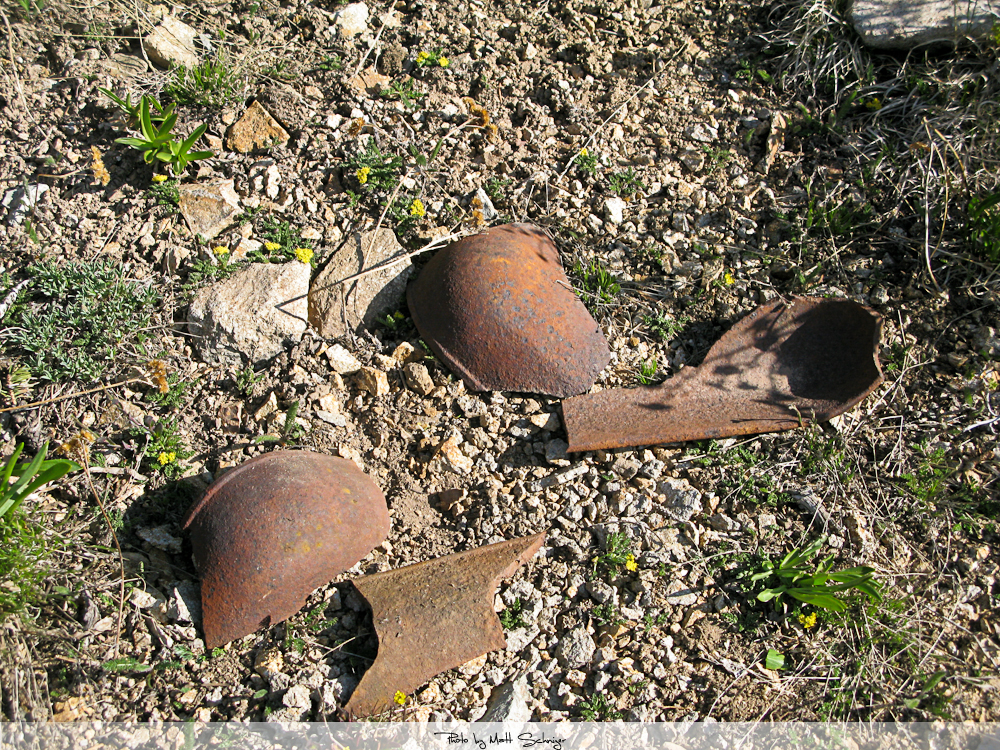
We followed the NE trail and along the east side of Manns Pk. Retrospectively I would choose a more northern route to gain more elevation and then follow the ridge all the way to the top. On the positive side, we discovered several interesting remnants from mining activities along this route. Since Mike used to be a Mining Engineer in his former life, he was a fountain of useful information related to geology and mining operation.
Mike reached the Talus
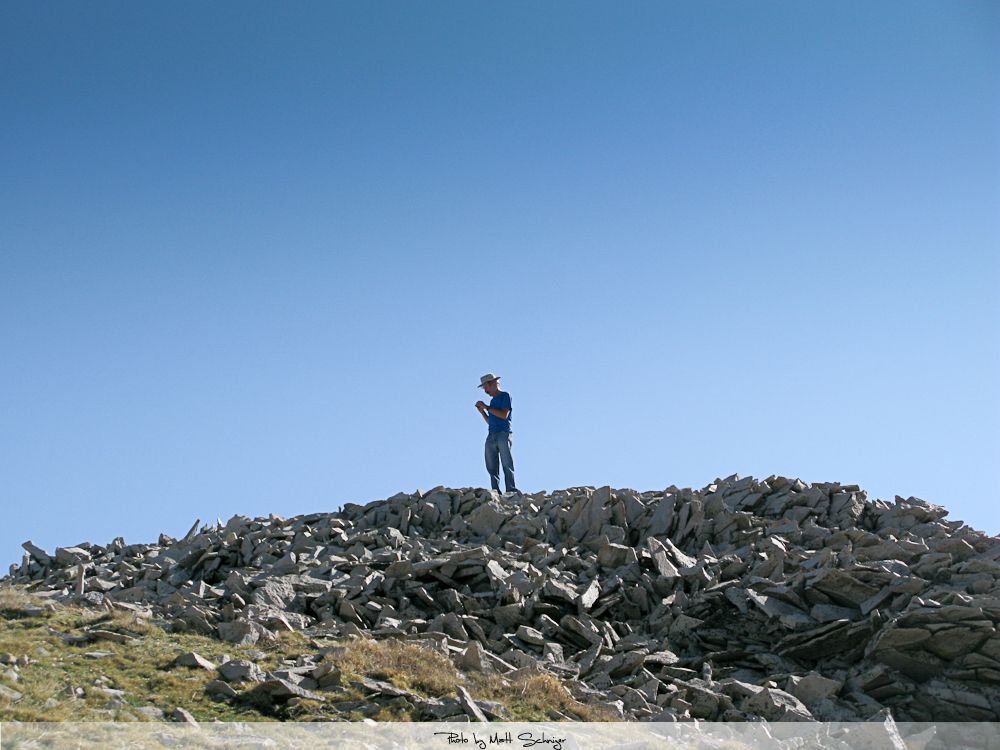
The La Sal Mountains are famous for Talus or Scree. So far we hiked on solid ground but that was about to change… the final approach to Manns Pk. gave me an idea what to expect for the next couple of days. Mike called it: ‘Potato chips on ball-bearings’. They indeed look like giant potato chips, they behave as if they were lying on top of ball-bearings and they sound as if they are hollow. Needless to say that hiking on this stuff can be difficult at times. You will see what I am talking about on some of the pictures and videos clips. Nevertheless we made it to the top without any troubles.
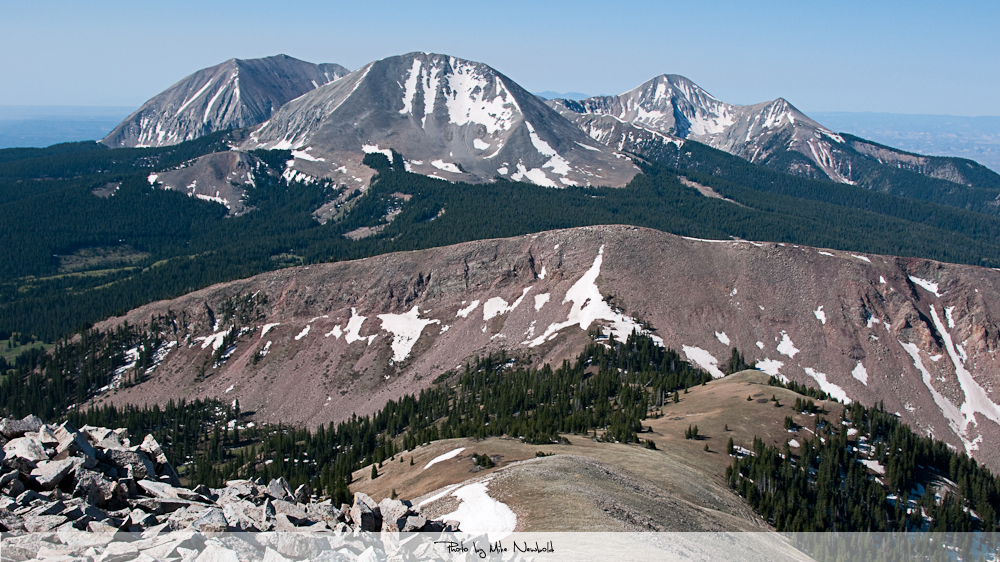
The Summit: The summit is basically a huge pile of loose rocks (Talus) with a wind shelter built from rocks at the top. Plenty of room to setup antennas. The views are spectacular and very unique. The La Sals are a relatively small Mountain Range towering high over the Colorado Plateau and therefore offering (almost) unobstructed views to the horizon in every direction. Despite a forest fire to the East, the air was clear and crisp with blue skies and pleasant temperatures. From up here we could actually see the only repeater in the area (Bald Mesa/146.76- tone: 88.5 Hz), operated by Royce/K7QEQ in Moab.
Mt. Mellenthin, Mt. Peale, Mt. Tukuhnikivatz as seen from Manns Peak
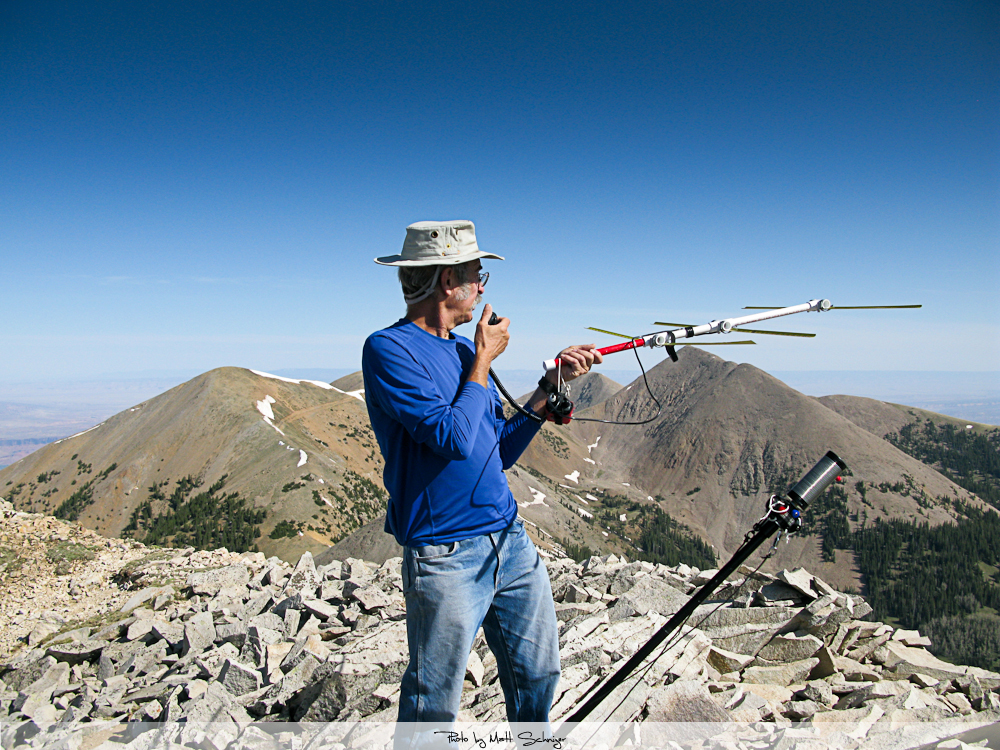
Our priority was to set-up for 2m first to keep our “appointment” with Bob/KIØG who climbed another SOTA summit, WØC/SJ-Ø15 (Crags Crest) in nearby Colorado. Our Google Earth plots (see below) were in favor of a S2S contact on 2m. LOS looked good and a distance of 80 mi (~130 km) should not be a problem with 5W and a tape-measure YAGI.
Elevation Profile between Manns Pk. (left) and Crag Crest (right)Mike/KØYO using a tape-measure YAGI on 2m.
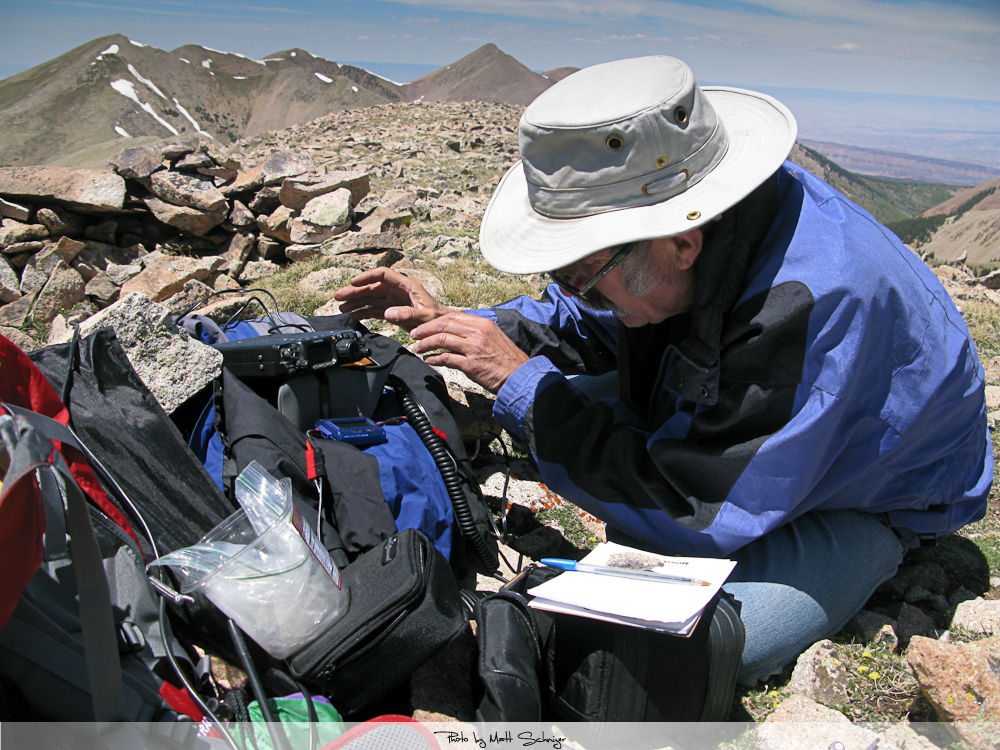
After fiddling for a while with the HT to punch in the right frequency, Mike raised KIØG quickly on 146.520. The first contact and successful first activation of both summits, a nice start of our trip. During Mike’s and Bob’s QSO, I set-up the Buddipole for 20 m, eager to make some more contacts and move-on to the next summit – you never know how the weather develops in the mountains.
Here some more pictures from the summit:
Mike/KØYO doing some Voodoo to the FT-817Matt/KØMOS operating on 20m
After a total of 13 QSO we started to pack-up the gear and evaluate our options. In order to get to Mt. Waas we would have to follow the ridge-line, bagging several unnamed summits including Pilot Mountain (which is not a SOTA summit). With the help of binoculars we were able to determine a rather big snow cornice still hanging in the saddle just before the steep ascent to Mt. Waas. Not a big surprise since it is only May and snow can hamper your activities in the La Sals even in August. Mike was firmly against making an attempt under these circumstances and I had no good arguments to go forward with this summit – after all that is the advantage of having a hiking buddy who is familiar with the area and conditions.
APRS coverage
We turned in the opposite direction instead where Mount Tomasaki was waiting for us. Tomasaki is only about 1.5 mi (~2.5 km) SE of our current position and the cross over is straight forward and no snow was hampering our efforts. Only the Talus…. and I think I used a few swear words on our way up to the summit. Luckily we were high enough to have APRS coverage between the two summits in case chasers were watching our progress.
Mt. Tomasaki from the saddleKØMOS on the ascent
The summit of Mount Tomasaki is very similar to Manns Pk. The shelter was little smaller, the wind had picked-up a bit but the views were also stunning. We followed the same procedure, Mike tried to get contacts on 2m with the Yagi and I prepared the Buddipole in the mean time.
Why are these radios so darn small?
The Descent:
We tried to keep the descent as short as possible and turned SW as soon as we reached the saddle. This led us into steep and treacherous territory and we had to scout our options carefully. We finally reached the trail just a few hundred yards above our camp.
Plenty of time to charge our batteries with the solar panels, cooking and sharing stories and making plans for the upcoming day. The cold wind after sunset finally drove us into the sleeping bags – as far as I am concerned, it was a great day even-though we missed one of the summits.
Bascamp
Some video impressions:
httpvh://youtu.be/r-JkcnNGlT4
If you would like to leave questions or comments, please do so through Youtube.
Wondering how our trip progressed? Click the FOLLOW button at the bottom right corner of this page to sign-up.
73, Matt/KØMOS
!! WARNING !! There are old mountaineers, and
bold mountaineers… there are no old-bold mountaineers.
Hiking and mountain climbing are potentially hazardous activities particularly in Colorado with its extreme elevations. I am not accepting responsibility for any death or injury resulting from activations based on my trip reports. Proper training, experience, and personal capability assessment is required – enjoy!
I have always been fond of the La Sal Mountain range. They provided a nice backdrop to many of my photos taken on visits to the Moab and Lake Powell area. It never occurred to me to climb them though… until I ‘met’ Mike/KØYO.
Mike commented on my trip report to Mount Werner, an area that he is very familiar with. We started to exchange e-mails about SOTA and summits in Utah where he now lives, and soon started to make plans for activating some of the summits in the La Sal Range for the upcoming season.
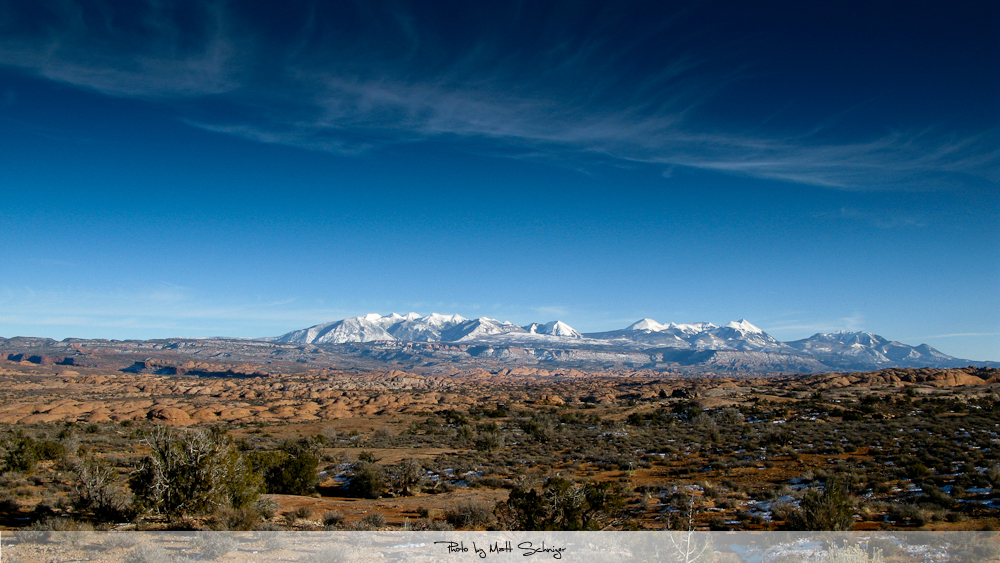
La Sals as seen from Delicate Arch
The La Sals can carry snow until August which can make an ascent of the rather steep slopes hard if not impossible. Luckily for us, it had been a very dry winter in Utah and most of the snow was already gone. With the weather forecast in our favor, we set a date and within 5 days I was on my ~550 mi (ca. 900 km) journey to Utah.
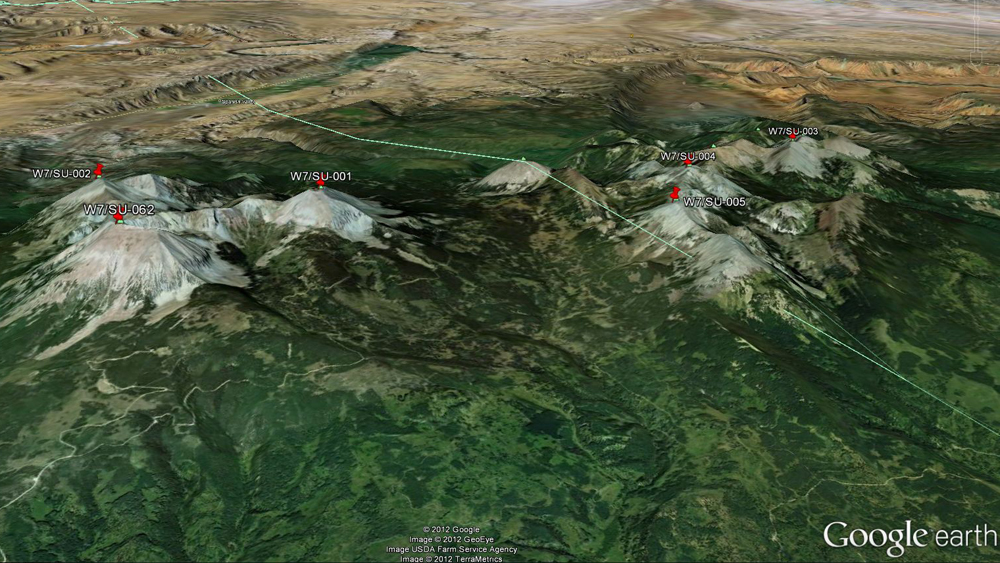
The mountain range contains of two clusters of peaks and rises high over the surrounding Colorado Plateau. It has several major peaks and six of them are currently SOTA peaks:
During the preparation we debated for a while where to set-up our base-camp to make the activations as efficient as possible. We went back and forth but finally settled on the Geyser Pass area because both clusters can be easily reached by foot from the pass. Since Mike was leaving earlier than me… that’s where we planned on meeting.
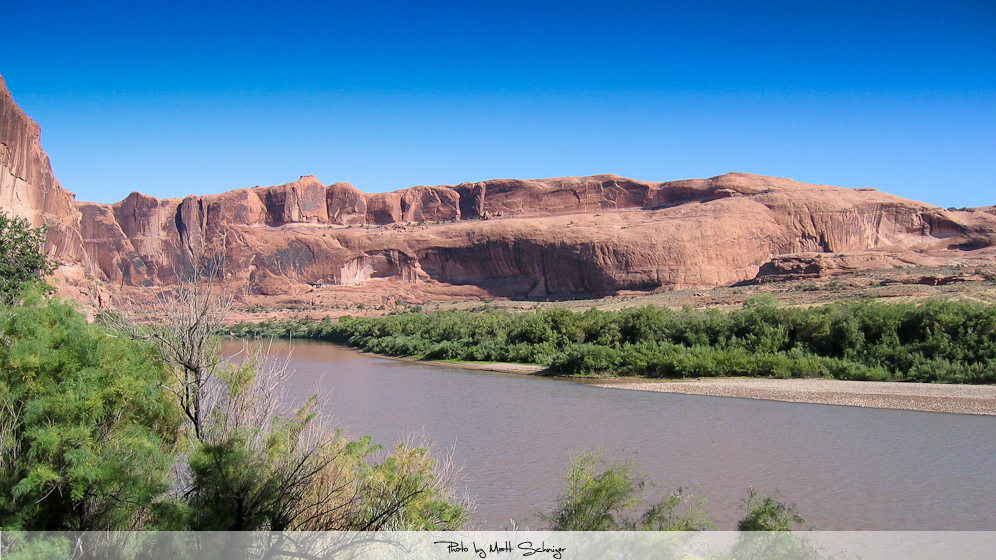
Along the Colorado River – Scenic Byway to Moab
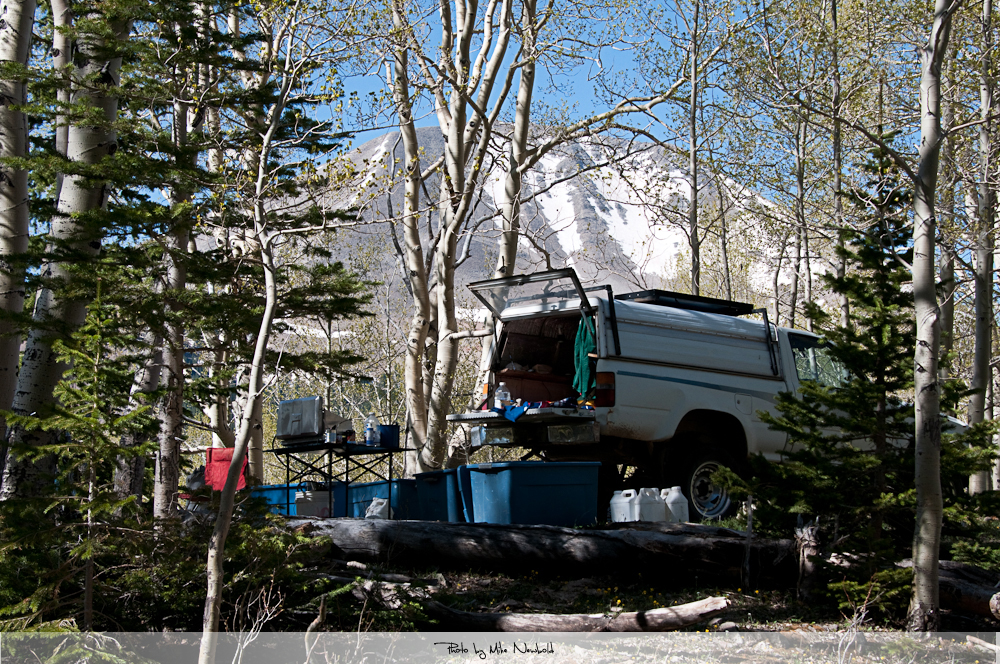
I left my QTH early in the morning on May 29th , hoping to arrive around 5PM at our base-camp. Traffic was light on I25 as well as I70 and I made good time with just one pit stop to re-fuel the car and to get some caffeine in my system. I took the scenic byway to Moab along the Colorado river. Route 128 has always been a favorite of mine. From Moab it is another hour to get to Geyser Pass, mostly over dirt-roads. I was pleasantly surprised about the good condition of the dirt road in the Manti La Sal National Forest. Besides all the fallen trees along and over the road, my old Subaru Outback had no issues until Geyser Pass… then the ‘road’ condition changed and I was moving at a snails pace to navigate the holes and uneven track towards the base-camp. I received a phone call from Mike just a few hundred yards before reaching the pass. He was investigating possible routes to Mt. Mellenthin when he picked-up a cell signal. He gave me the crucial details on where to find his camp. Perfect timing – just 15 minutes later I discovered his truck in the trees, just
La Sals – I found Mike’s camp
below Mount Tomasaki. The final approach was tough for the old Outback but with spinning wheels I (barely) made it up the steep, dusty and bumpy ‘road’ to the camp.
La Sal Mountain Range: SOTA summits (click picture to enlarge)
Mike was still out exploring and since I had been sitting in the car for almost nine hours, I needed some exercise. I took my HT and hiked up towards Burros Pass to explore the ascent to Mount Manns and Mount Tomasaki. I continued uphills, making good progress towards Mt. Manns when Mike called me on 146.52 – he was back at the camp. I turned around and 45 minutes later, we finally met in person.
After dinner we discussed out plans for the coming day and turned to the sleeping bags early…
Video Impressions:
If you have not yet seen the trailer… here it is:
httpvh://www.youtube.com/watch?v=mlmn-0oBoVc
or move on to Part 2 of the trip. If you would like to leave questions or comments, please do so through Youtube.
!! WARNING !! There are old mountaineers, and
bold mountaineers… there are no old-bold mountaineers.
Hiking and mountain climbing are potentially hazardous activities particularly in Colorado with its extreme elevations. I am not accepting responsibility for any death or injury resulting from activations based on my trip reports. Proper training, experience, and personal capability assessment is required – enjoy!
This was a re-activation for me. If you are looking for all the details on how to get there and other useful info, you can find the original trip-report with the necessary details right here. This post has only a few specifics from today’s activation.
Waking up this morning, I was not sure whether I saw fog or smoke when I looked out of the window. However, my nose was clear about what was going on – it was definitely smoke… coming from a large wild-fire (Hewlett fire) just a few miles north of here. It has been burning for the last six days and consumed over 7300 acres (~30 square km) in the Poudre Canyon, one of my main access routes to SOTA summits. Checking the Web confirmed that Co14 was closed between Ted’s Place and Rist Canyon due to the fire. I was planning to activate Mount McConnel, an easy hike of ~4,2 mi (6,8 km) and 2110 ft (643 m) ASL, about 10 miles up the Canyon from the fire. The road closure forced me to take an alternate route through Rist Canyon to get to the trail head. The early morning drive along the small and winding road was very enjoyable and I reached the trail-head ahead of schedule. The bridge over the Poudre River to Mountain Park Campground (where the TH ls located) was still closed for the season – so I parked the car on the downhill side of the road on a small gravel strip and started my hike. The temperatures were perfect, low 60s with a light breeze. Wildflowers started to come out everywhere and I quickly found my rhythm heading up the trail. Hanging out with my own thoughts, I almost stepped on a large male Dusky Grouse who panicked and flapped nervously into the trees. He almost gave me a heart-attack, but I was glad it was just a grouse and nothing more predatory. Shortly after that incident we had another encounter. This time it was a little more civilized and relaxed, at a safe distance. He displayed his square tail but did not allow me to take a good picture – too bad. By the time I reached the summit, it was partly cloudy and with all the particles in the air from the raging fire not too far from here, the views were not as good as I had experienced last time. I used the top of a tree (growing below the cliff) to attach and tune my antenna for 17m. My first contact was with Kriss/KA1GJU/AM who was en route to San Francisco. He was just about 50 miles east of me at 36’000 ft (~11’000 m) and was kind enough to use his unique position and 400 W radio to drum-up some more contacts – thanks a bunch Kriss. 17m was not very productive so I re-tuned to 20m and worked most of my regular chasers. By the time I could not copy any more chasers, more clouds already moved in and the winds picked-up too. A sign to pack up and head down.
Thanks for all the contacts and spots.
Update: Sadly, since then Mount McConnel has now been consumed by the Highpark fire as well. As of yesterday, two more SOTA summits are within the burn area.
Some video impressions: httpvh://www.youtube.com/watch?v=azvG7_AnVAk
Please post comments or questions through YouTube.
!! WARNING !! There are old mountaineers, and
bold mountaineers… there are no old-bold mountaineers.
Hiking and mountain climbing are potentially hazardous activities particularly in Colorado with its extreme elevations. I am not accepting responsibility for any death or injury resulting from activations based on my trip reports. Proper training, experience, and personal capability assessment is required – enjoy!
This was a re-activation for me. If you are looking for all the details on how to get there and other useful info, you can find the original trip-report with the necessary details right here. This post has only a few specifics from today’s activation.
Signal Mtn. – View from the summit
From my prior activation in September 2011, I knew that it was going to be a long hike (11.7 mi/18.8 km – 4064 ft / 1239 m) mostly within the tree-zone. The two summits (Signal Mtn and South Signal) are just pushing their ‘heads’ above the treeline providing some amazing views.
My backpack with Yagi
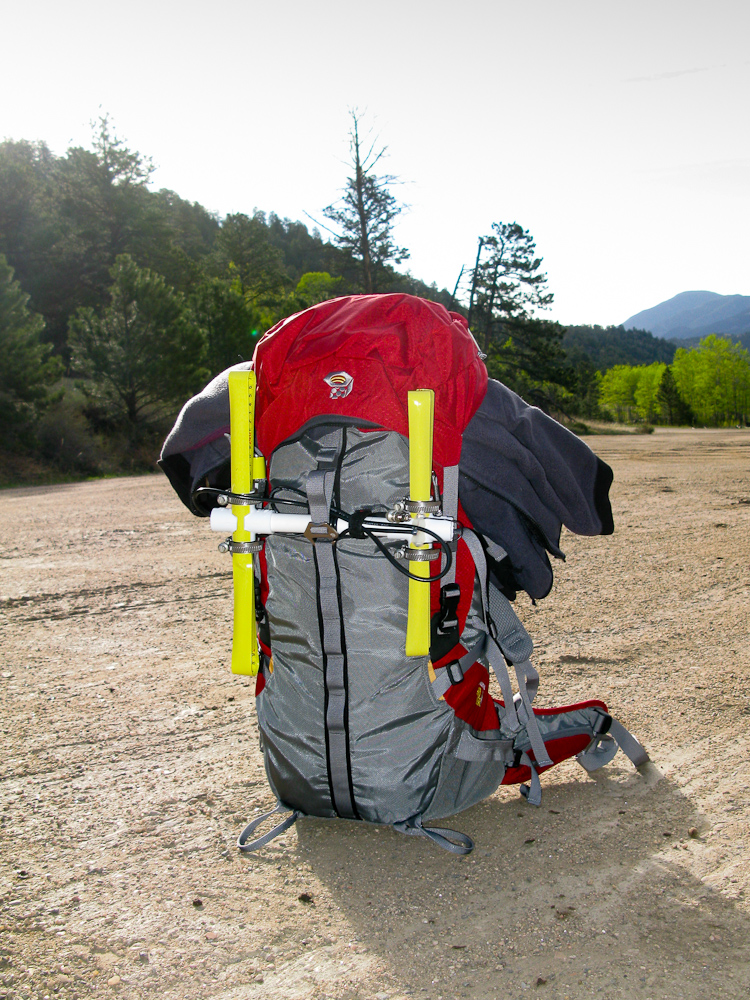
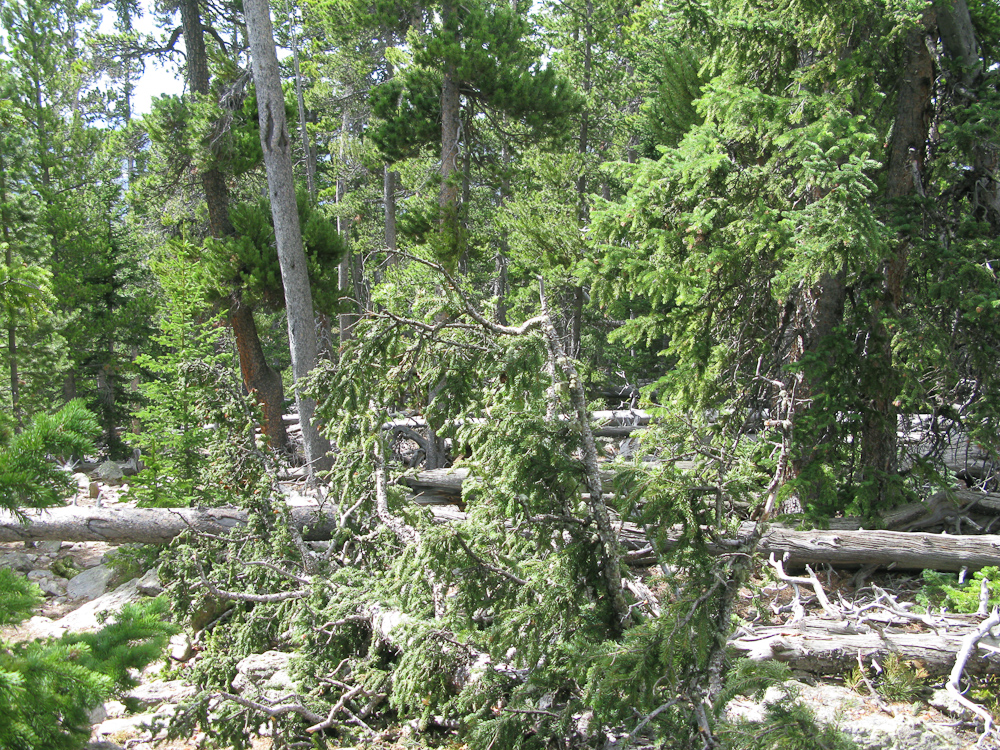
Besides my normal gear, I also carried a ‘tape-measure’ Yagi antenna I wanted to test on the summit. The first two miles of my hike went as expected but the following 2-3 miles through the forest were extremely difficult. A winter-storm must have destroyed large parts of the Bulwark Ridge. Trees were lying around everywhere. And I am not just talking about dead-trees… large and healthy trees were broken apart like tooth-picks, blocking the way to the summit. It was a very time-consuming and exhausting hike, climbing over trees or trying to find a way around it. Often I
Devastated Forest
had a difficult time finding the trail again. Finally, the last 1-2 miles above the tree-line provided more challenges in form of big, soft, and deep snow-fields. Without having any ‘floatation-devices’, I was post-holing through approx. 3-4 ft of snow. Luckily I brought my gators – keeping at least my feet dry. It took me almost 4 hours to reach the summit (compared to 3’10” in September). The view from the summit was worth it though. After setting up my antenna, I was hiding from the wind behind the small stone-shelter on the top. The wind behaved kind of strangely… completely calm for several minutes, followed by very strong gusts for a couple of minutes and back to complete calmness again. One of the stronger gusts took my antenna down (again), just after switching from 20m to 17m. Unfortunately the stinger of my shock-corded whip got bent during the process . I guess its time to use some of those spare parts. I took it as a sign to leave and packed-up my gear, knowing that it would take me quite a while for the ~6 miles climbing over all the trees again. At least it was downhill this time. I have to admit that I was pretty tired by the time I reached my car.
Thanks for all the contacts and spots.
Some video impressions:
Please post comments or questions through YouTube.
!! WARNING !! There are old mountaineers, and
bold mountaineers… there are no old-bold mountaineers.
Hiking and mountain climbing are potentially hazardous activities particularly in Colorado with its extreme elevations. I am not accepting responsibility for any death or injury resulting from activations based on my trip reports. Proper training, experience, and personal capability assessment is required – enjoy!
Taylor Mountain (WØC/FR-Ø61) is part of the Front-Range of the Rocky Mountains and located south of Estes Park, close to the towns of Boulder and Longmont. Now that I am writing about this activation, it occurs to me that I should have left the first activation of this peak up to Jerry/KDØBIK – it would have been a nice touch for the first activator to share the same name than the mountain. I guess it’s too late now – sorry Jerry. You can still try to first activate Taylor Mountain in the Sawatch Range.
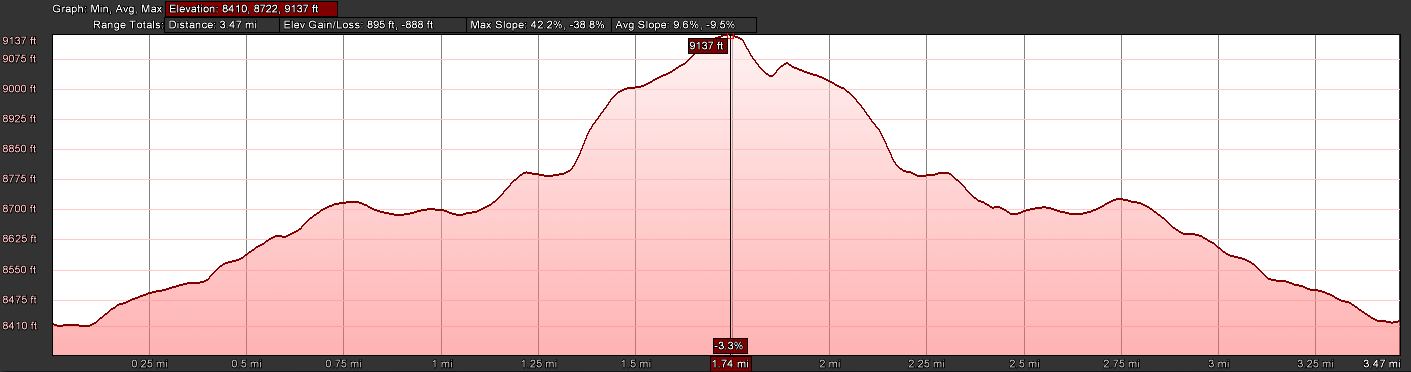
Trailhead: 8415ft / 2565 m
Summit: 9134 ft / 2784 m
Elev. gain: 908 ft / 277 m
Roundtrip: 3.5 mi / 5.6 km
How to get there: Taylor Mountain is close to Denver, Boulder, Longmont, Loveland, Estes Park and Fort Collins. Go west on CO 66 (Ute Highway north of Longmont) towards Lyons. In the quaint village of Lyons take a left (south) onto 5th Avenue or CO-7 which is also St. Vrain Drive. Continue on CO-7 through the gorgeous St. Vrain Canyon until you encounter CO-27 on your left. From there it is another 2.2 mi (3.5 km) to where you have to take a right onto Taylor Road, a dirt road that leads through a small subdivision. The trail-head is now just 0.7 mi (~1.1 km) ahead of you.
Red Tape:
Taylor Mountain is managed by the National Forest Service. There are no permits or entry fees required. The parking possibilities at the TH are limited which might not be an issue as soon as the FS opens the gate to all the forest roads up there.
The Ascent:
Elevation Profile
For most of the way you can hike along forest service roads. The TH is located at FR-330. A gate blocks access to the FR system – it was still locked for the season,
Taylor Mountain as seen from TH
preventing access of motorized vehicles. FR-330 leads gently up the slope through a thinned out pine forest. Several larger areas were completely cut-down… the purpose is unknown to me but a good guess might be to control the Mountain pine beetle infestation. Soon you will encounter the intersection with FR-330B – take FR-330B towards the right. FT330B is not much of a road and feels more like a hiking trail (for most parts anyways). A sign indicates where FR-330B ends… but a narrow track continues uphills and eventually reaches the summit. Navigation or terrain is not much of a challenge and this, combined with the short distance (3.5 mi / 5.6 km round trip) makes it an easy morning hike.
The Summit:
View from the Summit
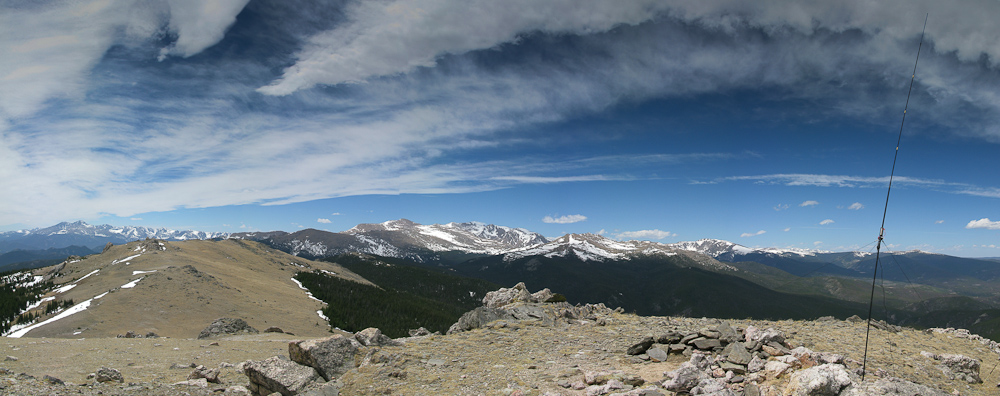
The summit is rather flat and the highest point is defined by a large stone cairn with a summit register in a peanut jar. The views are limited due to the trees but you can take a peek through the trees at some 14ers near the Continental Divide. Longspeak and Mt. Meeker are visible as well as some peaks in the Mummy Range. The summit can easily accommodate several activators and provides ample space and trees for antenna and guy-lines. I made 20 contacts in ~40 minutes on 20m and 17m.
The Descent:
I followed the same route back to the car but managed to get lost on my way down, loosing the faint trail just a few minutes after leaving the summit. A look at map and compass and a little bit of bush-whacking finally brought me back on the trail.
Some video impressions: httpvh://www.youtube.com/watch?v=_jUbml6wBNg
If you would like to leave questions or comments, please do so through Youtube.
!! WARNING !! There are old mountaineers, and
bold mountaineers… there are no old-bold mountaineers.
Hiking and mountain climbing are potentially hazardous activities particularly in Colorado with its extreme elevations. I am not accepting responsibility for any death or injury resulting from activations based on my trip reports. Proper training, experience, and personal capability assessment is required – enjoy!
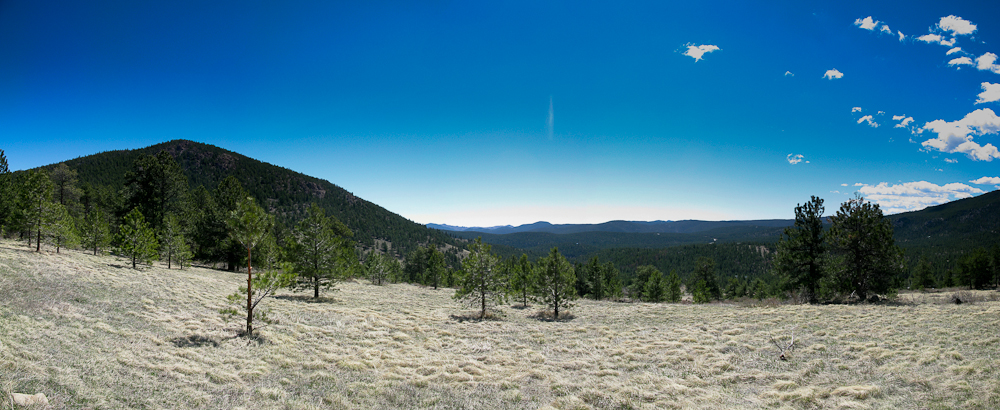
I had planned a double activation for today. Thunder Peak or WØC/FR-15Ø was the first on the list.The weather forecast was great for the Estes Park area and a friend of mine joined me for the hike. We drove into Estes Park and were surprised to see how much snow the mountains got during the week. Dark clouds were hanging in the Mummy Range (Continental Divide). A stiff wind greeted us when we left the car at the trail-head. Light snow-flurries were present for the first part of the hike, even though we had blue skies above us.
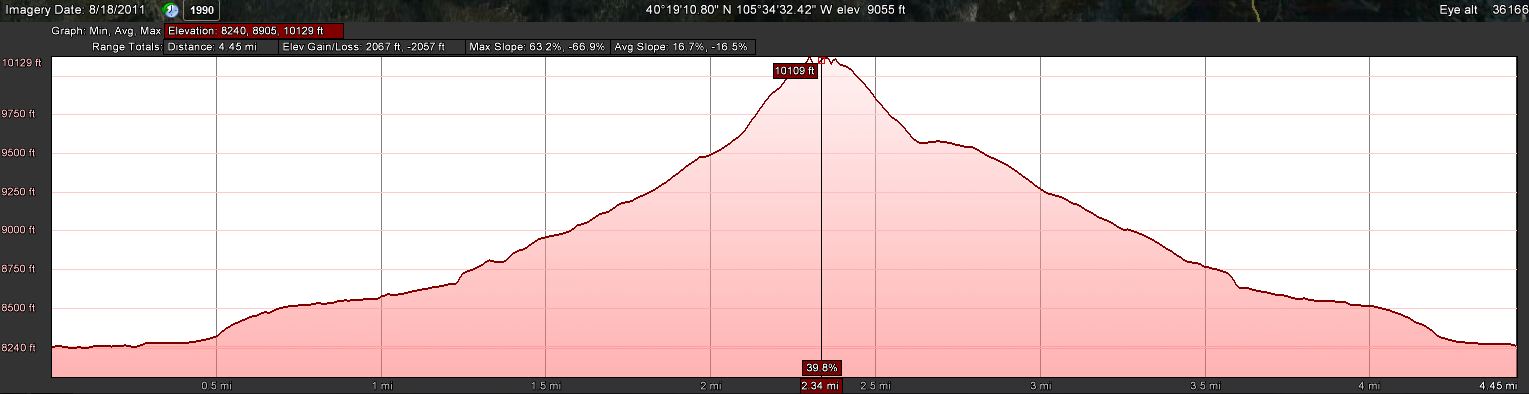
Trailhead: 8244 ft / 2513 m Summit: 10134 ft / 3083 m Elev. gain: 2051 ft / 625 m Roundtrip: 4.5 mi / 7.2 km
How to get there: Take US34 from Loveland towards Estes Park through Big Thompson Canyon. Thunder Peak is on the south-west side of Estes Park. Stay on US34 towards Rocky Mountain NP. Go left on County Road 66 (or Tunnel Road), following the signs to the YMCA campus. Follow the road all the way to the end. There is a campground at the very end – as well as the East Portal of the Big Thompson Project Pipeline. Park your car at the loop of the road (there is room for about 10 cars on a gravel strip at the south side of the loop.
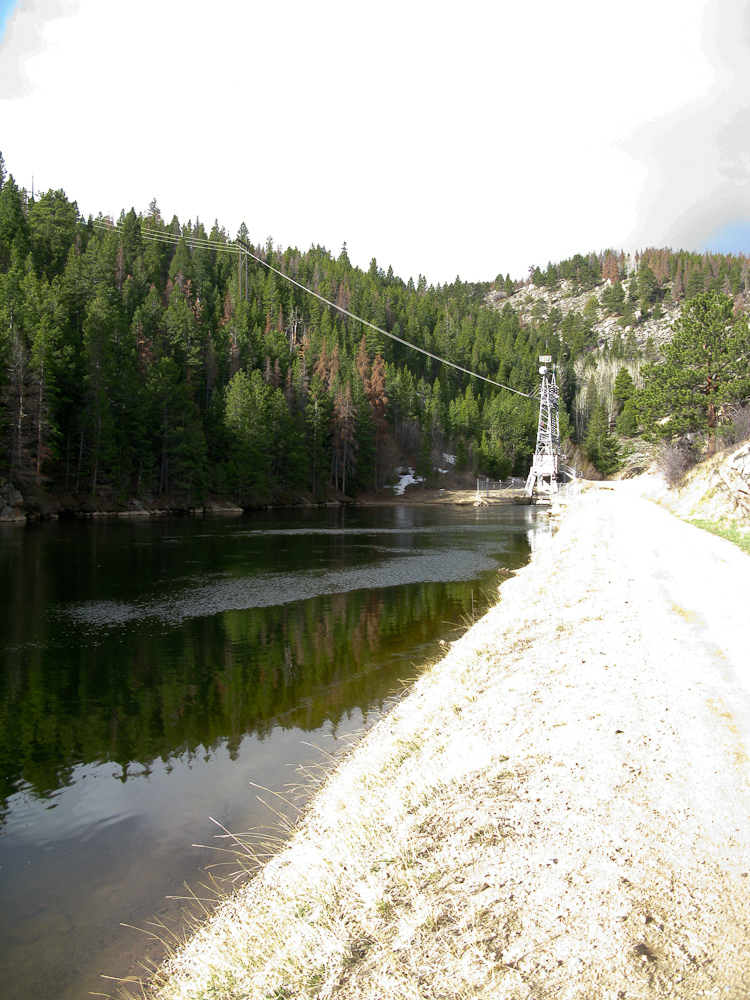
Follow the dirt road at the end of the loop (SE) towards the reservoir and East Portal trail-head. The kiosk of the trail-head can be found when you follow the road on the right-side (north) of the reservoir.
Red Tape: At the East Portal of the Adams Tunnel is a small (really small) reservoir – and the surrounding area is Federal property. You are not supposed to park, fish, boat, pee etc. within 100 yards of the dam – Homeland security and such. Thunder Peak is within the RMNP, ergo it is a fee area and their rules apply (no dogs etc.) I am not sure about RMNP entry fees… since the parking lot is outside of the park, I think you are not required to have a NP pass. I have a yearly pass anyway and therefore did not look into this further.
The Ascent:
Elevation ProfileTurn left after the Horse hitch
For the first few hundred yards we followed the dirt-road on the north-side of the Reservoir to the kiosk. We continued on the dirt road along Wind River (more like a small creek) to a concrete retention pond. About 20 yards before the pond there is a faint trail to the right which continues to follow the creek. It was hard to see on our way up and we missed it. The result was some bush-whacking until we found the trail again. [UPDATE (3/13/13): There is now a new sign pointing you into the right direction. You cannot miss it.] On the opposite site of the creek are some nice rock-outcroppings. Right around the horse hitch we left the established Wind River trail and turned towards the drainage between Thunder and Lightning Peak.
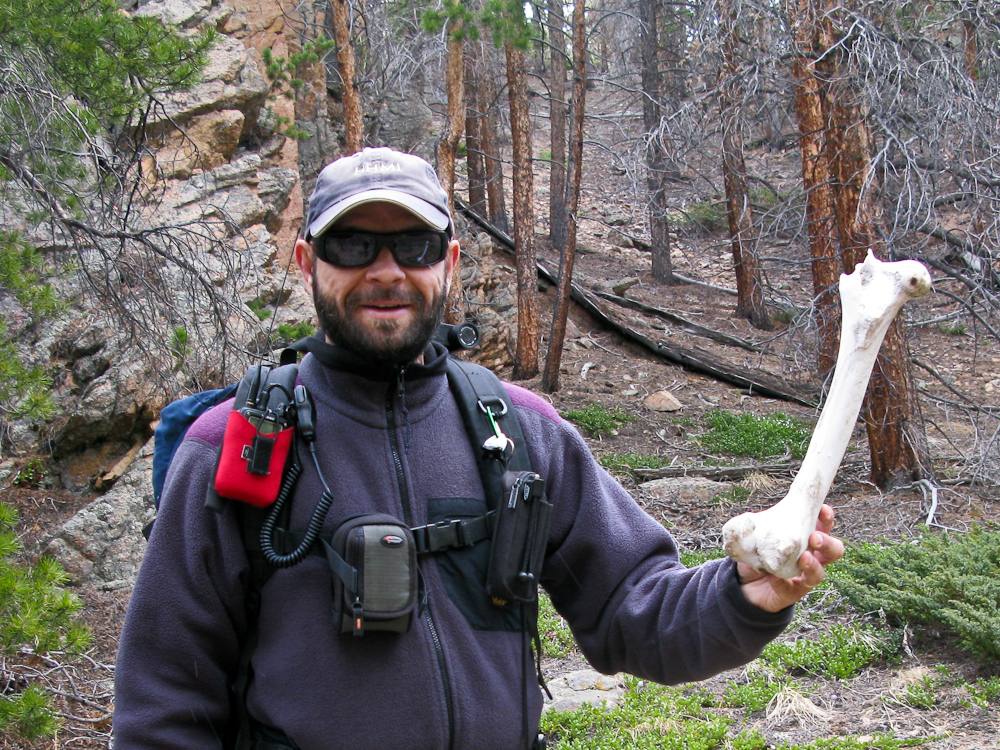
See what I found
First we had to cross the creek which was easy with the current water-level. We kept going along the drainage through lodge-pole pines and areas of aspen groves -always staying on the left (NE) side of the drainage where we encountered more open areas. As a result we made good progress. Interestingly, the soil in the drainage was very soft and sandy – sometimes we found big piles of sand as if a few kids had destroyed their sand-castle. You can’t get lost if you stay in the drainage and keep going all the way up to the saddle between Thunder and
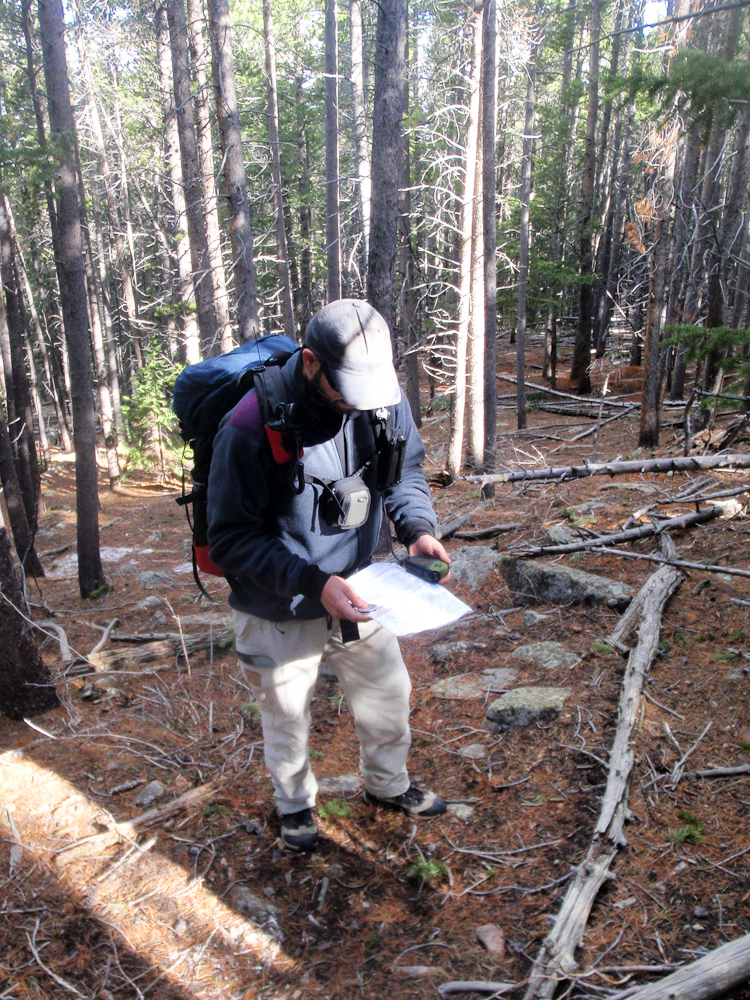
Where are we?
Lightning. From there you can see the summit and head up there. We wanted to shave off some time and took a more direct line to the summit since we were aiming for a second activation. Every now and then I verified our position with the GPS to see whether we were still on the plotted track. Heading up the south-west side was quite a work-out… it was rather steep (around 30%) and with the soft and sandy soil it felt like climbing sand-dunes. Having enough momentum was sometimes crucial to overcome a section.
The Summit:
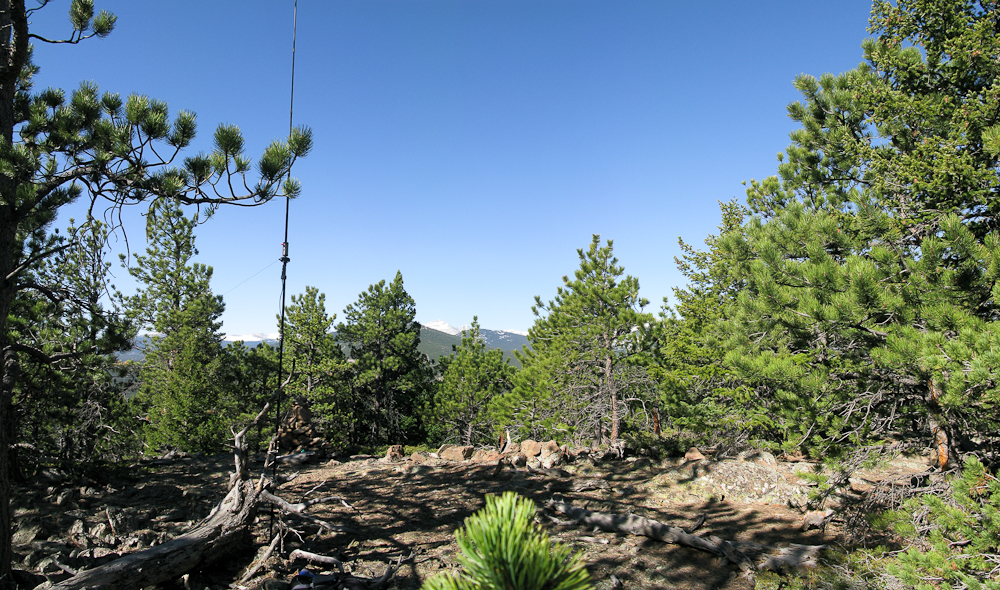
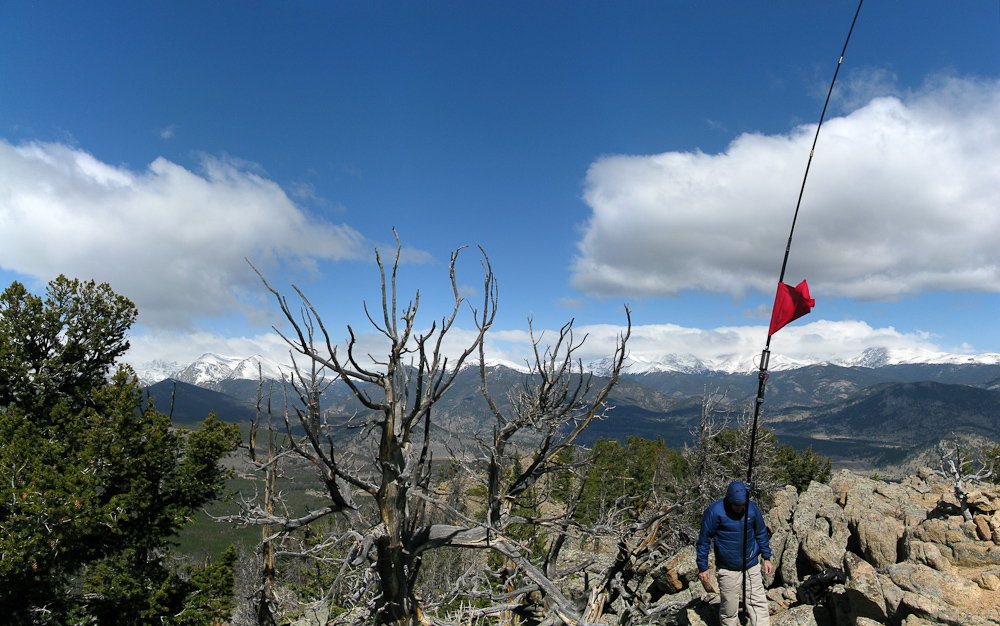
On the Summit
The views from the summit are spectacular. There are quite a few SOTA peaks right in front of you. To the south are Estes Cone (WØC/FR-Ø39), Longs Peak (WØC/FR-11Ø) and Mount Meeker; to the East, Lily Mountain (WØC/FR-Ø50), Twin Sister Peak East (WØC/FR-Ø37) and West. To the north we could see Emerald Mountain (WØC/FR-Ø58 ) and Eagle Cliff Mountain (WØC/FR-Ø68 ) and finally to the west, the Continental Divide and the Mummy Range with too many SOTA summits to list. The summit was very windy but the skies to the west looked a lot friendlier than earlier in the morning. Setting up the equipment was very efficient due to the fact that I had help and Phil/NS7P was my second contact after just a few CQs. His spot posted on SOTAwatch attracted the usual chasers within minutes (thanks guys).
The Descent:
Ben running downhills
The descent was quite fun… the soft and sandy soil allowed us to run/slide downhills towards the saddle and finally turn north into the drainage again, following our ascent route back to the trail-head an car. We only took the time to exchange our empty water bottles with full ones and off we went, heading to the second summit, a ~30 minutes drive.
Some video impressions:
If you would like to leave questions or comments, please do so through Youtube.
!! WARNING !! There are old mountaineers, and
bold mountaineers… there are no old-bold mountaineers.
Hiking and mountain climbing are potentially hazardous activities particularly in Colorado with its extreme elevations. I am not accepting responsibility for any death or injury resulting from activations based on my trip reports. Proper training, experience, and personal capability assessment is required – enjoy!
I successfully activated W6/SN-048 (Banner Mtn.) today – or so I thought. It seems that either the coordinates provided by the SOTA database or the summit name and elevation are wrong as of 3/12/2012. The provided coordinates (N39.30640030 / W120.26529694) are taking you to the top of Schallenberger Ridge (2276 m / 7469 ft . Since the nature of the error is unknown to me, I am not providing a full trip report and mislead another activator. I am adding the short version I posted on various Yahoo groups instead. If you are planning to activate Banner Mountain as it is currently defined in the SOTA database, I suggest to wait for clarification on either the correct coordinates or name/elevation of this summit.
Trip report:
Banner Mtn. – On the trail
WX looked very promising when I left my temp. QTH at Lake Tahoe. The sun was out and the temps well above freezing when I drove towards Truckee. The picture was quite different when I arrived at the Schallenberger Ridge. The low hanging and fast moving clouds were around sumit level, and the sun was hardly visible. With the help of the nice lady at the museum (Donner Memorial State Park) I was on my way in no time.
Avalanche conditions were moderate according to Sierra Avalanche Center. Due to the temps, the snow was quite wet. Snow exposed to the high winds was hard-pressed but easy to tackle with my snowshoes. The summit was very windy and hideouts rare. I was determined to activate this summit at (almost) any cost to get my 5th association under my belt.
Luckily the Buddipole antenna survived the 40 minutes in high wind conditions, however I experienced not only problems with the counterpoise (keeping the counterpoise attached to my ski-pole in high wind conditions is a recurring problem for me), but I also had issues with my SWR… one second at 1.2, the next at >10 and back to 1.2. I tried to rectify the situation but finally decided to give it a try as long as the antenna is still upright. My first contact was with Paul (W0RW) from Colorado who was hiking at > 10,000 ft. This was my first on-air contact with Paul who is normally too close for my activations in CO and it was an S2S as well. A great start, signal reports were excellent (57/58) and I was hopeful that the antenna is
performing well. Paul graciously left me the frequency for my activation (Thanks Paul). The remaining signal reports were underwhelming, not sure whether the antenna or the propagation conditions were to blame.
Two other first on-air contacts for me was Mike (KD9KC) and Bob (KI0G), both in TX.
A big THANK YOU to Andy (KI6ZHC) and Fred (K6DGW) for their help during the planning phase of the trip as well as to the spotters (N4EX, AJ5C (no copy), KI0G, K6ILM (no copy)) and all the chasers out there.
I am glad I went out yesterday, we are experiencing heavy snowfall and high gusts for the last eight hours… and the forecast for tomorrow isn’t any better. I doubt I can activate another summit during my stay here but surely enjoyed my snowshoe hike in the forest today.
!! WARNING !! There are old mountaineers, and bold mountaineers… there are no old-bold mountaineers.
Hiking and mountain climbing are potentially hazardous activities particularly in Colorado with its extreme elevations. I am not accepting responsibility for any death or injury resulting from activations based on my trip reports. Proper training, experience, and personal capability assessment is required – enjoy!
Eagle Cliff Mountain (WØC/FR-068) is part of the Front Range of the Rocky Mountains – just six miles south of Estes Park, right at the border to Rocky Mountain N.P. (the summit is within RMNP). There is no official trail up to the summit, but it seems to be a popular hike based on the faint network of trails. The ascent can be tackled from either County Road 66 (south slope) or from the RMNP side (NW slope via Moraine Park/Museum parking lot). I have chosen the south side of the mountain because I wanted to activate Emerald Mountain (WØC/FR-Ø58) as well (see separate trip-report) – Emerald Mountain is just a few miles up the road and thus the two make an ideal pair for a double activation. Both hikes are relatively short in terms of miles, but steep. The drive up the Big Thompson Canyon took a little longer than usual due to the fact that the road was still snow-covered with icy spots in some areas. When I exited the canyon near Estes Park, the sky was blue and no cloud was in sight – a welcome indicator for a great day ahead.
Trailhead: 7836 ft / 2388 m
Summit: 8906 ft / 2709 m
Elev. gain: 1216 ft / 371 m
Roundtrip: 2.3 mi / 3.7 km
How to get there: Take US34 from Loveland towards Estes Park through Big Thompson Canyon. Eagle Cliff Mountain is on the south-west side of Estes Park. Stay on US34 towards Rocky Mountain NP. turn left onto County Road 66 (or Tunnel Road), following the signs to the YMCA campus. The TH is right after you pass the ‘Dunraven Inn‘ on the right side of the road. There is a small dirt road with a metal-gate… you have to be very creative in finding a parking spot for your car (see Red Tape). If you pass the gate to the YMCA, you have gone too far.
A better option (in terms of parking ) might be to take US-34 into RMNP, then continue towards Moraine Park and park on the Museum parking lot.
Eagle Cliff Mtn. is within RMNP – therefore all their rules and regulations apply. RMNP is also a fee area. You don’t have to pay the fee when coming from CR-66 because you will be parking outside of the regular park entrance. If you choose to tackle the summit over the NW-slope, you have to go through the regular entrance and pay the day fee ($20.00).
Parking near/along CR66 (Tunnel road) is difficult. All the signs along the gravel strips on the right side of the road are indicating private property, and promise to tow your car.
The Ascent:
EagleCliff Mtn – ElevationProfile
EagleCliff – Sign
From CR-66 I hiked west, passing the metal gate on the dirt-road. Two bridges lead over two creeks before the path intersects a trail leading into RMNP (Bear Lake Road). There is private property on your left and right, so make sure to respect the signs. As expected and hoped, most of the snow had already melted away and snow-shoes were not necessary. The ascent is straightforward, with hardly any challenges. You can (almost) see the summit from the base of the mountain and you just aim for it. Pick one of the faint trails through the grassy/brushy and steep slope – all of them seem to end up at the same slightly wooded area in the saddle just below the summit. I tried to stay more on the rocky-section of the mountain (south-west). There are a few rock-outcroppings you have to circumnavigate or, if you feel up to it, you can scramble/climb up with a few easy moves. This route provides mostly unobstructed views into RMNP all the way to the summit.
The Summit:
EagleCliff Mtn. – Operating from the Summit
There is a steep cliff (~60 feet / 20 m) on the north-side of the summit, giving you a great take-off angle. The views are really spectacular – I know… I say that a lot… and it is always true but in this case you can not only see the massive mountains of the Mummy Range, Never Summer Mountains etc. but you can also look down into the Moraine Park area of RMNP. A rather unique view, giving a great impression of the power of the ancient glaciers. There are plenty of rocks and trees to guy the antenna (and I needed a well guyed antenna due to the winds), and within a few minutes I was calling CQ. I logged my first QSO with Rick (N4EX) @ 1730 UTC. It was my first time on 15m and my Buddipole antenna (vertical Versatee) seemed to perform well on this band. In addition to my regular chasers, I met a few new SOTA chasers on this band. I changed to 20m a little later on, since not all of my ‘regulars’ could copy me on 15m.
The Descent:
I took basically the same route back to the car, hoping that it hadn’t been towed. The descent was very enjoyable and I went rather slow to enjoy the views.
Some video impressions:
httpvh://www.youtube.com/watch?v=nCHxwXusMvs
If you would like to leave questions or comments, please do so through Youtube.
!! WARNING !! There are old mountaineers, and bold mountaineers… there are no old-bold mountaineers.
Hiking and mountain climbing are potentially hazardous activities particularly in Colorado with its extreme elevations. I am not accepting responsibility for any death or injury resulting from activations based on my trip reports. Proper training, experience, and personal capability assessment is required – enjoy!
This was a re-activation for me. If you are looking for all the details on how to get there and other useful info, you can find the original trip-report with the necessary details right here. This post has only a few specifics from today’s activation.
Emerald Mtn. – View from the summit
Today’s activation of Emerald Mtn. was my second summit of the day. Earlier I had activated Eagle Cliff Mtn. (WØC/FR-Ø58 ) on 15 and 20m (see separate trip-report) . Since Emerald Mtn. is just a few miles up the road and the weather was gorgeous, a double activation was an obvious choice. With my earlier acquired information about the trail-head and route, the ascent was a breeze. The south slope was almost snow free and snow-shoes were not required. Without the snow I could even find a small stone cairn on the trail to Glacier Basin campground. The cairn is just before you enter an Aspen grove and after a rock outcropping. That’s where I left the trail and headed towards the summit in an (almost) straight line. Distance and elevation gain is almost identical to Eagle Cliff Mountain, making today’s excursion a 4.5 mi (7.2 km) round-trip with a total of ~2500 ft (750 m) accumulated elevation gain.
Luckily, the S8 noise I experienced last time on this summit was gone – making me believe that it was related to the approaching snow-storm. The winds however were quite strong – even stronger than last time and I had to guy the antenna really well. My extremities started to get cold thanks to the high winds and the fact that I was sitting in the snow – even-though the sun was out. I packed-up my gear and went QRT after I did not get any further responses to my calls. It was indeed a wonderful day in the mountains.
Some video impressions:
httpvh://www.youtube.com/watch?v=pW6KmzYLnOc
If you would like to leave questions or comments, please do so through Youtube.
!! WARNING !! There are old mountaineers, and bold mountaineers… there are no old-bold mountaineers.
Hiking and mountain climbing are potentially hazardous activities particularly in Colorado with its extreme elevations. I am not accepting responsibility for any death or injury resulting from activations based on my trip reports. Proper training, experience, and personal capability assessment is required – enjoy!
 !! WARNING !! There are old mountaineers, and
bold mountaineers… there are no old-bold mountaineers.
Hiking and mountain climbing are potentially hazardous activities particularly in Colorado with its extreme elevations. I am not accepting responsibility for any death or injury resulting from activations based on my trip reports. Proper training, experience, and personal capability assessment is required – enjoy!
!! WARNING !! There are old mountaineers, and
bold mountaineers… there are no old-bold mountaineers.
Hiking and mountain climbing are potentially hazardous activities particularly in Colorado with its extreme elevations. I am not accepting responsibility for any death or injury resulting from activations based on my trip reports. Proper training, experience, and personal capability assessment is required – enjoy!