Date: 18 September 2011
Time: Approx. 1800 UTC – 1900 UTC
Location: N-Colorado
Elevation: 4107 M / 13502 ft – 10 Points
Call Sign: KØMOS/qrp
Frequency: 14.3200-ssb alt. frequency: 14.285-ssb (+/-QRM)
Plans might change depending on conditions. We got the first snow in Colorado and the road to the trail-head (Old Fall River Road) was closed yesterday due to this fact. There is currently snow on all the peaks in the Mummy Range but I am hoping it will disappear until Sunday. I have a few fall-back summits in the area in case conditions are against me. If you work me, make sure to verify where I am – it might not be Fairchild Mountain.
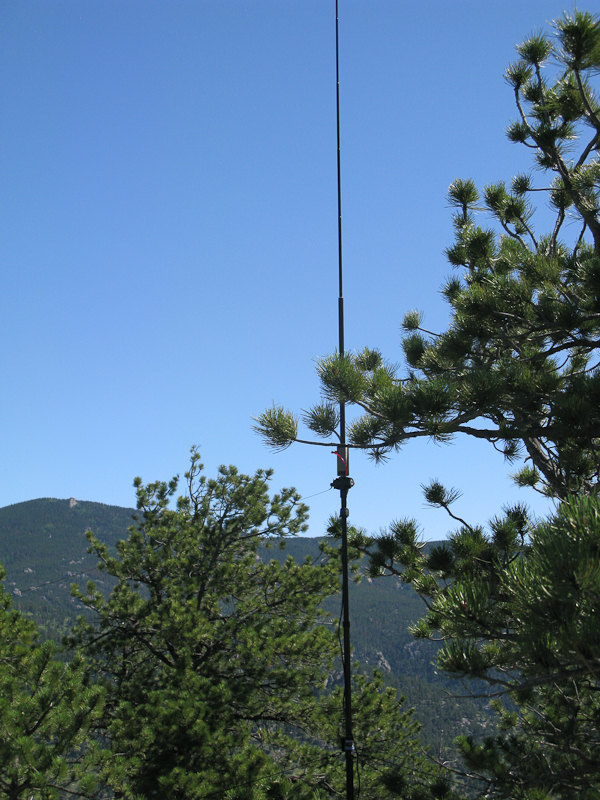
Equipment: FT-817ND / vertical dipole (Buddipole)
Keep your ears/antennas pointed towards Colorado.
Thanks
Matt / KØMOS
!! WARNING !! There are old mountaineers, and
bold mountaineers… there are no old-bold mountaineers.
Hiking and mountain climbing are potentially hazardous activities particularly in Colorado with its extreme elevations. I am not accepting responsibility for any death or injury resulting from activations based on my trip reports. Proper training, experience, and personal capability assessment is required – enjoy!
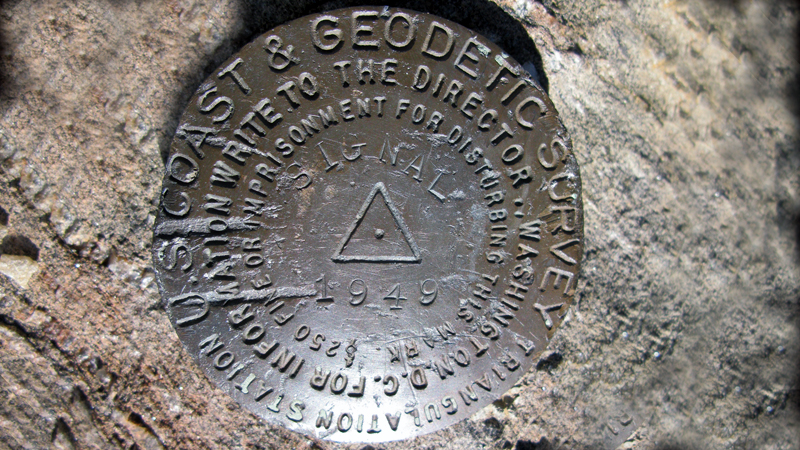
Signal Mountain (WØC/FR-127) can be reached from the Dunraven trailhead from the south, or from Pingree ParkRoad from the north. If you are lucky enough to have a shuttle driver, it makes a great 11+ mile hike from the north fork of the Big Thompson River all the way to the Poudre River. The peak is located at the north-east end of the Mummy Range in the Comanche Peak Wilderness which is part of the Roosevelt National Forest. The summits of Signal Mountain – as well as nearby West Signal – are pushing well above the treeline and thus provide unobstructed 360 degree views. The weather forecast was excellent (it cooled down quite a bit) and I was joined by my best trail-buddy, friend and wife – making this a great anniversary hike.
Trailhead: 7828 ft / 2386 m
Summit: 11262 ft / 3432 m
Elev. gain: 4064 ft / 1239 m
Roundtrip: 11.7 mi / 18.8 km
How to get there:
Take US34 from Loveland towards Estes Park through Big Thompson Canyon. When you pass through Drake, take a right on CR43 along the north-fork (scenic). Take a right on Dunnraven Glade Road (dirt road) which follows the north-east flank of Triangle Mountain. You can’t miss the parking lot since it is the end of the (public) road. A private road continues behind a locked gate all the way to Trails End Ranch.
Red Tape:
Nothing comes to mind – rules of the Roosevelt National Forest apply.
The Ascent:
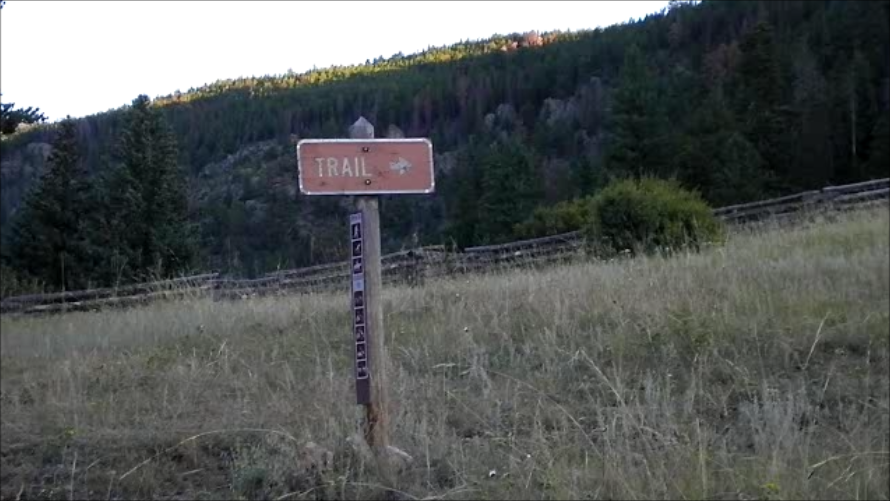
The official trail-head is about half a mile from the parking lot, following the fairly steep
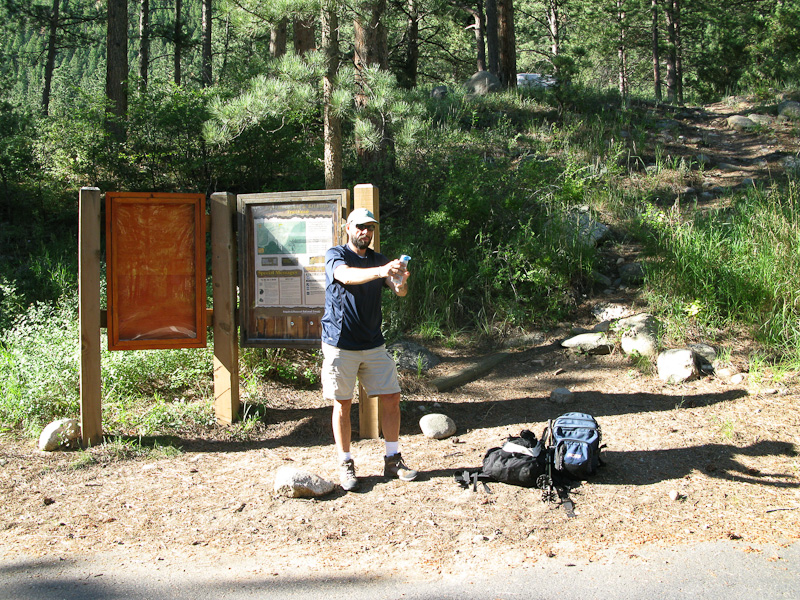
Sign to trail-head
private road after a locked gate towards Trails End Ranch. Shortly before you enter the ranch, the trail-head is clearly marked on your right side with the usual map/posters etc. From here, the trail climbs up the steep hillside to Bulwark Ridge through open terrain. After reaching the ridge, you have some good views to several nearby SOTA peaks such as Triangle Mountain (WØC/FR-Ø82), Crosier Mountain (WØC/FR-Ø57), West Crosier (WØC/FR-Ø64) and even more looking towards Estes Park and the Rocky Mountain National Park (RMNP). Shortly after, the trail intersects with the Indian and Miller Fork trails. Taking the north-west route – following Bulwark Ridge – will lead to Signal Mountain through mostly forested area over a very well established trail. The treeline will be reached after about 3.5 miles, offering great views towards north/north-east.
Just above the treeline
The Summit:
On the summit
The summit can be reached by crossing over the fragile tundra-like flora from the trail at the highest point before it leads back down on the other side towards Pingree Park. It is a large, barren, rocky and wind-swept summit with a small stone shelter at the very top where the summit-register is ‘hidden’. The summit is large enough for several SOTA teams if necessary… luckily nobody else was encountered during the whole trip. The views are unobstructed and stunning in all directions.
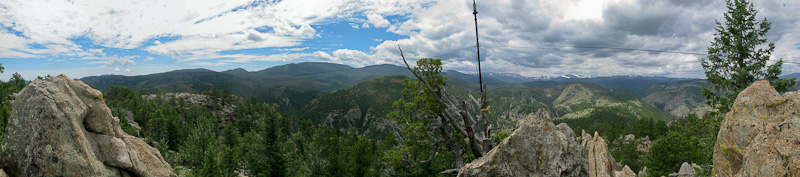
View from Signal Mtn.Did I mention that it was windy?
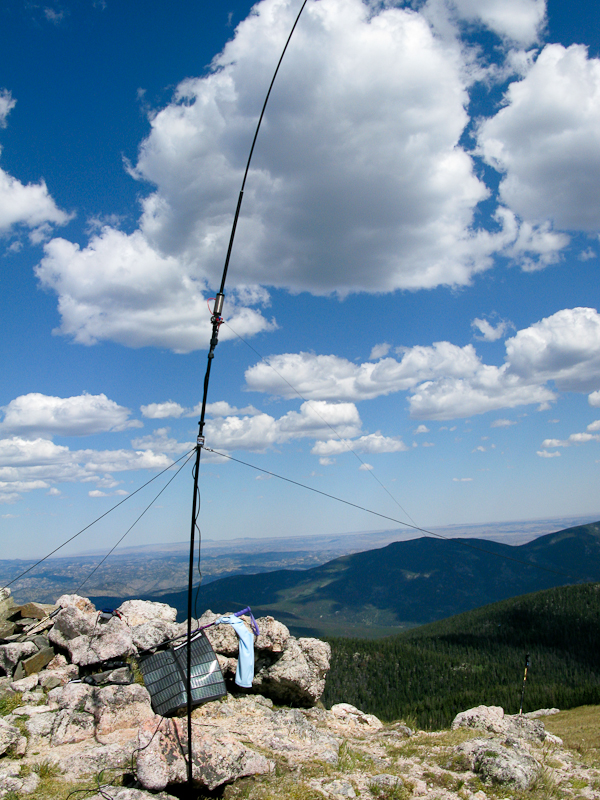
The weather was just perfect, with a few white and puffy clouds which provided a nice contrast on the blue sky. The setup was easy since space was not an issue and all the rocks lying around helped me with guying the mast in this windy environment . It was my first time with the newly acquired shock-corded mast from Buddipole. I really like the reduced weight of it but it requires a different technique to set it up and to change bands. All the ‘training’ in my backyard helped and I was on the air in no time. It was my first week-end activation and getting QSOs was definitely easier than on all my prior outings, even-though the propagation conditions were not necessarily better than before – at least that is my theory and I am sticking to it.
The Descent: If you arranged for a shuttle in Pingree Park, you might enjoy a different route, but for us it was the same route back to the car.
Some video impressions:
If you would like to leave questions or comments, please do so through Youtube.
I activated this summit again on May 5th, 2012. You can find the trip-report right here:
!! WARNING !! There are old mountaineers, and
bold mountaineers… there are no old-bold mountaineers.
Hiking and mountain climbing are potentially hazardous activities particularly in Colorado with its extreme elevations. I am not accepting responsibility for any death or injury resulting from activations based on my trip reports. Proper training, experience, and personal capability assessment is required – enjoy!
Crosier Mountain (WØC/FR-Ø57) is part of the Front Range of the Rocky Mountains – close to Estes Park, a popular gateway to the Rocky Mountain National Park (RMNP). According to my knowledge, there are three trails going up to the summit from three separate trail-heads along CR43.
Garden Gate trail-head: Is located closest to the village of Drake. It is just before mile-marker 13 and hardly visible from the road. You will find a gravel patch on the south side of the road with some sign of a wooden gate. It is a 5.1 mile trail to the summit of Crosier. The trail leads through some grassy meadows and continues via switch-backs though trees. There was a large wildfire (Bobcat Fire) in 2000 and the trail goes in and out through the burned area.
Rainbow trail-head: Located between mile-marker 10 and 9, a large gravel-pit on the left side of the road (coming from Drake) is the parking lot for the trail just across a wooden gate. It is marked as Crosier Rainbow Trail No. 981. The early trail ascends through aspens, pines and spruce trees. It will eventually lead to an 4-way intersection of all the trails coming from the valley and the trail coming from the summit. The overall length to the summit is about 4.0 miles.
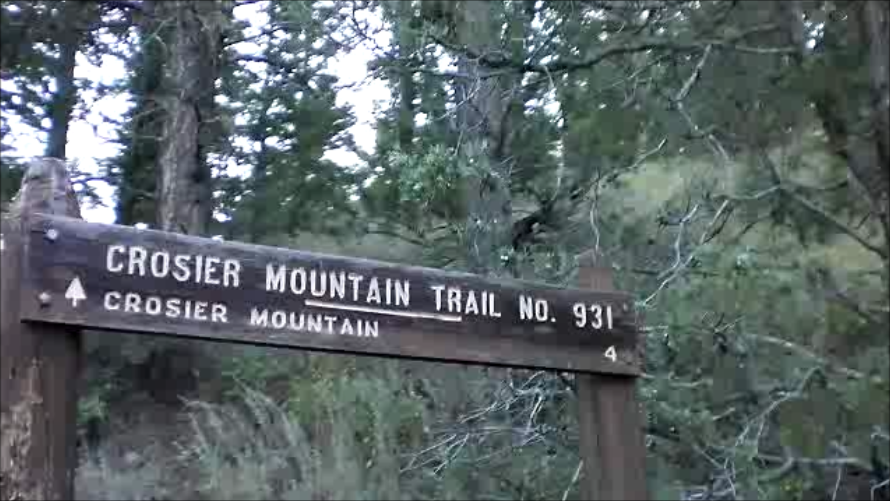
Glen Haven trail-head (No. 931-2) : I have chosen this 4.1 mi trail (see description below) because it crosses Piper Meadows – a very scenic place – and it also provides a nice view on a previously activated SOTA summit – Triangle Mountain (WØC/FR-Ø82)
Trailhead: 7254 ft. / 2211 m
Summit: 9232 ft. / 2814 m
Elev. gain: 1928 ft / 588 m
Roundtrip: 8.0 mi / 12.9 km
How to get there:
Take US34 from Loveland towards Estes Park through Big Thompson Canyon. Take CR43 in Drake all the way to Glen Haven. It’s a scenic drive along the north fork of Big Thompson River. Going through Glen Haven (don’t blink) you will find a red barn on the left side of the road. The TH is just behind the stable and a gravel strip is located on the right side of the road – providing space for several cars.
Red Tape:
Several signs indicate that the locals do not like when you park the car in Glen Haven or in their driveway. Make sure to park on the gravel strip indicated above. The trail borders to private land, indicated through a barbed-wire fence.
The Ascent:
The Trail-head
The trail-head is just across the street of the parking lot where you will find the first brown trail sign . The first few yards (~150) lead you up a dirt road through an area with private homes. The amount and size of the signs pitched in their driveways are an indication of the numbers of unconsiderate hikers who seem to park wherever they see fit. It’s a rocky trail going uphills to an opening (~0.8 mi) with a nice view (specifically early in the morning) and two trails splitting off to the south and north-east. the main trail continues down through a small canyon before climbing up again to Piper Meadow.
Piper Meadow
Apparently Henry Piper operated a dairy farm up here from 1913 into the 1930s. You can clearly identify some foundation walls along the way. The trail follows the meadow on the north side until it sharply bends to the north-east, going uphills with several switch-back to a ridge (with a nice view to Piper Meadow and Triangle Mountain) and finally to the Rainbow Trail junction. The next one and a half mile is a dull hike through very dense Lodgepole pines on a well established trail. The trail takes you all the way around the summit and the final ascent is from the east. About half a mile before the summit you will encounter the Garden Gate Trail intersection.
The Summit:
Setup on the Summit
The trail ends at a steep cliff to the south with a spectacular view into RMNP and Estes Park. The summit is quite large, providing ample space to setup the antenna and even to set up an overnight camp in the woods if you wish to do so. Trees and rocks give plenty of opportunities to guy the mast and also allow a comfortable and shady place during operations.
View from Crosier Mountain
The Descent:
Since West Crosier (WØC/FR-Ø64) is only about one mile from the summit (as the crow flies), I planned to bush-whack my way down to the saddle between the two summits. Going downhills, the thick stand of Lodgepole pines made it very difficult to keep my bearing and to navigate in general. You never see the saddle or the summit and the trees are so close together that I had to pick my route carefully to fit between the trees. I did not realize a big thundercloud moving in, since it was very dark to begin with – sunlight had a difficult time to find its way all the way to the ground. I only realized the upcoming thunderstorm when the first thunder rolled through the valley. I decided to abort my quest to cross to the other summit and headed north-east instead, trying to find the trail down to the car. I finally stepped out of the trees when the first rain started to fall and the cadence of thunder increased. It was an unexpected and surprising morning thunderstorm (it was only 11:00 AM) which drove me down the mountain. The rain cooled me off on my way to the car and I joined a guy from the phone company who also waited for the thunderstorm to pass before climbing back on the poles to take some slack out of the phone line.
Some video impressions: httpvh://www.youtube.com/watch?v=nELv-FOZ10s
If you would like to leave questions or comments, please do so through Youtube.
!! WARNING !! There are old mountaineers, and
bold mountaineers… there are no old-bold mountaineers.
Hiking and mountain climbing are potentially hazardous activities particularly in Colorado with its extreme elevations. I am not accepting responsibility for any death or injury resulting from activations based on my trip reports. Proper training, experience, and personal capability assessment is required – enjoy!
Bull Mountain is part of the Park Range of the Rocky Mountains, just west of the continental divide. It is located within the State Forest State Park, a popular place for hunters, fishermen and ATV activities. The park is also a good starting point to climb SOTA WØC/PR-001, Clark Peak – 3940 M / 12951 ft.
I parked the car at the North Michigan Reservoir and hiked up the 4WD road into the forest (one of two options to get to the summit).
Trailhead: 8945 ft / 2726 m
Summit: 9708 ft / 2959 m
Elev. gain: 763 ft / 233 m
Roundtrip: 3.1 mi / 5.2 km
How to get there:
Driving on CO14 (driving west coming from Fort Collins or east from Walden) take CO41 (going east) for about half a mile until you hit the State Park entrance toll booth. Continue on CO41 (dirt road). It will split soon after – take the left arm of CO41 until the about the middle of the reservoir. There is a big parking lot with some larger group cabins on the lake shore.
Red Tape:
State Forest State Park requires an entry fee [$8]. It is NOT allowed to swim in the reservoir (bummer, no way to freshen up after the hike). Staff was unable to explain the reasons to me.
The Ascent:
As far as I know, there are two options . There is the 4WD road I took from the Reservoir and there is a hiking trail approaching Bull Mountain from the North. Since my allotted time for this one was limited, I did not want to continue for another 20-30 minutes on the dirt road to get to the hiking trail.
I encountered two ATVs during my hike through heavily forested area; the trail does not have any outlooks or other scenic features. The entire area is suffering from a bark beetle infestation with tons of dead trees – a very sad sight. When paying the entrance fee, you will get a crude map of the area. Despite the lack of details it was easy to determine which 4WD road to take on the three intersections. It’s a very gradual climb with no challenges.
The Summit:
Abandoned 4WD road to the summit
It is not easy to determine the highest point. There is no rock outcrop or any other prominent feature at the top – it is just heavily forested. There is however an old abandoned 4WD road going off to your right.
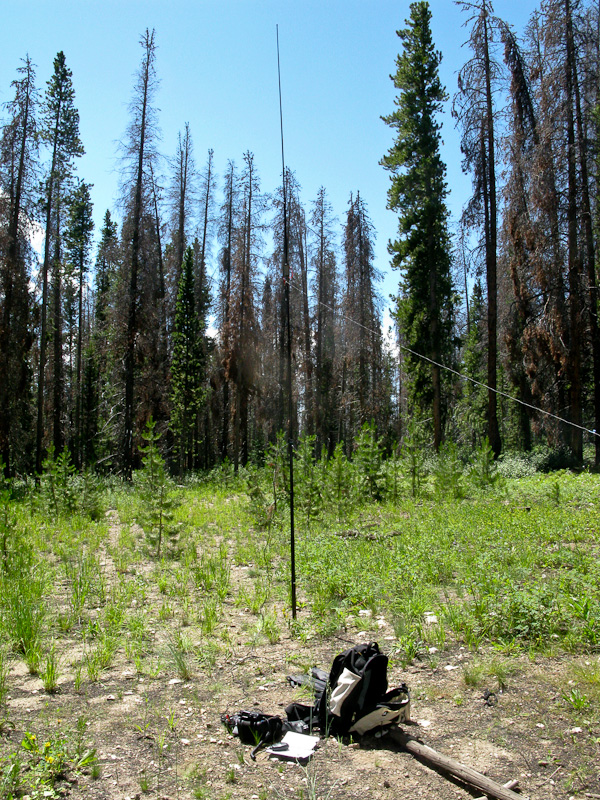
I was lucky and followed the general direction and arrived at the summit after about 100-200 yards (verified by GPS). A little frustrated about the non-scenic location I set up my equipment and started to call CQ…. it was hot, mosquitoes and flies were plentiful with nothing to do but buzzing me. Propagation was pretty bad too and I did not hear a soul on 20m SSB. Finally, after 50 minutes I got my fourth required QSO with WB9WHQ (thanks Dan). I packed up my gear and ran down the mountain to the car – happy to leave this summit.
Buddipole on the summit
Final Remarks:
If you are in for an outdoor experience I suggest you skip on this one. It was probably the dullest hike I ever took (except for hitchhiking on an Interstate). I am certainly glad I did not drive all the way out there just for this activation. If you are out for just the SOTA points, this one gives you easy points (if you can live with the mosquitos/flies/heat).
Video Summary:
httpvh://www.youtube.com/watch?v=kFU3BARCPH4
If you would like to leave questions or comments, please do so through Youtube.
!! WARNING !! There are old mountaineers, and
bold mountaineers… there are no old-bold mountaineers.
Hiking and mountain climbing are potentially hazardous activities particularly in Colorado with its extreme elevations. I am not accepting responsibility for any death or injury resulting from activations based on my trip reports. Proper training, experience, and personal capability assessment is required – enjoy!
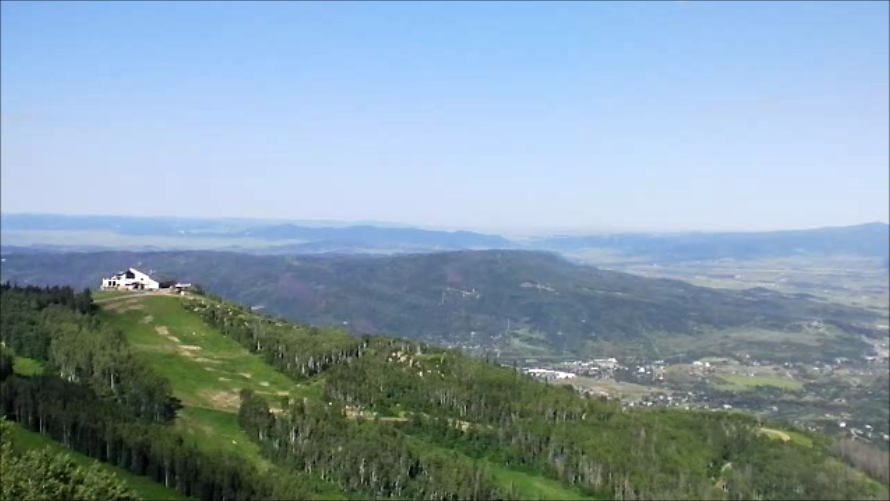
Mount Werner is located in the Park Range of the Rocky Mountains in Routt County and is part of Routt National Forest. It is a popular winter destination, since it is getting some of the highest levels of snowfalls in all of Colorado. At the base of the Mountain isSteamboat Springs and the Mountain is operated by Steamboat Ski Resort Corporation (which has a long term lease from the National Forest I believe).
Thunderhead Station and Steamboat Springs at the base of Mt. Werner
In summer the main activity seems to be Mountain-biking. A ski resort in summer is never an attractive sight. Hiking trails are scarce due to the fact that the resort makes most of their money with Bikers (just an assumption). If you want to do some nice hiking in this area, try Rabbit Ears Pass instead, you will not be disappointed. During my hike to Mount Werner, I could never get the feeling to be in a remote location and was unable to connect to nature on this disturbed and heavily scared mountain.
Trailhead: 6900 ft / 2103 m (Gondola Base) or 9080 ft / 2768 m (Thunderhead)
Summit: 10565 ft / 3220 m
Elev. gain: 3665 ft / 1117 m (from base) or 1485 ft / 453 m (from Thunderhead)
Roundtrip: 10.4 mi / 16.7 km (from base) or 7.2 mi / 11.6 km (from Thunderhead)
I took the Gondola to Thunderhead (about $20 for a ticket if I remember correctly – you can use the ticket all day long) and hiked up to the summit on the hiking trails (really just a dirt road) indicated on the official resort map.
How to get there:
The Gondola base is impossible to miss if you are in Steamboat Springs. The base-station of the Gondola is the heart of the Resort.
Red Tape:
The whole mountain is managed/controlled by the Steamboat Ski Resort Corporation and the rules of the National Forest do not apply here. According to the official resort map and the info I received locally by talking to their staff, it is not allowed to hike up to the highest point. The trails above Four Points Hut are reserved for Mountain-bikes only!!! In order to comply with SOTA rules I went up on a day where they had a mountain race (runners) and they changed the trail assignments to accommodate the racers. Optionally you could rent a mountain-bike or go up there in winter (you can go up all the way with Gondola and Ski-lifts and have an easy traverse to the Mt. Werner summit).
The Ascent:
It is pretty straight forward. It is a maintenance dirt-road from the Gondola station all the way to the highest point. You will get some nice views of Steamboat Springs and the valley. I always had to keep an eye on all the MBs coming downhills – not all are in complete control of their equipment.
The Summit:
The summit is very extensive and hosts several huge antenna installations. The views in easterly direction are undisturbed and were definitely the best feature on this trip.
View from the top of Mt. Werner (10565 ft / 3220 m)
The Descent:
You are limited to the same route back, either to the Gondola station or you could hike all the way down.
Video Impressions:
httpvh://www.youtube.com/watch?v=mSLBl6AOp2s
If you would like to leave questions or comments, please do so through Youtube.
!! WARNING !! There are old mountaineers, and
bold mountaineers… there are no old-bold mountaineers.
Hiking and mountain climbing are potentially hazardous activities particularly in Colorado with its extreme elevations. I am not accepting responsibility for any death or injury resulting from activations based on my trip reports. Proper training, experience, and personal capability assessment is required – enjoy!
Triangle Mountain (WØC/FR-Ø82) is part of the Front Rangeof the Rocky Mountains and within a one hour drive from my home QTH.
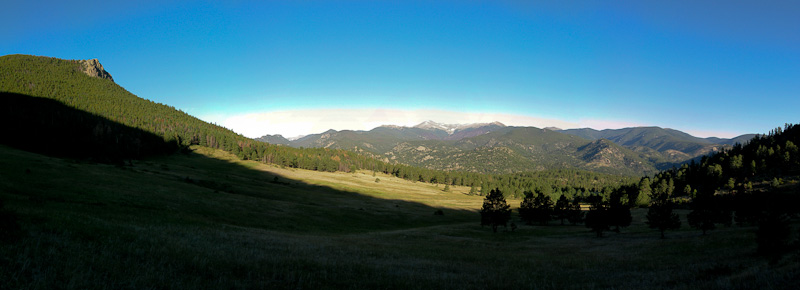
Overview from the first ridge
The summit is located within the Roosevelt National Forest and ranked 147th tallest peak in Larimer County. There is no established trail that goes all the way to the top (so don’t look for one on a map), but it seems to be climbed regularly by visitors from nearby Estes Park (a popular gateway to Rocky Mountain National Park [RMNP]). A clearly visible trail goes about about half-way up the mountain, before it fades out. Be prepared to use your map and compass. I certainly needed my navigation equipment on my way down. There are some steep cliffs on the south-west side of the summit which you should definitely avoid. The summit provides some very scenic views into the nearby Mummy Range and some impressive 14ers in the heart of the Rockies.
Trailhead: 7020 ft. / 2140 m
Summit: 8415 ft. / 2565 m
Elev gain: 1987 ft. / 606 m
Roundtrip: 3.5 mi / 5.6 km
The trail-head is a very close to a picnic area at the north-fork of Big Thompson River. The drive up the canyon from Loveland is quite scenic.
How to get there:
Take US34 from Loveland towards Estes Park through Big Thompson Canyon. When you pass through Drake, take a right on CR43 along the north-fork. Park at the Lower North Fork picnic area on the left side of the road. There is space to park about five cars.
The east side of Triangle Mountain is private property. The trail follows the fence line closely at some points. Since you have to bushwhack part of the way, you will find out that most of the flora has some sort of poky, prickly and/or thorny part. Make sure to stay away from the steep cliffs on the south-west side.
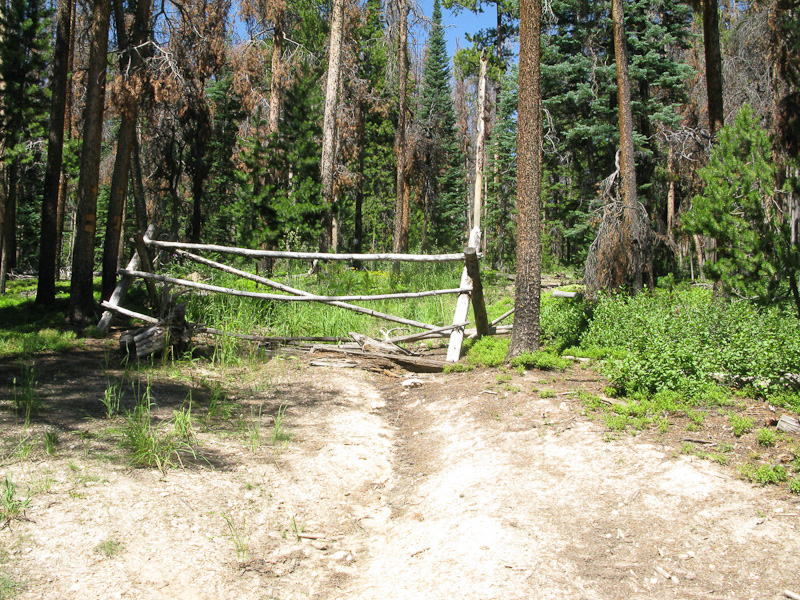
The Ascent: Look directly across the street from the picnic area where a faint trail leads up the steep hillside. The trail becomes more prominent until a grassy area where the trail becomes faint but marked with some stone cairns. Follow the ridge line and climb across the rock outcroppings. The south-west side is private property and your route might get very close to it.
The Summit:
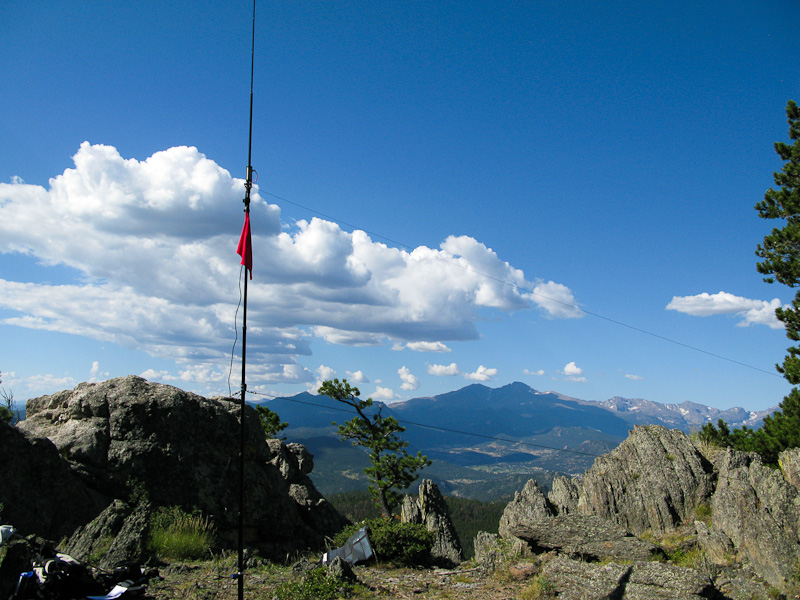
Antenna on the summit
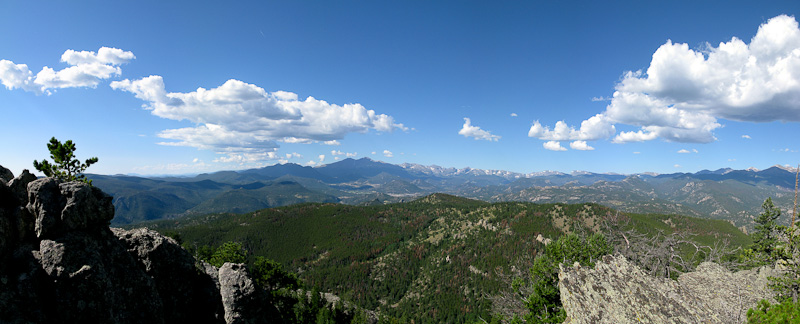
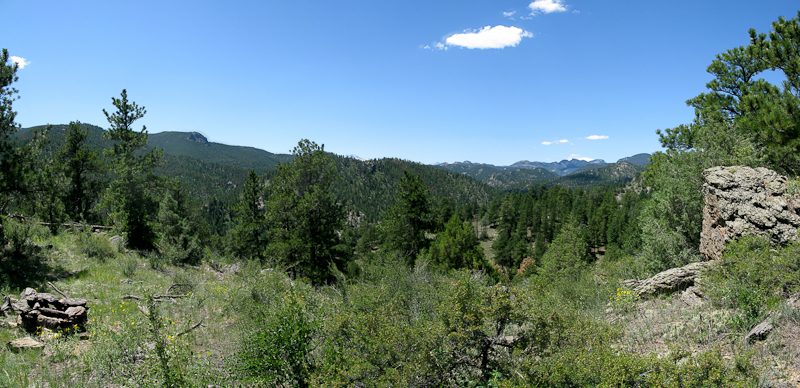
The summit is on a nice rock-outcropping and gives you unobstructed views in all directions. Most spectacular are the views into the nearby RMNP and Crosier Mountain (another SOTA summit). Is is a rather small area and a larger group cannot setup on the summit. More space is available a few feet below the actual summit (without the breathtaking views).
The Descent:
Basically you go back the same way, following the ridge. Unfortunately I made some unplanned detours, exploring the cliffs on the south-west side – not recommended. Map and compass brought me back to the ridge and finally to the trail-head.
Some video impressions: httpvh://www.youtube.com/watch?v=JJn_HwEeyUs
If you would like to leave questions or comments, please do so through Youtube.
!! WARNING !! There are old mountaineers, and
bold mountaineers… there are no old-bold mountaineers.
Hiking and mountain climbing are potentially hazardous activities particularly in Colorado with its extreme elevations. I am not accepting responsibility for any death or injury resulting from activations based on my trip reports. Proper training, experience, and personal capability assessment is required – enjoy!
I received quite a few inquiries regarding the solar setup I am using for my SOTA activations. I hope I answered all of them in this short video. If not, please fell free to add questions/comments via Youtube
httpvh://www.youtube.com/watch?v=IsvPOyn0LeQ
!! WARNING !! There are old mountaineers, and
bold mountaineers… there are no old-bold mountaineers.
Hiking and mountain climbing are potentially hazardous activities particularly in Colorado with its extreme elevations. I am not accepting responsibility for any death or injury resulting from activations based on my trip reports. Proper training, experience, and personal capability assessment is required – enjoy!
Mount McConnel (WØC/FR-Ø88), part of the Front Range of the Rocky Mountains, is located about 25 miles (40 km) north-west of Fort Collins, CO. The mountain is within the Roosevelt National Forest in the Cache La Poudre Canyon. The trail up to the summit consists of two overlapping loops.
William Kreutzer Nature Trail and (#936)
Mount McConnel Summit Trail (#992)
The Summit Trail splits off the Nature Trail at t it’s highest point and loops over the ridge and finally re-joins the Nature Trail making it an easy and enjoyable 4.23 miles (6.8 km) hike.
Trailhead: 6612 ft / 2015 m
Summit: 8020 ft / 2444 m
Elev. gain: 1408 ft / 429 m
Roundtrip: 4.23 mi / 6.8 km
How to get there: Take US287 N from Fort Collins towards Wyoming. Go west at Ted’s Place on CO14.
KØMOS at the trail-head of Mount McConnel
About 24 miles into the Canyon turn left into the Mountain Park Campground where you will find about five parking spaces. There is an bulletin board right at the parking lot with information, regulations and a map. It seems that the board was relocated at some point in time. The label You Are Here on the map is certainly not were you are. Keep that in mind. You have to go uphills towards the campground where the trail-head is located, despite of what the sign says. Alternative parking can be found just after the bridge alongside the road (facing downhills – on the side of the river).
Red Tape: The National Forest requires a day use fee of $5.00. Dogs are required to be leashed.
The Ascent: The trail leaves the Mountain Park Day Use Area at the east end of the campground. I went up Kreutzer Nature Trail (#992). The trail climbs gradually up the south face through Ponderosa pines and Douglas firs. It is a well established trail with several interpretative signs along its way. After about 3/4 of a mile (1.2 km), the Summit Trail splits off and you will get to a quite spectacular overview of Poudre Canyon. Following the trail will bring you very close to some cliffs and several really nice overlooks. Shortly after entering the Cache la Poudre Wilderness (there is a sign), the trail forks again. You have to take the right fork to get to the near summit (approx. 0.2 mi/500m), the left fork continues the Summit Trail (going down to the river again).
The Summit: The trail ends at the base of some large rock outcroppings where you will experience spectacular views into the Mummy Range of the Rocky Mountains.
View of the Mummy Range from atop Mt. McConnel
The available rocks and trees/tree-stumps provided ample and comfortable space for my equipment. Setting it up was a breeze and my signal got out well.
Setting up the antenna
After finishing my eighth QSO, I turned off the radio and enjoyed the gorgeous views, the warm sun and the solitude. After an hour or so, another hiker stumbled onto the summit… an RF engineer from Florida who was vacationing in Colorado. After a little chat, he went back down and I packed up my equipment, leaving this place as well.
The Descent: At the fork, I turned south continuing on the Summit Trail which descends back into the Poudre Canyon through very a scenic landscape. The trail is not as well established as on the ascent, but keeping an eye on the stone cairns will help you find the way just fine. The descent is longer, steeper and rockier as well, providing several opportunities for panoramic views over the Poudre Canyon. It finally joins the Nature Trail again before going down a gulch and emerging east of the bridge leading to the campground.
Some video impressions: httpvh://www.youtube.com/watch?v=XY7SjK-mvrw
If you would like to leave questions or comments, please do so through Youtube.
Update: Read the trip report of my second activation of Mt. McConnel
!! WARNING !! There are old mountaineers, and
bold mountaineers… there are no old-bold mountaineers.
Hiking and mountain climbing are potentially hazardous activities particularly in Colorado with its extreme elevations. I am not accepting responsibility for any death or injury resulting from activations based on my trip reports. Proper training, experience, and personal capability assessment is required – enjoy!
Video (answers to inquiries I received):
httpvh://www.youtube.com/watch?v=IsvPOyn0LeQ
If you would like to leave questions or comments, please do so through Youtube.
!! WARNING !! There are old mountaineers, and
bold mountaineers… there are no old-bold mountaineers.
Hiking and mountain climbing are potentially hazardous activities particularly in Colorado with its extreme elevations. I am not accepting responsibility for any death or injury resulting from activations based on my trip reports. Proper training, experience, and personal capability assessment is required – enjoy!
W0C/FR-095 (Greyrock Mtn.) – 7613 ft / 2320 m
June 23rd, 2011
by KØMOS
Greyrock Mountain (WØC/FR-Ø95), part of the Front Range of the Rocky Mountains, is located in the Poudre Canyon about 20 miles north- west of Fort Collins (CO). As the name suggest, Greyrock is a large granite outcropping rising well above the scenic meadow at it’s base. In the 1930, the Civilian Conservation Corps established the Greyrock Summit Trail – one of two different options to the summit. In 1978, a second trail – Greyrock Meadows Trail was established and is IMHO the more scenic route to the top. Greyrock Mountain has actually two distinguished peaks and between the peaks are several small ponds. Quite amazing. You have to climb the peak to the west to find the highest point.
Trailhead: 5538 ft / 1688 m
Summit: 7613 ft / 2320 m
Elev. gain: 2075 ft / 632 m
Roundtrip: 8 mi / 13 km
On my second endeavor to activate a summit for SOTA I tried to improve my radio setup. Mainly the power-department needed some upgrades. I used an external powerpack and a foldable 10W solarpanel to increase my operation hours on the summit (check My Radio Equipment for details). I left my QTH early in the morning to beat the heat and to avoid other hikers since the summit is quite small, exposed and not well suited for lots of people – specifically not with an antenna and all the guy lines and counter-poise.
How to get there:
Take US287 N from Fort Collins towards Wyoming. Go west at Ted’s Place on CO14. About eight miles into the Canyon is a parking lot on the left side of the street. Shortly before that is a sign for the parking lot.
Red Tape:
This trail is one of Fort Collins most popular. Try to avoid on week-ends and go early in the day. There is a lot of Poison Ivy along the trail (in the beginning).
The Ascent:
There are two options to get to the top and it is possible to hike a loop. From the parking lot, cross the Poudre River over the bridge to the trailhead. Follow the well established trail to the west through dense underbrush (and Poison Ivy) until the Greyrock Trail splits into Greyrock Meadows Trail and Greyrock Summit Trail.
The Greyrock Summit Trail follows a small canyon towards the north and gains approx. 1000 ft (300 m) in just a mile. It joins the Greyrock Meadows Trail at the base of Greyrock Mountain – a mere 0.75 miles from the summit.
The Greyrock Meadows Trail – my favorite – follows the ridge to the west and reveals some scenic overviews along its way. It’s more moderate and more open than option #1. It reveals some majestic views of Greyrock Mountain and the Meadow below before the trail goes down to the Meadow, loosing about 390 ft (120 m) in elevation. Continue along the meadow before ascending up into the pine/fir and spruce forest (burned down in a recent wild fire) all the way to the junction with the Greyrock Summit Trail.
Greyrock Mtn. as seen from the Meadow
The Meadow is a very nice spot for an overnight camp. Make sure to brink your own water. There is hardly any and certainly nothing you wanna drink under normal circumstances.
The junction of the two trails is a good spot for a short break and to get re-hydrated for the remaining 0.75 miles to the top. They are steep and you have to keep an eye on the trail – it is not always obvious where to go and people get lost every year. The trail winds it’s way around the south-east flank of the summit. Cairns and signs are leading the way – not necessarily to the summit. Some minor scrambling is required during the final approach to the plateau between the two summits. Take some time to enjoy the views and the unique ponds with all their wildlife.
Between the two summits of Greyrock Mountain
The Summit:
It’s an easy stroll from here through pines and ponds to the west summit. Shortly before reaching the summit you will encounter another pond. The remaining 30 ft/10 m is a scramble again. The summit itself is small and can only accommodate a limited amount of people. Luckily I was all alone up there.
It took me about 20 minutes to setup my gear and tune the antenna. Several Chipmunks were eyeballing my backpack, waiting for the right moment to feast on my sandwich. The weather was sunny and nice and my signal got out. I made eight SSB QSOs on 20 m within an hour and successfully defended my lunch (simply by eating it).
The Descent:
At the junction, the shorter Summit Trail lead me down to the trailhead – completing a loop and I experienced heavy uphill traffic on the last mile or so.
Some video impressions:
httpvh://www.youtube.com/watch?v=U1KJqe0N9KY
If you would like to leave questions or comments, please do so through Youtube.
!! WARNING !! There are old mountaineers, and
bold mountaineers… there are no old-bold mountaineers.
Hiking and mountain climbing are potentially hazardous activities particularly in Colorado with its extreme elevations. I am not accepting responsibility for any death or injury resulting from activations based on my trip reports. Proper training, experience, and personal capability assessment is required – enjoy!
 !! WARNING !! There are old mountaineers, and
bold mountaineers… there are no old-bold mountaineers.
Hiking and mountain climbing are potentially hazardous activities particularly in Colorado with its extreme elevations. I am not accepting responsibility for any death or injury resulting from activations based on my trip reports. Proper training, experience, and personal capability assessment is required – enjoy!
!! WARNING !! There are old mountaineers, and
bold mountaineers… there are no old-bold mountaineers.
Hiking and mountain climbing are potentially hazardous activities particularly in Colorado with its extreme elevations. I am not accepting responsibility for any death or injury resulting from activations based on my trip reports. Proper training, experience, and personal capability assessment is required – enjoy!