SOTA outings by KØMOS and contributors

Tag: summits on the air

  • WØC/FR-Ø61 (Taylor Mountain) – 2779 m / 9134 ft

    Taylor Mountain (WØC/FR-Ø61) is part of the Front-Range of the Rocky Mountains and located south of Estes Park, close to the towns of Boulder and Longmont. Now that I am writing about this activation, it occurs to me that I should have left the first activation of this peak up to Jerry/KDØBIK – it would have been a nice touch for the first activator to share the same name than the mountain. I guess it’s too late now – sorry Jerry. You can still try to first activate Taylor Mountain in the Sawatch Range.

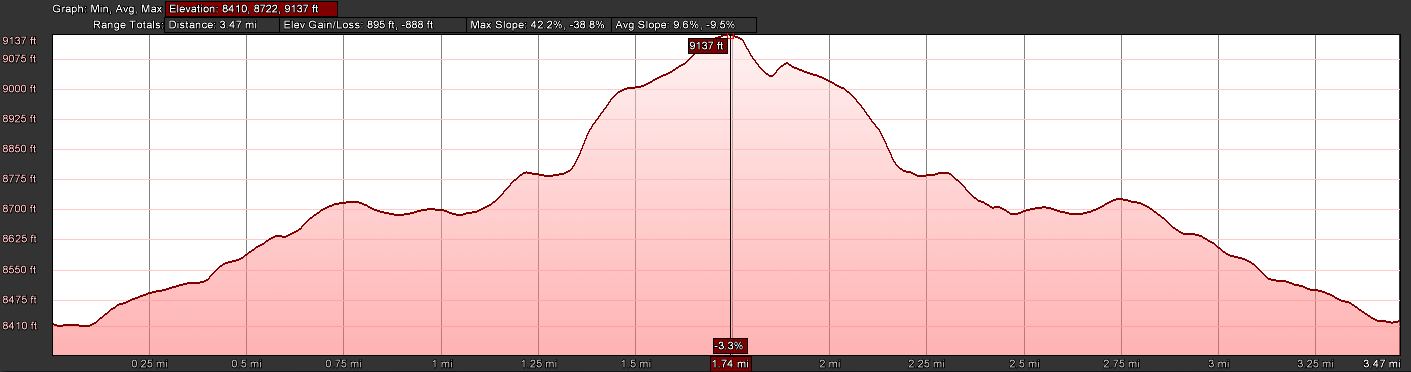
    Trailhead: 8415ft / 2565 m
    Summit:   9134 ft / 2784 m
    Elev. gain: 908 ft / 277 m
    Roundtrip: 3.5  mi / 5.6 km

    Compare this summit with my other activated summits

    How to get there:
    Taylor Mountain is close to Denver, Boulder, Longmont, Loveland, Estes Park and Fort Collins. Go west on CO 66 (Ute Highway north of Longmont) towards Lyons. In the quaint village of Lyons take a left (south) onto 5th Avenue or CO-7 which is also St. Vrain Drive. Continue on CO-7 through the gorgeous St. Vrain Canyon until you encounter CO-27 on your left. From there it is another 2.2 mi (3.5 km) to where you have to take a right onto Taylor Road, a dirt road that leads through a small subdivision.  The trail-head is now just 0.7 mi (~1.1 km) ahead of you.

    Parking/Trailhead

    View Larger Map

    Red Tape:
    Taylor Mountain is managed by the National Forest Service. There are no permits or entry fees required. The parking possibilities at the TH are limited which might not be an issue as soon as the FS opens the gate to all the forest roads up there.

    The Ascent:
    Elevation Profile

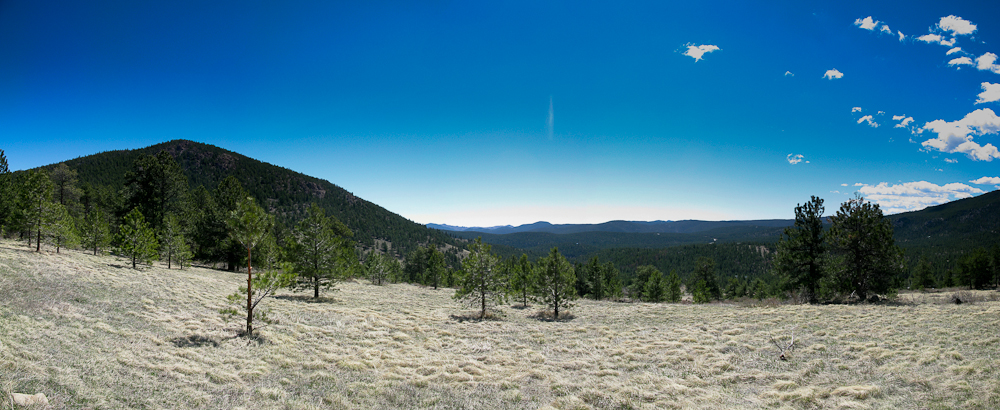
    For most of the way you can hike along forest service roads. The TH is located at FR-330. A gate blocks access to the FR system – it was still locked for the season,
    Taylor Mountain as seen from TH

    preventing access of motorized vehicles. FR-330 leads gently up the slope through a thinned out pine forest. Several larger areas were completely cut-down… the purpose is unknown to me but a good guess might be to control the Mountain pine beetle infestation. Soon you will encounter the intersection with FR-330B – take FR-330B towards the right. FT330B is not much of a road and feels more like a hiking trail (for most parts anyways). A sign indicates where FR-330B ends… but a narrow track continues uphills and eventually reaches the summit. Navigation or terrain is not much of a challenge and this, combined with the short distance (3.5  mi / 5.6 km round trip) makes it an easy morning hike.

    The Summit:
    View from the Summit

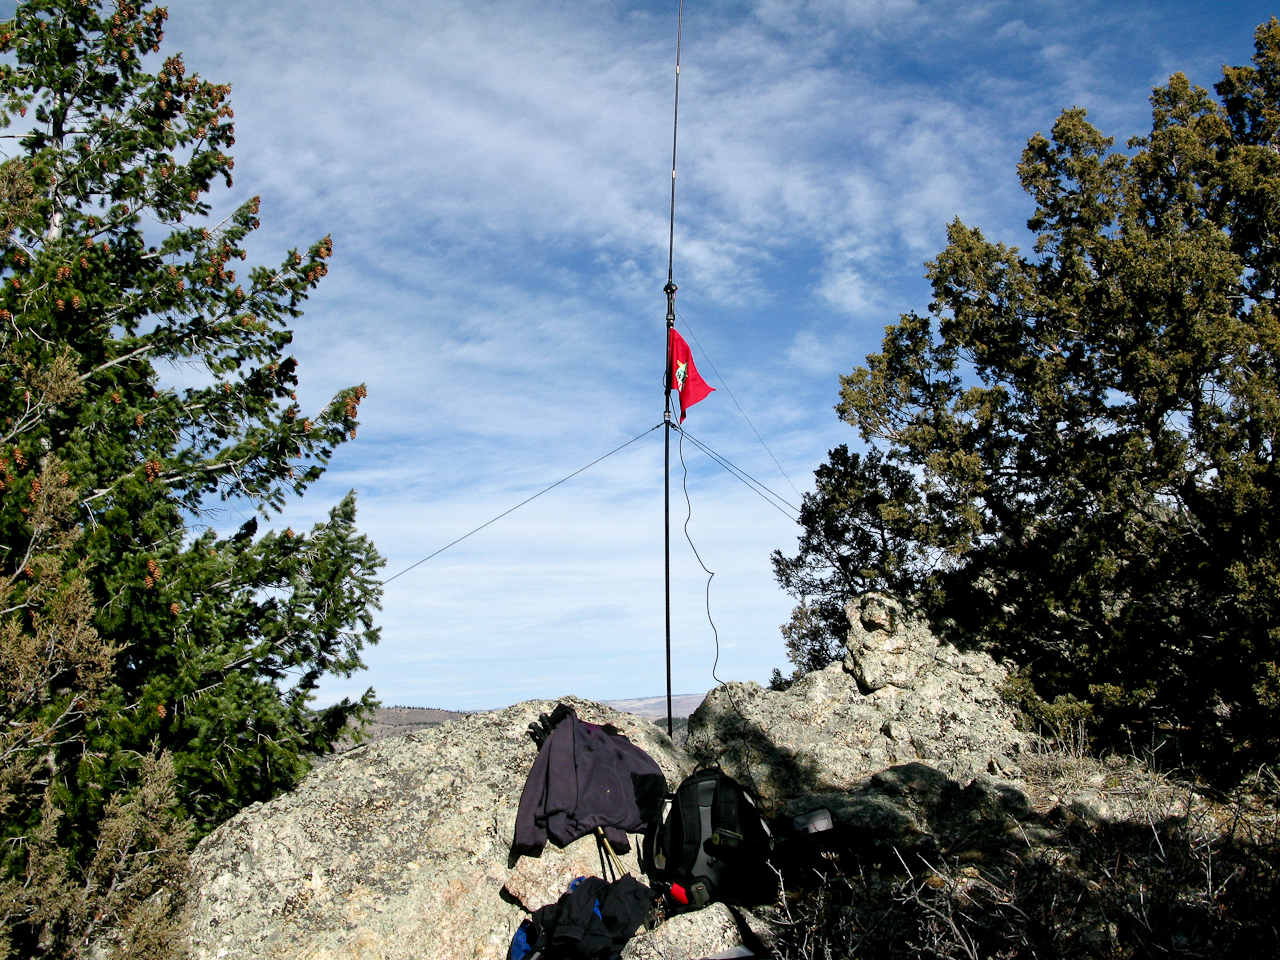
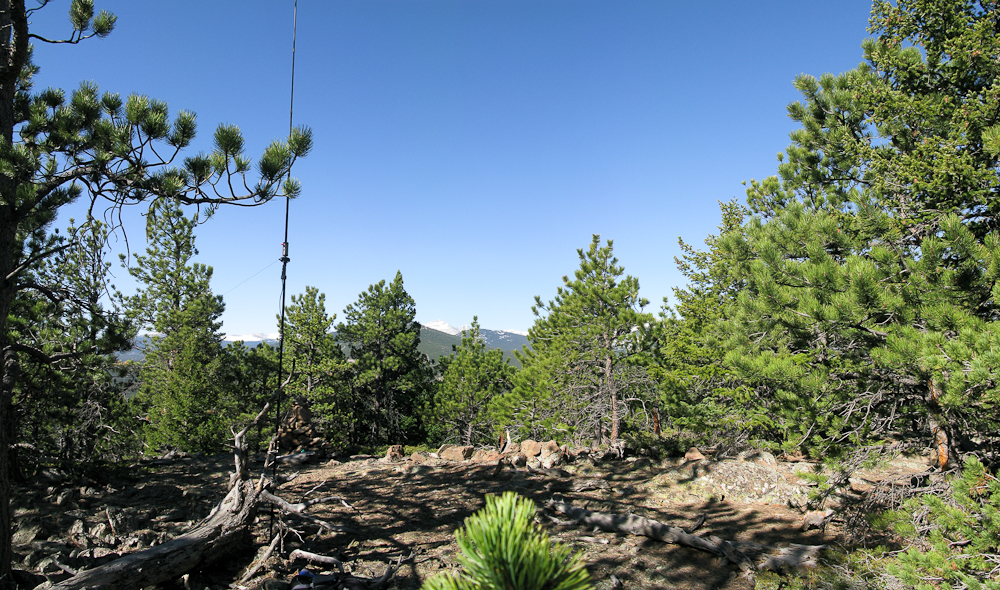
    The summit is rather flat and the highest point is defined by a large stone cairn with a summit register in a peanut jar. The views are limited due to the trees but you can take a peek through the trees at some 14ers near the Continental Divide. Longspeak and Mt. Meeker are visible as well as some peaks in the Mummy Range. The summit can easily accommodate several activators and provides ample space and trees for antenna and guy-lines. I made 20 contacts in ~40 minutes on 20m and 17m.

    The Descent:
    I followed the same route back to the car but managed to get lost on my way down, loosing the faint trail just a few minutes after leaving the summit. A look at map and compass and a little bit of bush-whacking finally brought me back on the trail.

    Some video impressions:
    httpvh://www.youtube.com/watch?v=_jUbml6wBNg

    If you would like to leave questions or comments, please do so through Youtube.


    ATTENTION !! WARNING !! There are old mountaineers, and bold mountaineers… there are no old-bold mountaineers. Hiking and mountain climbing are potentially hazardous activities particularly in Colorado with its extreme elevations. I am not accepting responsibility for any death or injury resulting from activations based on my trip reports. Proper training, experience, and personal capability assessment is required – enjoy!
  • KX3 for SOTA?: A Rebuttal

    After reading KDØBIK’s blog post comparing the new KX3 with the FT-817 under the aspect of using it for Summits on The Air (SOTA), I felt I have to defend ‘my’ little radio a bit. No doubt, the KX3 is a great rig and has tons of new features and advantages compared to the FT-817. I also freely admit that I am not an experienced ham, nor did I ever have the opportunity to see and/or touch a KX3 in real life. My stated opinion is based on the KX3 manual, pictures, videos as well as my personal experience with the FT-817 and a few activations for SOTA. I am offering my view on the categories Jerry created in his article.

    Weight – Advantage KX3:
    Based on the numbers Jerry provided, the KX3 is indeed 20% lighter compared to the FT-817. Not sure whether this includes the optional 2m module (I doubt it, since it is not yet available). For a fair comparison however, we have to add the additional weight for the optional module, since the FT-817 has the 2m capability. As a result, the difference is a little less. In real numbers this boils down to an advantage for the KX3 of less than 0.5 pounds (< 226 g). Don’t get me wrong, carrying 0.5 pounds less to a remote summit is great, in my case however this can achieved with a few days of dieting :)

    Size – Advantage KX3:
    Based on the numbers provided in the article, the KX3 indeed has a huge advantage compared to the Yaesu. If my math is correct it takes up nearly 50% less space! That’s a lot… space in a backpack is always an issue and cannot be mitigated with a diet. What is unclear to me is whether the provided measurements are just for the case of the radio or if it includes the protruding knobs/buttons/dials etc. So maybe it’s not that big of an advantage after all… we will have to wait for an update on this issue.

    Durability and Ruggedness – Advantage 817:
    I completely agree with Jerry on this point. What bothered me the most on the KX3 when I did my research were the buttons/knobs/dials/paddle, especially under the aspect of taking the rig to a summit. I am curious to see how fragile/problematic these protrusions  are. Being extra careful might just not cut it… a backpack can be a crowded place on a longer hike.

    LCD Display and Control Panel– Advantage KX3:
    No kidding – the huge display and the control panel are certainly a huge advantage on the KX3. Even though I do not need glasses, seeing all the necessary info on the tiny display of the FT-817 can be a pain in the rear – and so is the fact that you have to push buttons and dial through endless menus to make adjustments.

    Portability and SOTA Readiness – Advantage KX3:
    I strongly disagree with Jerry on this point (keep in mind I never touched a KX3). The lack of a feature (2m module) cannot make it an advantage for SOTA! Specifically if you  substitute the missing feature with an additional radio, which adds weight and volume to your pack (eliminating the stated advantages above). At best it is a draw… in my opinion, the FT-817 has a clear advantage in this category mainly because of the protruding knobs/dials of the KX3 on the one hand, and the acknowledged ruggedness of the FT-817 on the other hand.

    Speaker Audio Output – Advantage 817:
    Can’t really judge this point but I am sure Jerry is right on the mark with this. Personally I am always carrying ear-buds to an activation (but I hate to wear them), just in case I have company on a summit – so far I was lucky and never encountered a soul.

    Other Features and Functionality – Advantage KX3:
    An increase of your output to 10W might be nice under certain conditions. It will increase your signal slightly but you have to carry extra power sources to the summit – again, eliminating certain advantages mentioned above (weight/volume) – I would say it’s a draw.

    The huge VFO knob, certainly an advantage during operation, represents a drawback in terms of ruggedness (needs to be seen) and ability to pack the rig.

    The ability of the KX3 to decode PSK/RTTY and CW is certainly a great feature – how useful this is for a SOTA rig I am not sure – time will tell.

    A missing piece in this comparison is the price tag. Configuring the KX3 with a microphone and a charger, as well as with the 2m option will run you approx. twice the price of an FT-817.  If you can justify this for your SOTA rig – go for it.

    Where the KX3 will shine are areas of less importance to SOTA activators. SDR and data mode features are great but have limited value if you are looking for just a SOTA rig. The wide open front end of the FT-817? Certainly better on the KX3.  For me, the KX3 does just not have enough advantages to say good-by to my FT-817 – but I am using the radio only for SOTA.

    I am looking forward to KDØBIK’s updates on the SOTA readiness of the KX3 and his real-life experiences. It might just be the perfect rig after all.

    73, Matt / KØMOS


    ATTENTION !! WARNING !! There are old mountaineers, and bold mountaineers… there are no old-bold mountaineers. Hiking and mountain climbing are potentially hazardous activities particularly in Colorado with its extreme elevations. I am not accepting responsibility for any death or injury resulting from activations based on my trip reports. Proper training, experience, and personal capability assessment is required – enjoy!
  • WØC/FR-15Ø (Thunder Peak) – 3083 m / 10134 ft

    I had planned a double activation for today. Thunder Peak or WØC/FR-15Ø was the first on the list.The weather forecast was great for the Estes Park area and a friend of mine joined me for the hike. We drove into Estes Park and were surprised to see how much snow the mountains got during the week. Dark clouds were hanging in the Mummy Range (Continental Divide). A stiff wind greeted us when we left the car at the trail-head. Light snow-flurries were present for the first part of the hike, even though we had blue skies above us.

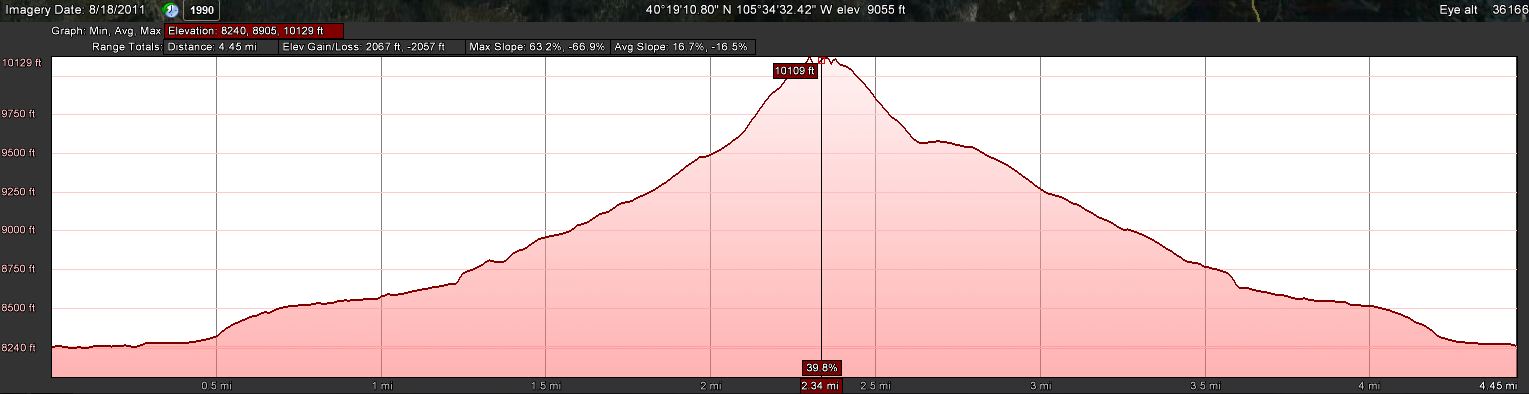
    Trailhead: 8244 ft / 2513 m
    Summit:   10134 ft / 3083 m
    Elev. gain: 2051 ft / 625 m
    Roundtrip: 4.5  mi / 7.2 km

    Compare this summit with my other activated summits

    How to get there:
    Take US34 from Loveland towards Estes Park through Big Thompson Canyon. Thunder Peak is on the south-west side of Estes Park. Stay on US34 towards Rocky Mountain NP. Go left on County Road 66 (or Tunnel Road), following the signs to the YMCA campus. Follow the road all the way to the end. There is a campground at the very end – as well as the East Portal of the Big Thompson Project Pipeline. Park your car at the loop of the road (there is room for about 10 cars on a gravel strip at the south side of the loop.

    Parking/Trailhead

    View Larger Map

    East Portal with Reservoir

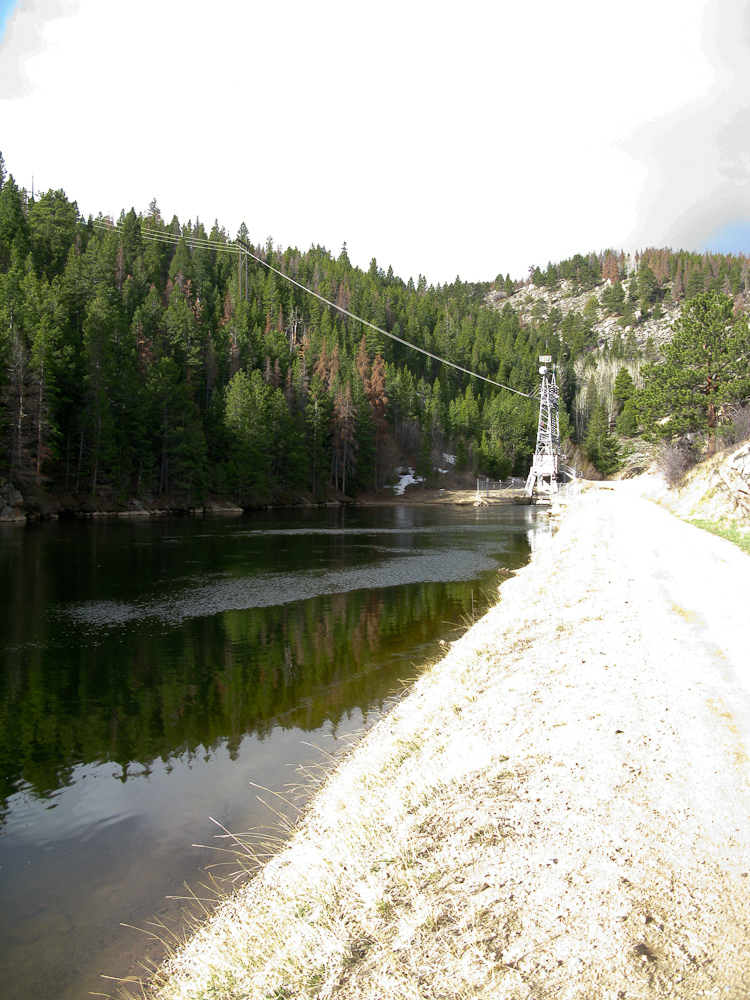
    Follow the dirt road at the end of the loop (SE) towards the reservoir and East Portal trail-head. The kiosk of the trail-head can be found when you follow the road on the right-side (north) of the reservoir.

    Red Tape:
    At the East Portal of the Adams Tunnel is a small (really small) reservoir – and the surrounding area is Federal property. You are not supposed to park, fish, boat, pee etc. within 100 yards of the dam – Homeland security and such. Thunder Peak is within the RMNP, ergo it is a fee area and their rules apply (no dogs etc.) I am not sure about RMNP entry fees… since the parking lot is outside of the park, I think you are not required to have a NP pass. I have a yearly pass anyway and therefore did not look into this further.

    The Ascent:

    Elevation Profile
    Turn left after the Horse hitch

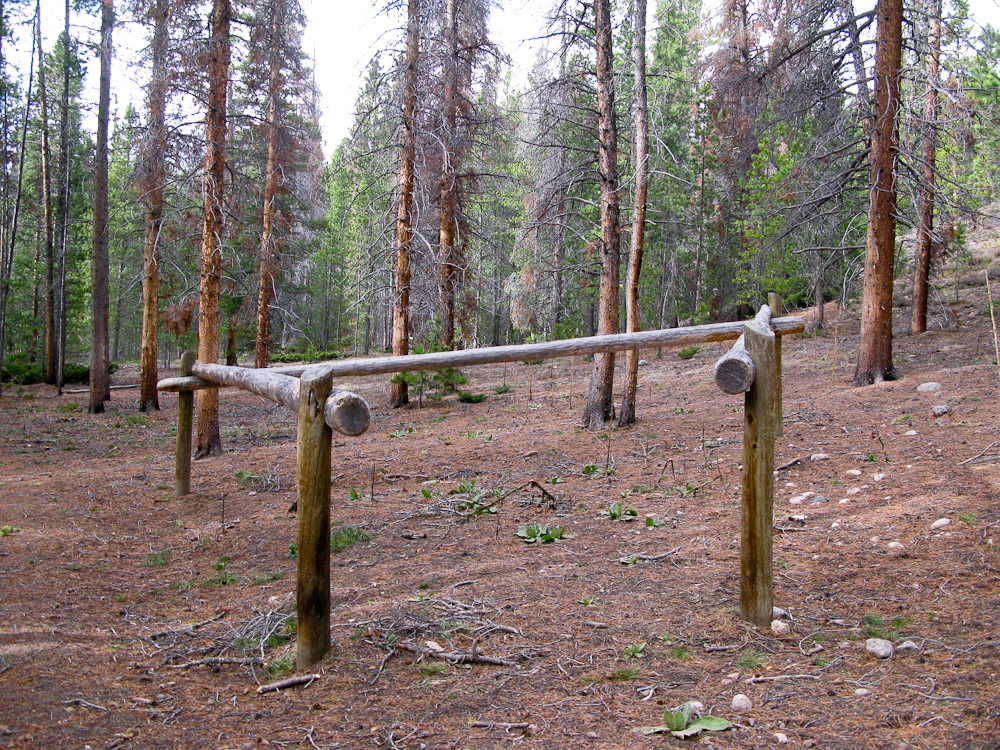
    For the first few hundred yards we followed the dirt-road on the north-side of the Reservoir to the kiosk. We continued on the dirt road along Wind River (more like a small creek) to a concrete retention pond. About 20 yards before the pond there is a faint trail to the right which continues to follow the creek. It was hard to see on our way up and we missed it. The result was some bush-whacking until we found the trail again. [UPDATE (3/13/13): There is now a new sign pointing you into the right direction. You cannot miss it.] On the opposite site of the creek are some nice rock-outcroppings. Right around the horse hitch we left the established Wind River trail and turned towards the drainage between Thunder and Lightning Peak.

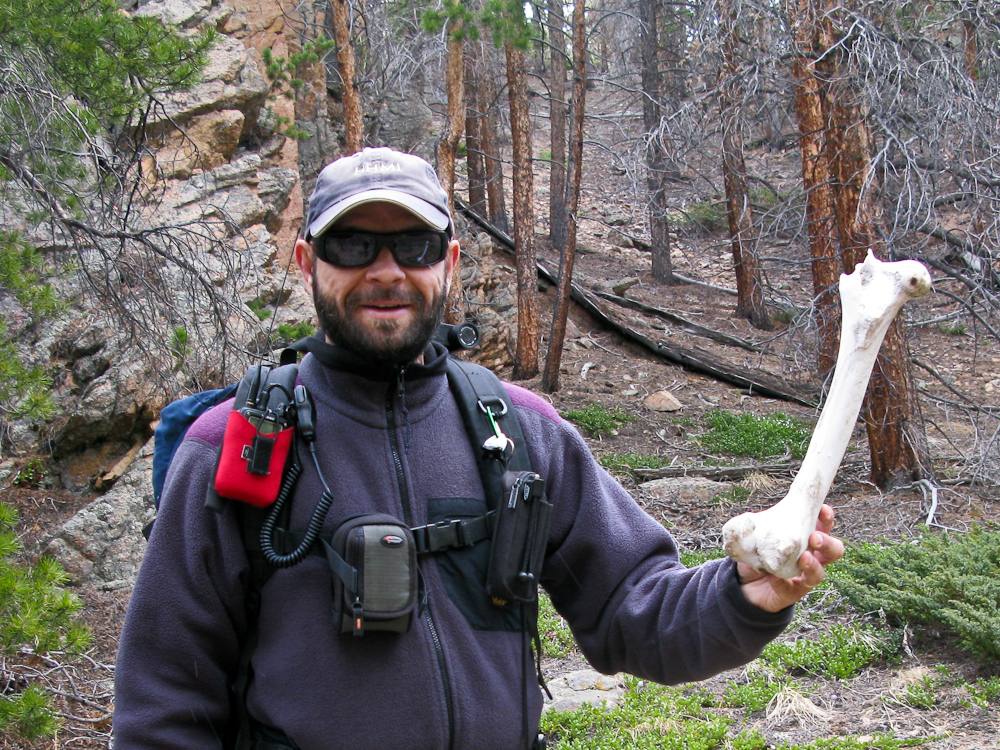
    See what I found

    First we had to cross the creek which was easy with the current water-level. We kept going along the drainage through lodge-pole pines and areas of aspen groves -always staying on the left (NE) side of the drainage where we encountered more open areas. As a result we made good progress. Interestingly, the soil in the drainage was very soft and sandy – sometimes we found big piles of sand as if a few kids had destroyed their sand-castle. You can’t get lost if you stay in the drainage and keep going all the way up to the saddle between Thunder and

    Where are we?

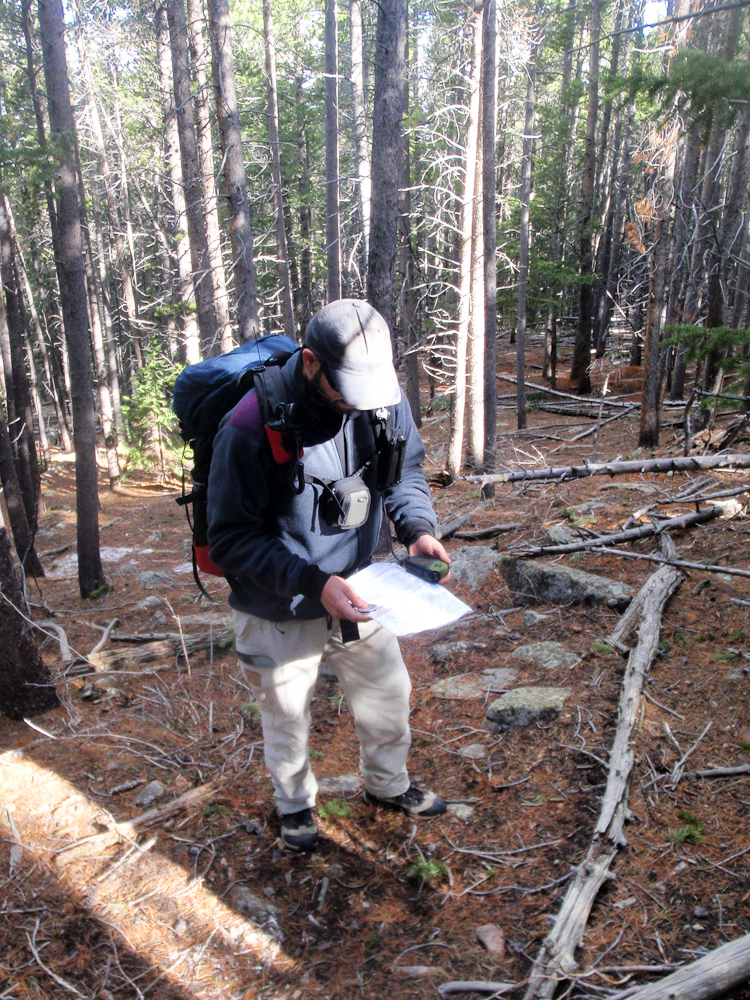
    Lightning. From there you can see the summit and head up there. We wanted to shave off some time and took a more direct line to the summit since we were aiming for a second activation. Every now and then I verified our position with the GPS to see whether we were still on the plotted track. Heading up the south-west side was quite a work-out… it was rather steep (around 30%) and with the soft and sandy soil it felt like climbing sand-dunes. Having enough momentum was sometimes crucial to overcome a section.

    The Summit:

    On the Summit

    The views from the summit are spectacular. There are quite a few SOTA peaks right in front of you. To the south are Estes Cone (WØC/FR-Ø39), Longs Peak (WØC/FR-11Ø) and Mount Meeker; to the East, Lily Mountain (WØC/FR-Ø50), Twin Sister Peak East (WØC/FR-Ø37) and West. To the north we could see Emerald Mountain (WØC/FR-Ø58 ) and Eagle Cliff Mountain (WØC/FR-Ø68 ) and finally to the west, the Continental Divide and the Mummy Range with too many SOTA summits to list. The summit was very windy but the skies to the west looked a lot friendlier than earlier in the morning. Setting up the equipment was very efficient due to the fact that I had help and Phil/NS7P was my second contact after just a few CQs. His spot posted on SOTAwatch attracted the usual chasers within minutes (thanks guys).

    The Descent:

    Ben running downhills

    The descent was quite fun… the soft and sandy soil allowed us to run/slide downhills towards the saddle and finally turn north into the drainage again, following our ascent route back to the trail-head an car. We only took the time to exchange our empty water bottles with full ones and off we went, heading to the second summit, a ~30 minutes drive.

    Some video impressions:

    If you would like to leave questions or comments, please do so through Youtube.


    ATTENTION !! WARNING !! There are old mountaineers, and bold mountaineers… there are no old-bold mountaineers. Hiking and mountain climbing are potentially hazardous activities particularly in Colorado with its extreme elevations. I am not accepting responsibility for any death or injury resulting from activations based on my trip reports. Proper training, experience, and personal capability assessment is required – enjoy!
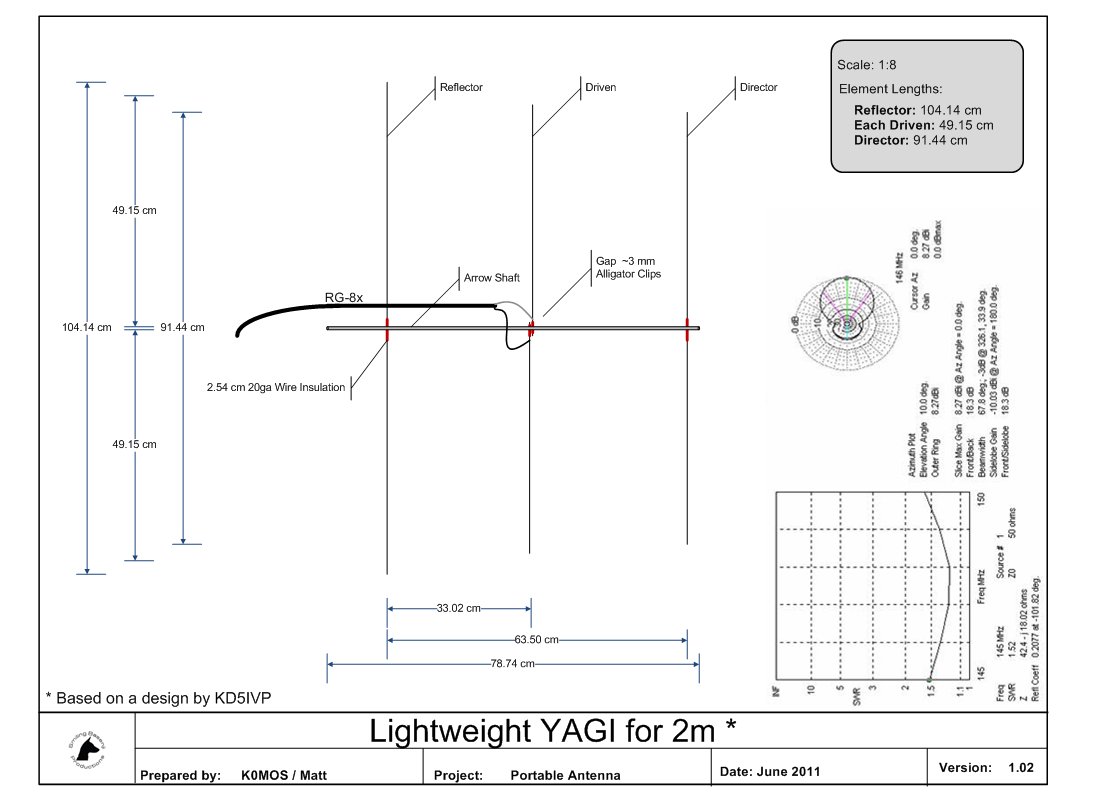
  • Ultra-lightweight 2m Yagi for SOTA

    Yagi – Dimensions

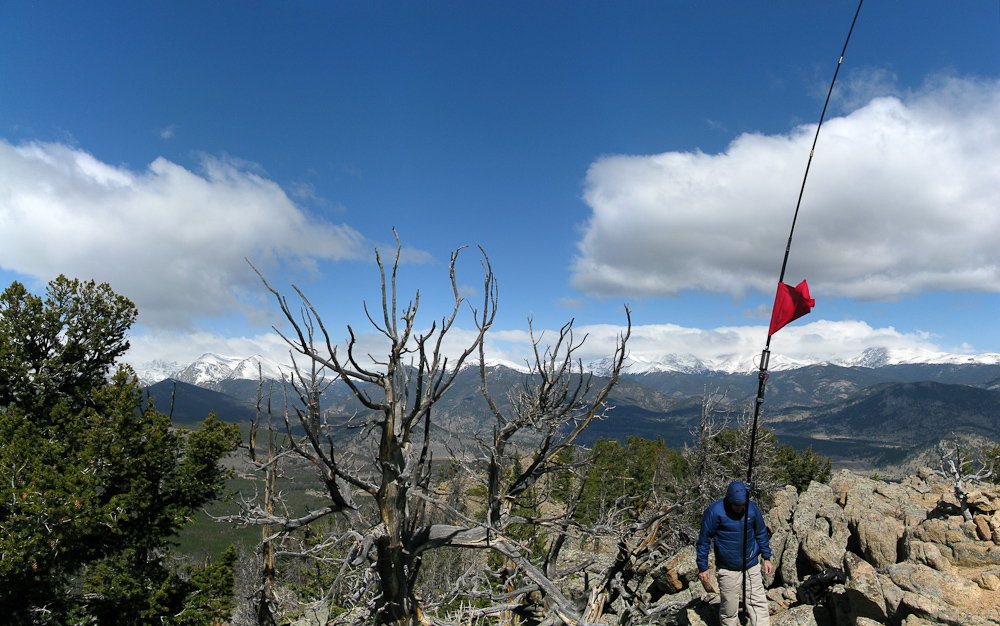
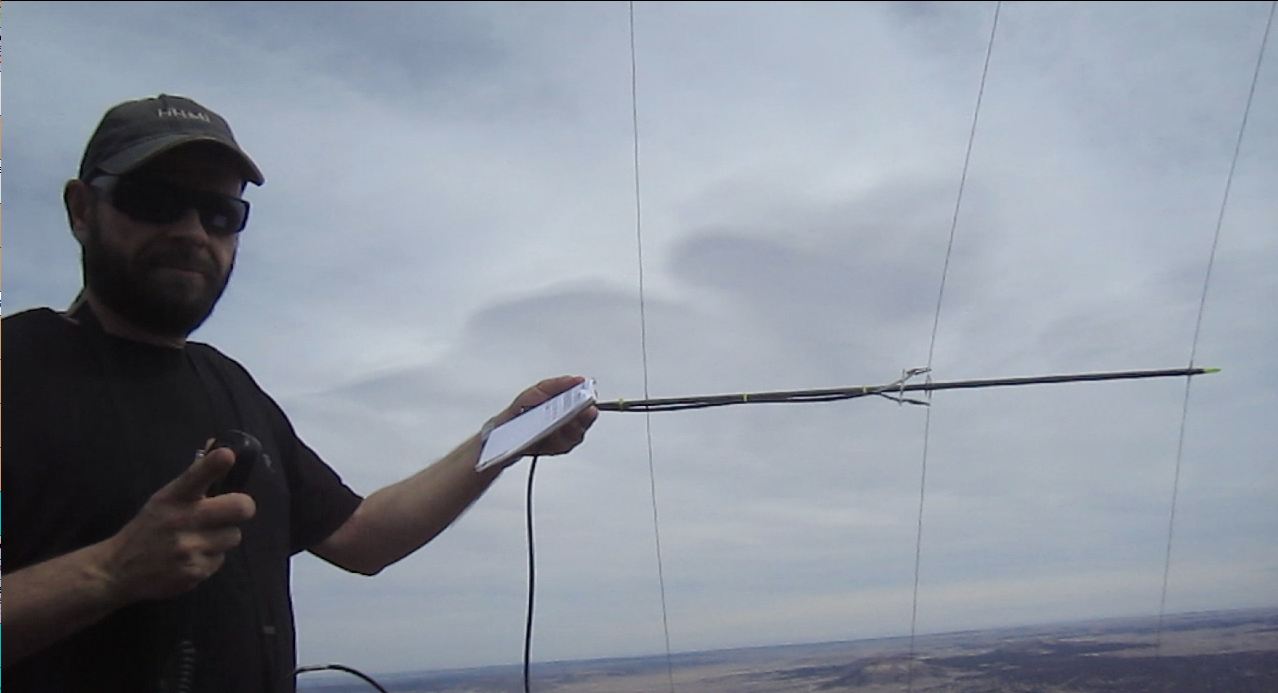
    I am always carrying my HT (Yaesu VX-7R) as a backup on my SOTA activations. It saved my butt on two occasions when high winds prevented me from setting up my vertical Buddipole. Since high winds are not unusual at higher elevations I was looking for a better antenna compared to the stock rubber-ducky for future activations. I found an antenna I really liked on Youtube, created by David/KD7MNI who was inspired by a design by Paul/KD5IVP. Paul even shared his plans online. I based my own plans on the info provided by David and Paul and after a week-end it was ready to test. A lightweight arrow-shaft houses the piano-wire for elements nicely but I was not happy with the dangling RG-8x… even wrapping it around the arrow-shaft made it awkward to transport… so I never actually took it to a summit until last week, when I activated Mt. Herman (WØC/FR-Ø63) with Steve/wGØAT.

    Yagi on Mt. Herman (photo by Steve/wGØAT)

    On the summit I had a real problem with my Buddipole coax and had to rely on my 2m 3-element Yagi to be able to claim my points. So… did it work you ask? YES, it sure did… the furthest contact I made was with Ken/WB9QDL who was in Thornton in his car (~60 miles). Not that the distance is unusual for a 2m contact with 5W but we had the opportunity to compare the signal with Steve’s HT. According to Ken, my signal and audio quality was better than Steve’s HT with a 17″ flexible whip antenna.

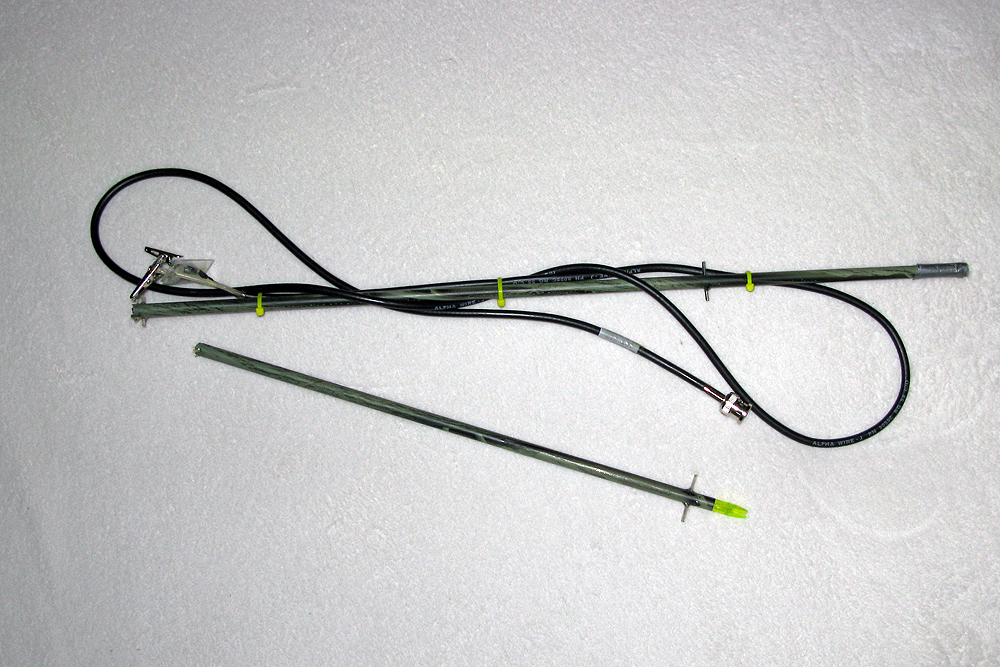
    Remains of a Yagi

    Good enough for me. I decided to take the antenna on my double-activation of Lily Mtn. & Panorama Pk. to see what it is capable of. Unfortunately it never came to another test. The antenna was strapped to the outside of my backpack. The light-weight arrow-shaft broke apart during my ascent through the forested area to Lily Mountain without me noticing and I lost some of the piano-wires which were stored inside.

    My Conclusion: It seems that the antenna was just too flimsy and not rugged enough for my purpose. Most trails around here start well below the treeline and there is always a part where I have to bush-whack through trees.  The arrow shaft is too long to be stored in a backpack and thus needs to be strapped to the outside. Using another container to protect the antenna seems to defeat the purpose of having an ultra-light antenna. I guess it is time to try a tape-measure antenna next  :)

    Video of the antenna in action:
    httpvh://www.youtube.com/watch?v=TeTrAPNo8tQ

    If you would like to leave questions or comments, please do so through Youtube.

    Check my other Yagi-Uda construction attempt.


    ATTENTION

    !! WARNING !! There are old mountaineers, and
    bold mountaineers… there are no old-bold mountaineers.
    Hiking and mountain climbing are potentially hazardous activities particularly in Colorado with its extreme elevations. I am not accepting responsibility for any death or injury resulting from activations based on my trip reports. Proper training, experience, and personal capability assessment is required – enjoy!
  • W6/SN-048 (Banner Mtn.) or is it?

    I successfully activated W6/SN-048 (Banner Mtn.) today – or so I thought. It seems that either the coordinates provided by the SOTA database or the summit name and elevation are wrong as of 3/12/2012. The provided coordinates (N39.30640030W120.26529694) are taking you to the top of Schallenberger Ridge (2276 m / 7469 ft . Since the nature of the error is unknown to me, I am not providing a full trip report and mislead another activator. I am adding the short version I posted on various Yahoo groups instead. If you are planning to activate Banner Mountain as it is currently defined in the SOTA database, I suggest to wait for clarification on either the correct coordinates or name/elevation of this summit.

    Trip report:

    Banner Mtn. – On the trail

    WX looked very promising when I left my temp. QTH at Lake Tahoe. The sun was out and the temps well above freezing when I drove towards Truckee. The picture was quite different when I arrived at the Schallenberger Ridge. The low hanging and fast moving clouds were around sumit level, and the sun was hardly visible. With the help of the nice lady at the museum (Donner Memorial State Park) I was on my way in no time.

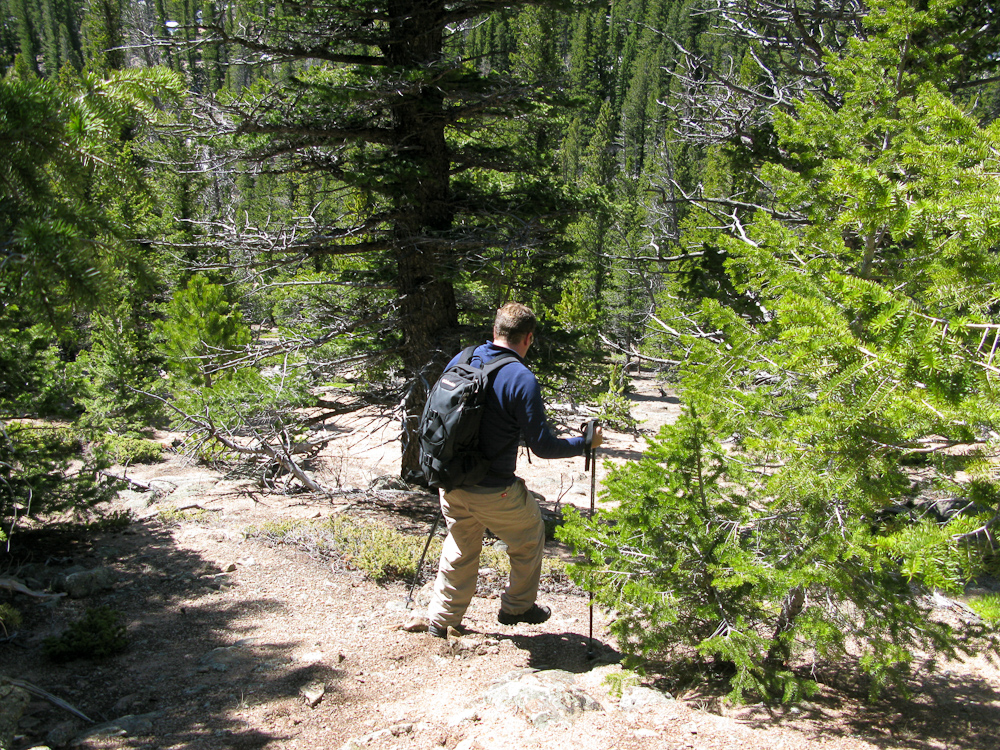
    Avalanche conditions were moderate according to Sierra Avalanche Center. Due to the temps, the snow was quite wet. Snow exposed to the high winds was hard-pressed but easy to tackle with my snowshoes. The summit was very windy and hideouts rare. I was determined to activate this summit at (almost) any cost to get my 5th association under my belt.

    Luckily the Buddipole antenna survived the 40 minutes in high wind conditions, however I experienced not only problems with the counterpoise (keeping the counterpoise attached to my ski-pole in high wind conditions is a recurring problem for me), but I also had issues with my SWR… one second at 1.2, the next at >10 and back to 1.2. I tried to rectify the situation but finally decided to give it a try as long as the antenna is still upright. My first contact was with Paul (W0RW) from Colorado who was hiking at > 10,000 ft. This was my first on-air contact with Paul who is normally too close for my activations in CO and it was an S2S as well. A great start, signal reports were excellent (57/58) and I was hopeful that the antenna is
    performing well. Paul graciously left me the frequency for my  activation (Thanks Paul). The remaining signal reports were underwhelming, not sure whether the antenna or the propagation conditions were to blame.

    Two other first on-air contacts for me was Mike (KD9KC) and Bob (KI0G), both in TX.

    A big THANK YOU to Andy (KI6ZHC) and Fred (K6DGW) for their help during the planning phase of the trip as well as to the spotters (N4EX, AJ5C (no copy), KI0G, K6ILM (no copy)) and all the chasers out there.

    I am glad I went out yesterday, we are experiencing heavy snowfall and high gusts for the last eight hours… and the forecast for tomorrow isn’t any better. I doubt I can activate another summit during my stay here but surely enjoyed my snowshoe hike in the forest today.


    ATTENTION

    !! WARNING !! There are old mountaineers, and
    bold mountaineers… there are no old-bold mountaineers.
    Hiking and mountain climbing are potentially hazardous activities particularly in Colorado with its extreme elevations. I am not accepting responsibility for any death or injury resulting from activations based on my trip reports. Proper training, experience, and personal capability assessment is required – enjoy!
  • DM/RP-475 (Lerchenberg) – 258 m / 846 ft

    I was in Mainz, Germany for a quick five day business trip with a very dense schedule. Nevertheless, I was hoping to activate at least one SOTA summit and was scanning through my options on Mario’s Adventureradio.de website. DM/RP-475 or Lerchenberg seemed to be the best option for the limited amount of time available to me. The summit is only approx. 7 miles (~11 km) from the Hotel I was staying at. I only brought along my HT (Yaesu VX-7R) to minimize luggage and was hopeful to be able to activate the summit on 2 meters – due to it’s proximity to a larger city.

    A big THANK YOU for all the help goes to

    • DL9MDI – Fred (repeat offender, Fred assisted also my OE activations)
    • DL4FDM – Fritz
    • DF2PI – Bert
    • DF5WA – Bert (joined me on the activation)

    I hope I did not mistakenly omit anyone on my list.

    The summit is not much to speak of (no offense). The “peak’ is just 258m (846 ft) above mean sea-level – about the elevation gain on my daily dog-walk :) .

    DM-RP-475 is within the state of Rhineland-Palatinate and close to the City of Mainz and Frankfurt, a very densely populated area of Germany. The region is fairly flat,  specifically compared to Colorado. My plane landed at 10:30 AM, right on time and I was in my Hotel by noon. My first phone call went out to Bert (DF5WA) soon after, and he picked me up a few minutes later. Bert is a very active SOTA chaser and with more than 42000 points well in the top 10 of all chasers – very impressive!

    He  gave me a quick tour of Mainz, which was founded by the Romans in the late first century BC and is  the home town of Johannes Gutenberg  (~1440) who developed the first printing press. Large parts of the town got destroyed in WWII, but there is still a beautifully restored medieval down-town with old houses, churches, city-walls and towers – definitively worth a visit.

    The Summit:


    View Larger Map

    Lerchenberg – The Summit

    As you can see on the terrain-map above, the summit is very flat. Finding the highest point is therefore not easy but luckily I had a native guide. The summit consists of mostly farm-land with narrow dirt roads for tractors and other farming equipment running between the fields. Since it was winter, the fields were all barren and wet due to the recent rain. It was a cold, overcast day, making me regret not having gloves and long underwear. Soon after finding a suitable spot for Bert’s antenna, he was on the air in no time on 40m CW. After verifying the local frequencies, I started calling CQ on my HT on 2m, hoping for a quick activation. But no such luck… after 15 minutes of constant calling I had nothing to show for and went back to Bert to verify the frequency. Since each OV (Ortsverein [Regional radio club]) has different calling frequencies I tried my luck on

    Bert (DF5WA ) activating Lerchenberg

    an other QRG recommended by Bert. To make a long story short, I was only able to get one single QSO (DK8IJ) until Bert drummed up some local support via phone. Even then, my  signal reports were quite bad and it took several attempts (in most cases) to complete a QSO. So what was to blame for the poor performance? Well, hard to say but I guess it was a combination of several factors. For one, the topography of the summit combined with my rubber-ducky 5W HT did not make for an ideall combination. The fact that the FSV Mainz (the local soccer club) was playing in the nearby Coface arena (just a stone’s throw away) was not conducive for having a lot of local contacts either. The arena holds over 30000 people and soccer is VERY popular in Germany, leading me believe that a large percentage of local HAMs were either in the arena or glued to the TV following their local club and not listening to a weak signal on 2m.

    What ever the reasons, I consider it another successful activation in a new (to me) association.  Neither the summit nor the outdoor experience was memorable but the warm welcome, help and assistance provided by local  amateurs, specifically by Bert will last. I hope I can return the favor at some point in the future. To wrap up the activation, I was invited to a coffee and a tour of Bert’s shack – thanks again Bert.

    In case you are wondering, FSV Mainz won the game 3:1 against SC Freiburg :)

    Some video impressions:

    httpvh://www.youtube.com/watch?v=_eFUlKINZEI

    If you would like to leave questions or comments, please do so through Youtube.


    ATTENTION

    !! WARNING !! There are old mountaineers, and
    bold mountaineers… there are no old-bold mountaineers.
    Hiking and mountain climbing are potentially hazardous activities particularly in Colorado with its extreme elevations. I am not accepting responsibility for any death or injury resulting from activations based on my trip reports. Proper training, experience, and personal capability assessment is required – enjoy!
  • WØC/FR-Ø68 (Eagle Cliff Mtn.) – 2709 m / 8906 ft

    Eagle Cliff Mountain (WØC/FR-068) is part of the Front Range of the Rocky Mountains – just six miles south of Estes Park, right at the border to Rocky Mountain N.P. (the summit is within RMNP). There is no official trail up to the summit, but it seems to be a popular hike based on the faint network of trails. The ascent can be tackled from either County Road 66 (south slope) or from the RMNP side (NW slope via Moraine Park/Museum parking lot). I have chosen the south side of the mountain because I wanted to activate Emerald Mountain (WØC/FR-Ø58) as well (see separate trip-report) – Emerald Mountain is just a few miles up the road and thus the two make an ideal pair for a double activation. Both hikes are relatively short in terms of miles, but steep. The drive up the Big Thompson Canyon took a little longer than usual due to the fact that the road was still snow-covered with icy spots in some areas. When I exited the canyon near Estes Park, the sky was blue and no cloud was in sight – a welcome indicator for a great day ahead.

    Trailhead: 7836 ft / 2388 m
    Summit:   8906 ft / 2709 m
    Elev. gain: 1216 ft / 371 m
    Roundtrip: 2.3  mi / 3.7 km

    Compare this summit with my other activated summits

    How to get there:
    Take US34 from Loveland towards Estes Park through Big Thompson Canyon. Eagle Cliff Mountain is on the south-west side of Estes Park. Stay on US34 towards Rocky Mountain NP. turn left onto County Road 66 (or Tunnel Road), following the signs to the YMCA campus. The TH is right after you pass the ‘Dunraven Inn‘ on the right side of the road. There is a small dirt road with a metal-gate… you have to be very creative in finding a parking spot for your car (see Red Tape). If you pass the gate to the YMCA, you have gone too far.
    A better option (in terms of parking ) might be to take US-34 into RMNP, then continue towards Moraine Park and park on the Museum parking lot.

    Parking/Trailhead

    View Larger Map

    Red Tape:

    • Eagle Cliff Mtn. is within RMNP – therefore all their rules and regulations apply. RMNP is also a fee area. You don’t have to pay the fee when coming from CR-66 because you will be parking outside of the regular park entrance. If you choose to tackle the summit over the NW-slope, you have to go through the regular entrance and pay the day fee ($20.00).
    • Parking near/along CR66 (Tunnel road) is difficult. All the signs along the gravel strips on the right side of the road are indicating private property, and promise to tow your car.

    The Ascent:

    EagleCliff Mtn – ElevationProfile

    EagleCliff – Sign

    From CR-66 I hiked west, passing the metal gate on the dirt-road. Two bridges lead over two creeks before the path intersects a trail leading into RMNP (Bear Lake Road). There is private property on your left and right, so make sure to respect the signs. As expected and hoped, most of the snow had already melted away and snow-shoes were not necessary. The ascent is straightforward, with hardly any challenges. You can (almost) see the summit from the base of the mountain and you just aim for it. Pick one of the faint trails through the grassy/brushy and steep slope – all of them seem to end up at the same slightly wooded area in the saddle just below the summit. I tried to stay more on the rocky-section of the mountain (south-west). There are a few rock-outcroppings you have to circumnavigate or, if you feel up to it, you can scramble/climb up with a few easy moves. This route provides mostly unobstructed views into RMNP all the way to the summit.

    The Summit:

    EagleCliff Mtn. – Operating from the Summit

    There is a steep cliff (~60 feet / 20 m) on the north-side of the summit, giving you a great take-off angle. The views are really spectacular – I know… I say that a lot… and it is always true but in this case you can not only see the massive mountains of the Mummy Range, Never Summer Mountains etc. but you can also look down into the Moraine Park area of RMNP. A rather unique view, giving a great impression of the power of the ancient glaciers. There are plenty of rocks and trees to guy the antenna (and I needed a well guyed antenna due to the winds), and within a few minutes I was calling CQ. I logged my first QSO with Rick (N4EX) @ 1730 UTC. It was my first time on 15m and my Buddipole antenna (vertical Versatee) seemed to perform well on this band. In addition to my regular chasers, I met a few new SOTA chasers on this band. I changed to 20m a little later on, since not all of  my ‘regulars’ could copy me on 15m.

    The Descent:
    I took basically the same route back to the car, hoping that it hadn’t been towed.  The descent was very enjoyable and I went rather slow to enjoy the views.

    Some video impressions:

    httpvh://www.youtube.com/watch?v=nCHxwXusMvs

    If you would like to leave questions or comments, please do so through Youtube.


    ATTENTION

    !! WARNING !! There are old mountaineers, and
    bold mountaineers… there are no old-bold mountaineers.
    Hiking and mountain climbing are potentially hazardous activities particularly in Colorado with its extreme elevations. I am not accepting responsibility for any death or injury resulting from activations based on my trip reports. Proper training, experience, and personal capability assessment is required – enjoy!
  • WØC/FR-Ø39 (Estes Cone) – 3348 m / 11006 ft – 2nd activation

    This was a re-activation for me. If you are looking for all the details on how to get there and other useful info, you can find the original trip-report with the necessary details right here. This post has only a few specifics from today’s activation.

    Estes Cone: View of RMNP from the summit

    After two days of high winds here in northern Colorado (I clocked 45 mph winds in my back yard – the news reported even higher winds in the mountains of up to 75 mph gusts) the weather forecast for today was excellent. I woke up to 17 degrees F (~minus 8 C) and blue skies. Since everybody in the family had the day off, I was joined by my wife and my daughter – making this a fun family affair. We left the house at nine o’clock with the goal of being at the trail-head of Estes Cone by 10, and on the air by noon local time (or 1900UTC). That’s how I announced my activation on SOTAwatch.org. Since today was a federal holiday, traffic was minimal and the mostly dry roads allowed me to pass through Big Thompson Canyon rather quickly. Nevertheless, we  arrived at the TH 15 minutes later  as expected because I underestimated the time it took to drive from Estes Park to the trail-head.

    Estes Cone: On the way up

    Determined to keep my ‘appointment’ on the summit, I shouldered my pack and headed towards the mountain – splitting up our ‘activation team’. My seven year-old cannot yet keep up with me in deep snow and we planned to re-join later somewhere on the trail after the activation.

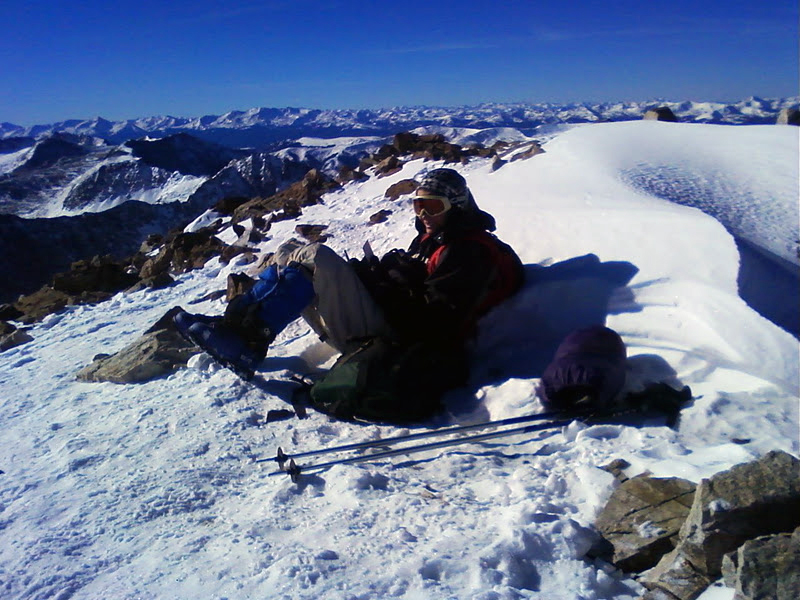
    There were two chances for an S2S contact today, one with VA2OTA on HF and the other with KF6LHX (Tim) who was activating WØC/PR-Ø14 near Breckenridge on VHF – that’s only 70 miles (~115 km), I covered larger distances on my HT before. On my way up, I was able to copy KT5E on 2m saying:”Your are Summits on the what?” and knew immediately that Tim was OTA. I was unable to contact him directly however. I was still in the valley and surrounded by trees and mountains.  I contacted KT5E and he relayed my message to Tim. By the time I arrived on ‘my’ summit he had already moved on – you can’t stay too long at 14236 ft (4339 m) in winter.

    Photo by Tim – KF6LHX

    You can find Tim’s trip-report on the SOTA reflector and see Tim’s PQL (Personal QSO Logger) shivering at high elevation on the right. Back home I learned that VA2OTA’s activation was cancelled due to bad weather – so that took care of all the S2S contacts possibilities for today.

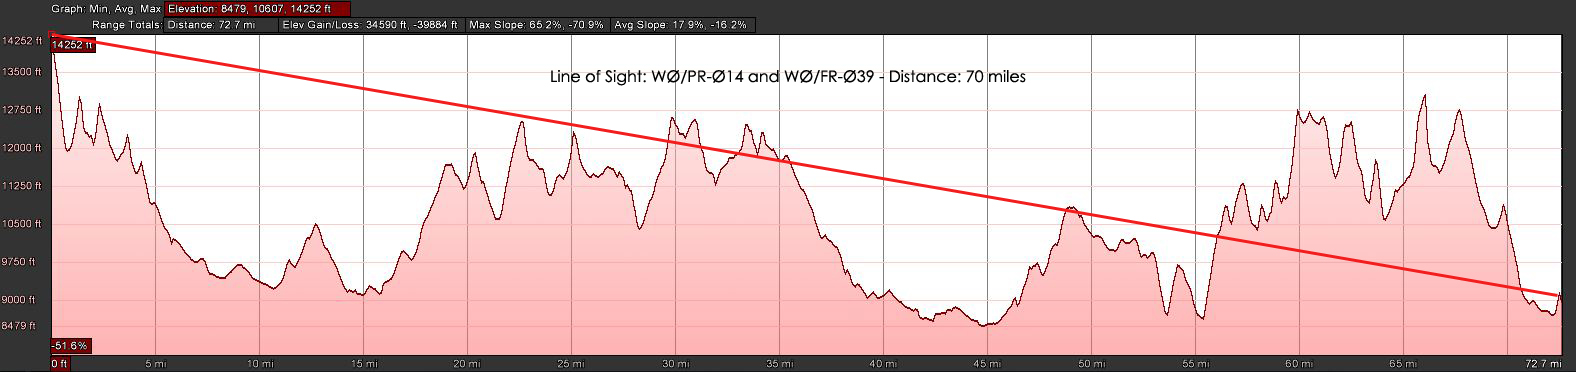
    Today I looked a little closer at the topography between Quandary Peak and Estes Cone to see whether a contact would have been feasible… it does not look promising (see below):

    Estes Cone: LOS to Quandary Peak (click for larger view)

    It took me an hour and 45 minutes to hike the three miles (~4.5 km) and 2000 ft (~600 m) of elevation through about two feet of (mostly) packed snow. I reached the summit at 11006 ft (3348 m) on-time and logged my first QSO at 19:00 UTC. The wind was blowing pretty strongly and I setup my equipment under the same rock formation than last time – about 30 feet below the summit. That blocked my signal towards the East and South-East but made the high winds a lot more bearable. The views from up here are spectacular. Longs Peak (4344 m / 14255 ft ) and Mt.Meeker (4240 m / 13911 ft ) at a close range (~4 miles / 6.5 km as the crows fly) and the snow-covered Mummy Range with several 13000+ ft (~4000 m) summits towards  the NNW are all within view. On the other side, one can spot beautiful Lily Lake and in the distance Estes Park.

    I tuned the antenna for 17m and started calling CQ. N4EX (Rick) was the first who answered my call on HF and he spotted me as well (thanks Rick). I was forced to move to another frequency after my 12th QSO since some other HAM’s decided to settle on ‘my’ frequency – they did not react to any of my calls and I could not get any other contacts on 17m. Since my extremities started to feel cold, I was tempted to wrap it up and head out of the cold wind. Instead, I opted to give it a try on 20m and re-tuned the antenna, looked for a free frequency and started to announce my presence… no takers after five minutes on this band… time to pack-up and move my body to get warm.

    Estes Cone: In the woods

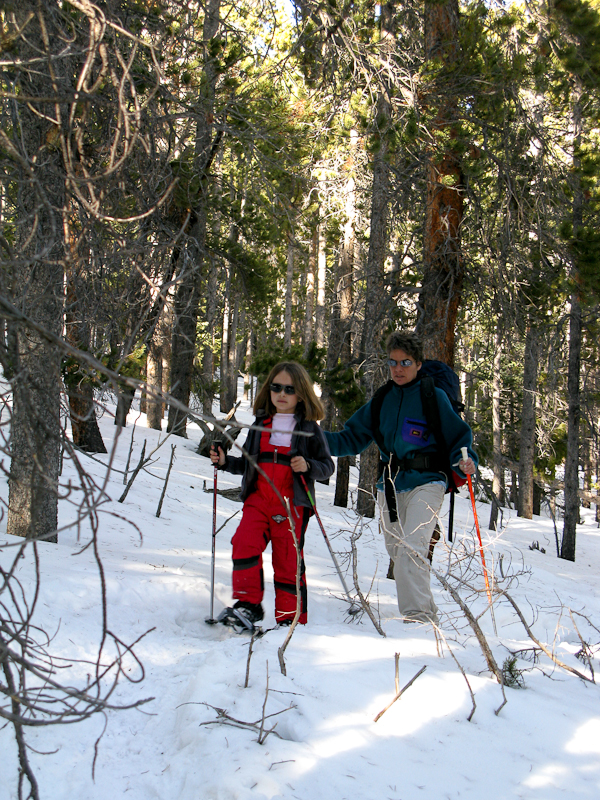
    I was pretty much running/sliding down the south-westerly facing route to catch-up with the rest of the family. I found them just below the saddle, singing Christmas songs while trudging through the trees on their snow-shoes.

    I was a perfect day in the mountains and it felt great to burn some of the calories which had accumulated around my waist over the holidays – too bad I could not reach Tim for a S2S.

    Some video Impressions:
    httpvh://www.youtube.com/watch?v=NFeMLIAqpdA

    If you would like to leave questions or comments, please do so through Youtube.


    ATTENTION

    !! WARNING !! There are old mountaineers, and
    bold mountaineers… there are no old-bold mountaineers.
    Hiking and mountain climbing are potentially hazardous activities particularly in Colorado with its extreme elevations. I am not accepting responsibility for any death or injury resulting from activations based on my trip reports. Proper training, experience, and personal capability assessment is required – enjoy!
  • WØC/FR-Ø58 (Emerald Mountain) – 2810 M / 9237 ft

    I got up at 6:00 AM this morning, facing a moderate 18 degrees F (approx. -8C) and clear skies outside – just a sliver of the moon and clouds over Longs Peak towards the west. A winter storm warning was issued for later in the day, but I thought I had enough time to activate WØC/FR-Ø58 (Emerald Mountain). The dogs were not too excited to go for a walk in the dark and at these freezing temperatures – but I guess they were relieved that they did not have to join me on the mountain.
    The drive up through Thomson Canyon followed the frozen river all the way up to Estes Park. Entering Estes Park through US34 always presents a perfect overview of the surrounding mountains. Even though I was still driving under clear skies, clouds were settling in the mountains in every direction – guess the weather forecast had not lying.

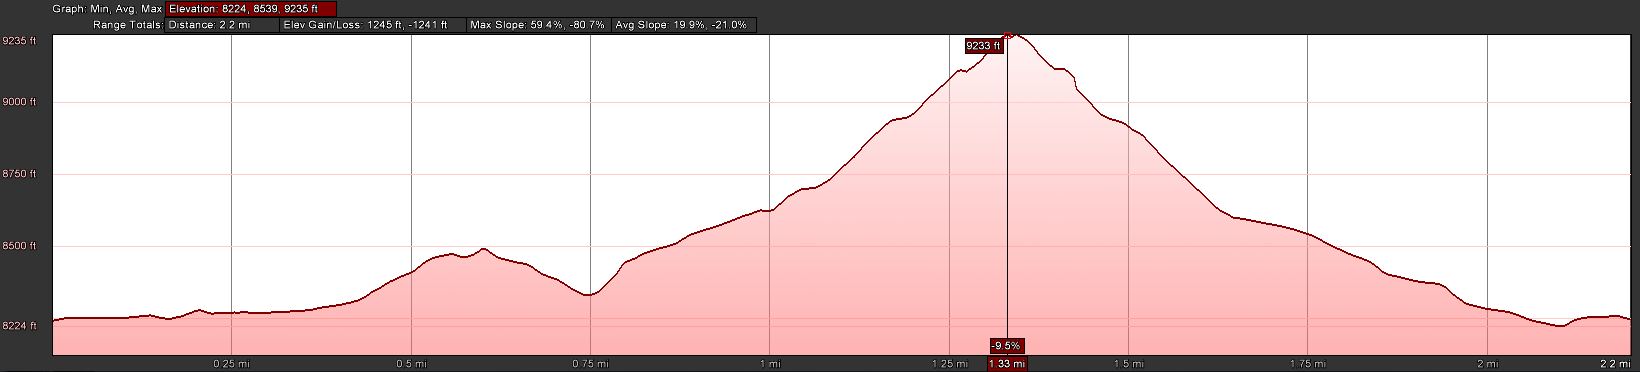
    Trailhead: 8244 ft / 2513 m
    Summit:   9237 ft / 2810 m
    Elev. gain: 1245 ft / 380 m
    Roundtrip: 2.2  mi / 3.5 km

    Compare this summit with my other activated summits

    How to get there:
    Take US34 from Loveland towards Estes Park through Big Thompson Canyon. Emerald Mountain is on the south-west side of Estes Park. Stay on US34 towards Rocky Mountain NP. Go left on County Road 66 (or Tunnel Road), following the signs to the YMCA campus. Follow the road all the way to the end. There is a campground at the very end – so is the East Portal of the Big Thompson Project Pipeline. Park your car at the loop of the road (there is room for about 10 cars on a gravel strip at the south side of the loop.

    Parking/Trailhead

    View Larger Map

    Red Tape:

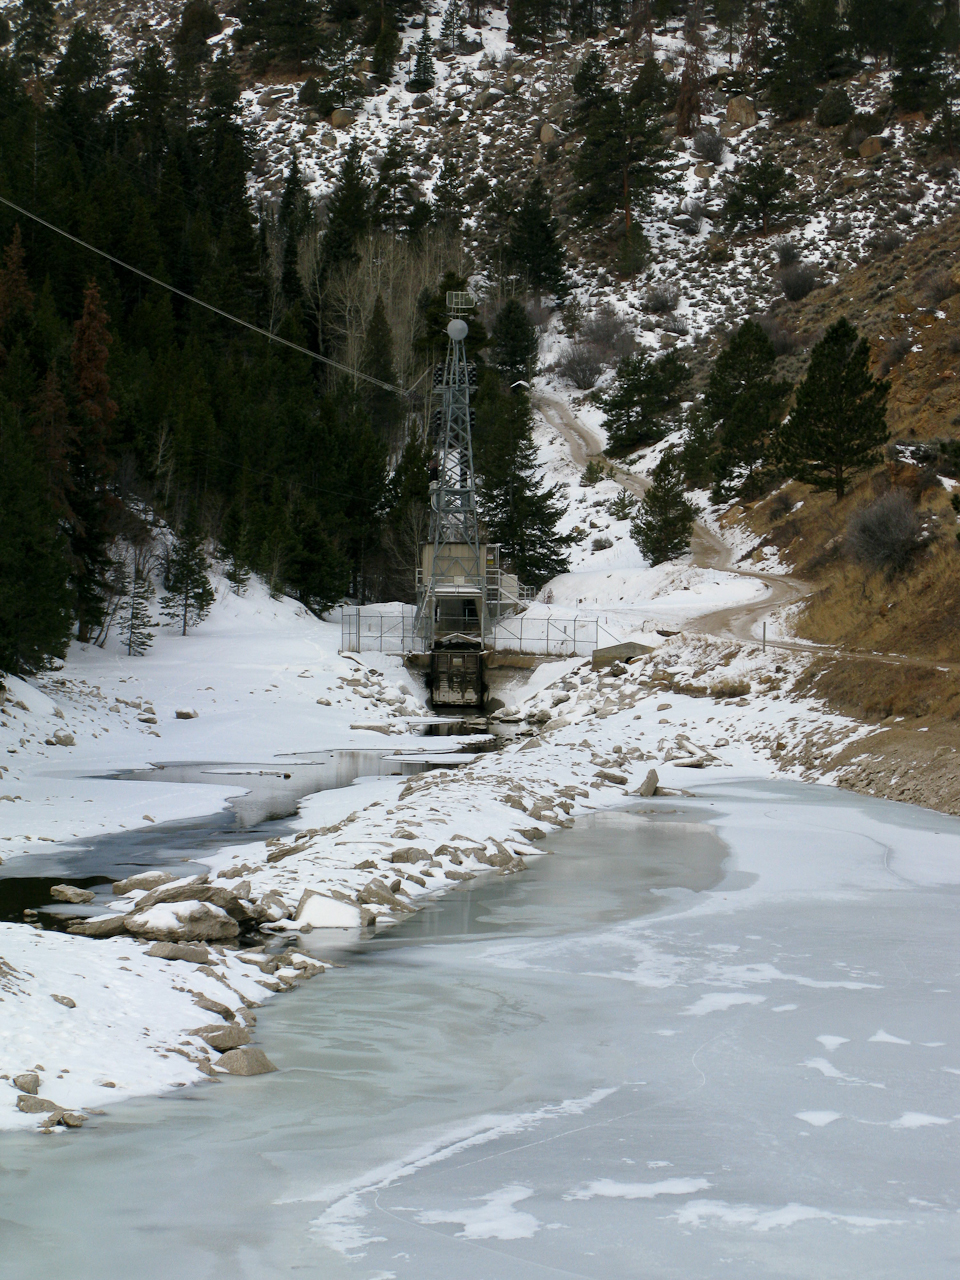
    East Portal

    At the East Portal of the Big Thompson Project Pipeline is a small (really small) reservoir – and the surrounding area is Federal property. You are not supposed to park, fish, boat, pee etc. within 100 yards of the dam – Homeland security and such. Emerald Mountain is – at least partially – within the RMNP, ergo it is a fee area and their rules apply (no dogs etc.) I am not sure about RMNP entry fees… since the trail starts outside of the park, I think you are not required to have a NP pass. I have a yearly pass anyway and did not investigate this aspect so far.


    The Ascent:

    Elevation Profile

    I selected the south face of the mountain for my ascent. It can be tackled from almost any side but I was hoping that the south would  have less snow compared to the other options. In addition, for part of the way I could use a trail going from the East Portal TH to the Glacier Basin campground in RMNP. I just passed the reservoir of the East Portal when I realized I forgot my camera in the car… so I turned around to get it. That is when I broke my sun-glasses… not that I needed them today but still… #$@%. Walking back to the reservoir, snow flurries started to fall and a stiff wind came up from the west. I continued the road uphills when a Jeep drove towards me, driving downhills but backwards? It was  Sam, a RMNP Ranger patrolling ‘his’ park. We talked for almost half an hour. He was very interested in SOTA and I was interested in his insider’s know-how of all the different routes to SOTA summits in the park and around Estes Park. We finally parted ways and I headed uphills in a (almost) straight line, trying to make up for lost time to keep my appointment on the summit. Luckily the south face was almost snow free – even better, the soil was frozen and I made good time. Every now and then, I could even see a faint trail going up the mountain.

    The Summit:
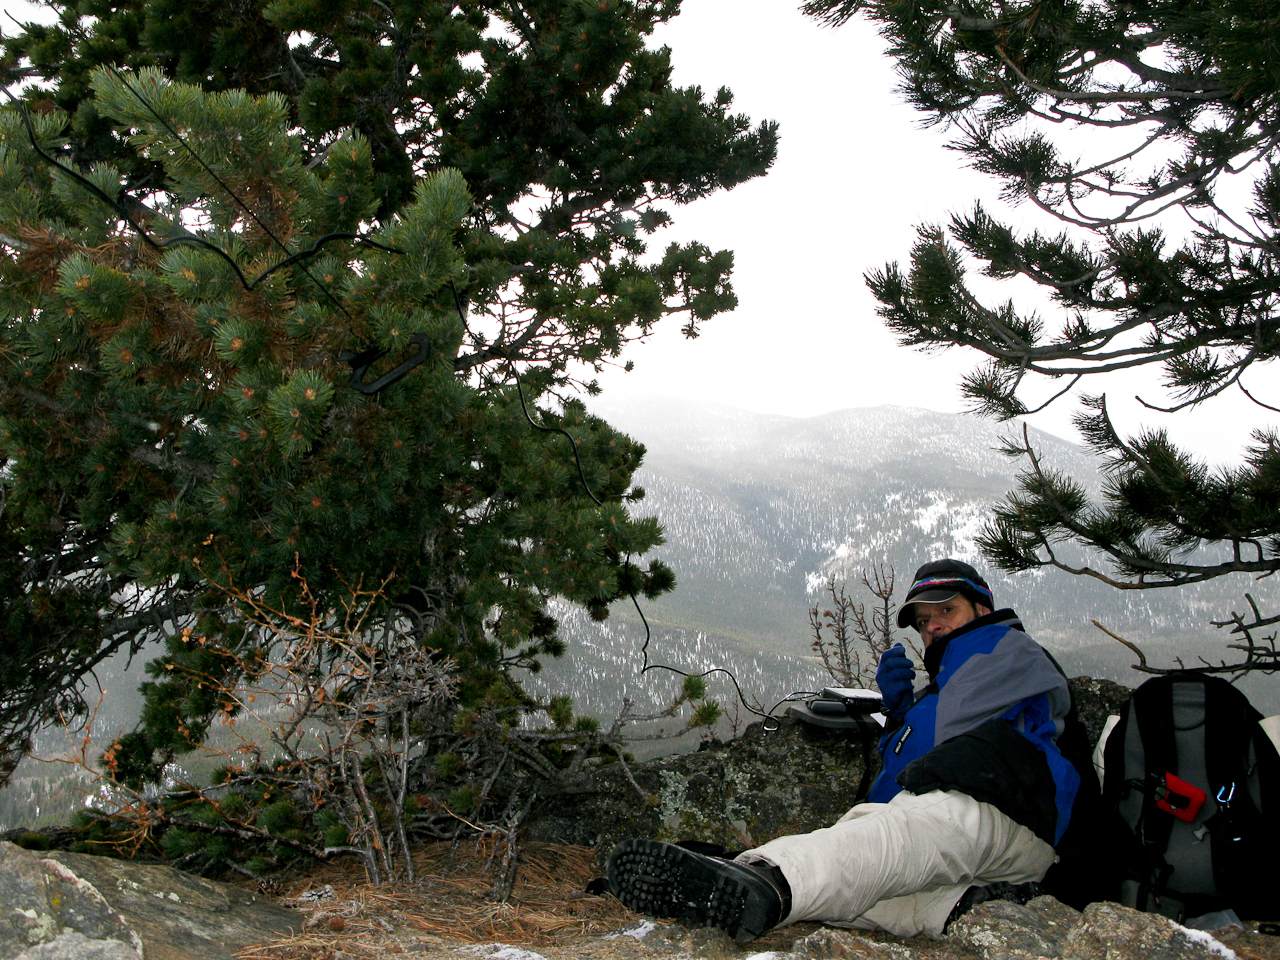
    The summit is rather small. I pretty much used up most of the space with my antenna guy-lines. It could host two small teams of activators. There are some rocks which can provide shelter from the wind – unfortunately the lee side was filled in with a deep snow drift. I had about six inches of snow on the top with some clear areas under (Christmas) trees – I claimed this spot immediately as my operating position.

    Operating position

    Setting up the equipment and antenna took a little longer than usual – fiddling with  Buddipole coil-taps with cold fingers is not easy. I did not want to drop one into the snow. Turned on the SWR analyzer and…. nothing… lets hope it is just an empty battery. So I had to use the internal meter of the FT-817. Turned on the radio on 20m and I experienced S8 noise throughout the band… I am used to S8-S9 noise at home but on a summit? No clue why… I had activated several summits nearby and never before had an issue on 20. Two adjustments to the counterpoise and I was on the air, calling CQ 20 minutes ahead of plan. The temperature was below freezing and the wind ~15-20 mph (guesstimate). There was a small blue cloud and the sun tried to peak out every now and then but finally gave up, overwhelmed.
    Thanks to the high noise level, I could only hear strong stations. After 12 contacts on 20m in 25 minutes I had to wrap it up. My feet and hands started to get uncomfortably cold and I was shivering.

    The Descent:
    Soon after leaving the summit it got warmer. Getting out of the wind and moving my body certainly felt good. I soon found a faint trail and followed it all the way down directly to the car – a route I would recommend to the next activator.

    Some video impressions:
    httpvh://www.youtube.com/watch?v=PcCG2f8j5og

    If you would like to leave questions or comments, please do so through Youtube.

    I activated this summit again on January 10th, 2012. You can find the trip-report right here.


    ATTENTION

    !! WARNING !! There are old mountaineers, and
    bold mountaineers… there are no old-bold mountaineers.
    Hiking and mountain climbing are potentially hazardous activities particularly in Colorado with its extreme elevations. I am not accepting responsibility for any death or injury resulting from activations based on my trip reports. Proper training, experience, and personal capability assessment is required – enjoy!
  • WØC/FR-198 (Peak 978Ø) – 2428 M / 798Ø ft

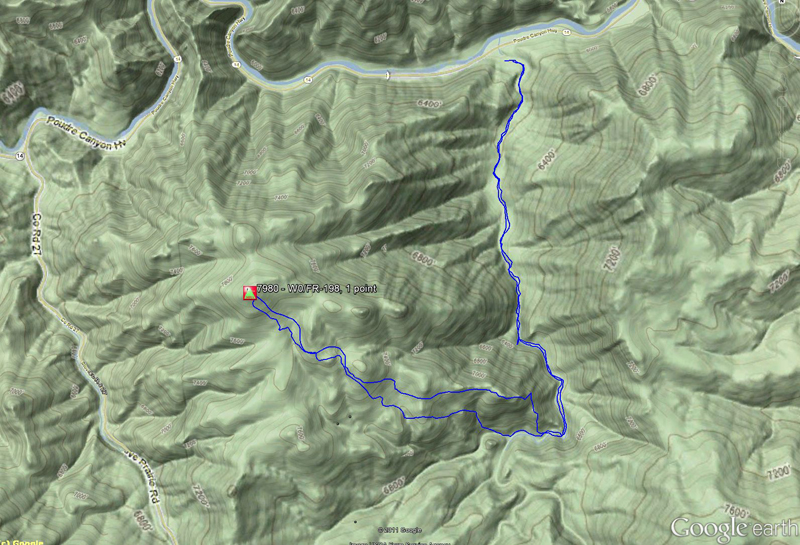
    There was a winter storm watch in effect for later in the day… hard to believe in light of the unusually warm weather in the morning. To get another SOTA peak on my record before the next snow arrives, I picked an unnamed peak WØC/FR-198 (798Ø) in the Poudre Canyon. The peak is located between Young’s Gulch, a popular hiking/biking area, and CO Rd 27 (Stove Prairie Road). It is part of the Front Range of the Rocky Mountains  and is managed by the Roosevelt National Forest.
    Since there is no trail to the summit, I had been wondering about the best way to bushwhack my way up there. There is private property on the south side of the mountain and the approach from the Canyon is too steep (well, it’s a Canyon after all). The approach from the west (Stove Prairie Road) seemed to be short but steep and appeared to be in wooded area. The approach from the east however seemed to be more open and it allowed me to use the hiking/biking trail into Young’s Gulch (along a creek) for a while, with some bushwhacking later in the trip over the south-easterly ridge. Even-though this route was substantially longer, I opted for it, specifically considering the approaching winter storm with forecast high winds out of the west – I would be better protected. Winter storms in the Rockies and Foothills can be fast and furious.

    Trailhead: 5848 ft / 1782 m
    Summit:   7980 ft / 2432 m
    Elev. gain: 2851 ft / 869 m
    Roundtrip: 7.5 mi / 12.1 km

    Compare this summit with my other activated summits

    How to get there:
    Take US287 N from Fort Collins towards Wyoming. Go west  at Ted’s Place on CO14. You will find a sign for the Young’s Gulch TH around mile 13 into the Canyon on the south side of the road. The section between CO14 and the parking lot is in very bad shape. Luckily it’s only about 100-200 yards but some of the pot-holes are  huge. The parking lot is quite big and was completely deserted.  The usual TH signs, warnings and maps can be found, but no potable water, toilet etc.

    Parkinglot/Trailhead

    View Larger Map

    Red Tape:
    It’s a very dog friendly trail, one of the few trails in the Poudre Canyon where you are allowed to let your dogs run off leash. That’s one of the reasons why this trail is very popular on week-ends. Be prepared  to encounter quite a few people/dogs/mountain bikers in summer and on week-ends.


    The Ascent:

    Icy waters

    The first part was easy to navigate since there is a trail, following a shallow creek. I had to cross the creek every once in a while (approx. 20 times). The (very) low water level in winter keeps your feet dry. The larger problem was the fact that the trail was quite icy. This time of the year the sun can’t reach the ground in the narrow gulch anymore. I was happy that I decided against using my mountain bike for the first part and that I carried my hiking poles – they saved my behind several times.
    I was looking for the ridge I determined on Google Earth to start the bushwhacking portion of the trip. The dense forest did not really help and I finally headed uphills, thinking that I clearly identified the correct spot. Looking at the GPS tracks back home, I missed it by a narrow margin and I sure payed for that mistake. As soon as I got out of the trees, I crossed large areas of mountain mahogany which disappeared higher up leaving me with steep rock outcroppings and the ground covered with cacti and other poky stuff. The views were great though…

    View towards the Poudre Canyon

    I was not willing to give up all the elevation gain and pressed on uphills, looking for a route through the outcroppings – which I finally found. From up there I could see the summit for the first time… and it was still a lot of ground to cover. The good news was that the weather was still nice and warm and that the terrain was free from large trees and other obstacles. Another 1.5 miles of bushwhacking and two more false summits brought me to  WØC/FR-198.

    The elevation profile

    Setup on the summit

    The Summit:
    The summit is large enough to host several activators if necessary. The views are limited due to the relatively low elevation. Some nice/unusual views can be had towards the north-east, looking down into the Canyon. I found some nice trees close to a large drop towards the east to help me guy the antenna. I spend most of my time on 10m until John (WB3LTT) relayed a message from Phil (NS7P) – a very active SOTA chaser/activator – indicating that he cannot copy me on 10m. So I reconfigured my Buddipole antenna for 20m for some more QSOs. Just around 1PM (MST), the wind picked up suddenly as if somebody had turned on a switch. I saw that as a sign that the winter storm was approaching fast and since all the chasers seemed to be satisfied, I started to pack up and head down.

    The Descent:

    The route I took

    I was looking for a better route to avoid the steep rock-outcroppings I had encountered on the way up. I found the ridge I was planning to take on my way up and forced my way through dead trees and thick brush – nothing I really enjoyed. Not sure whether it would be an better alternative to get to summit – maybe the westerly approach is no so bad at all. After a lot of swearing (if a man swears in woods and nobody is there, does it still make a sound?) I reached the bottom and followed the little creek towards east – the direction where I expected to meet the Young’s Gulch trail – which I eventually found. The way back to the trail-head/car seemed to be a lot longer than on my way up –  a clear sign that I was tired after five hours of bushwhacking but I got my SOTA point and another first.

    BTW, the winter storm arrived during the night as predicted and left us with a foot (~30 cm) of fluffy snow  in Fort Collins :)

    Some video impressions:

    httpvh://www.youtube.com/watch?v=bzaWovHJ0IM

    If you would like to leave questions or comments, please do so through Youtube.


    ATTENTION

    !! WARNING !! There are old mountaineers, and
    bold mountaineers… there are no old-bold mountaineers.
    Hiking and mountain climbing are potentially hazardous activities particularly in Colorado with its extreme elevations. I am not accepting responsibility for any death or injury resulting from activations based on my trip reports. Proper training, experience, and personal capability assessment is required – enjoy!