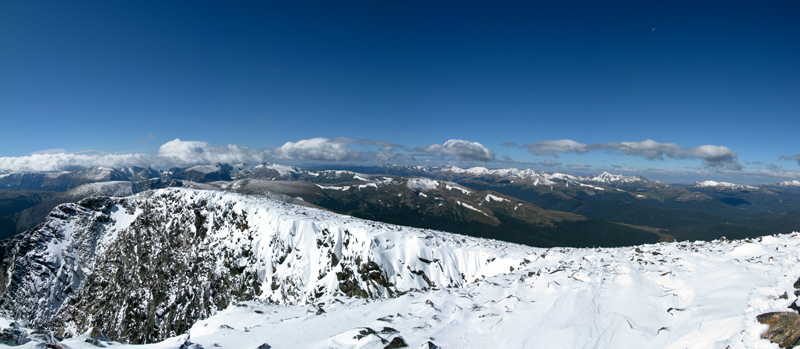
SOTA outings by KØMOS and contributors

Tag: RMNP

  • WØC/FR-Ø68 (Eagle Cliff Mtn.) – 2709 m / 8906 ft

    Eagle Cliff Mountain (WØC/FR-068) is part of the Front Range of the Rocky Mountains – just six miles south of Estes Park, right at the border to Rocky Mountain N.P. (the summit is within RMNP). There is no official trail up to the summit, but it seems to be a popular hike based on the faint network of trails. The ascent can be tackled from either County Road 66 (south slope) or from the RMNP side (NW slope via Moraine Park/Museum parking lot). I have chosen the south side of the mountain because I wanted to activate Emerald Mountain (WØC/FR-Ø58) as well (see separate trip-report) – Emerald Mountain is just a few miles up the road and thus the two make an ideal pair for a double activation. Both hikes are relatively short in terms of miles, but steep. The drive up the Big Thompson Canyon took a little longer than usual due to the fact that the road was still snow-covered with icy spots in some areas. When I exited the canyon near Estes Park, the sky was blue and no cloud was in sight – a welcome indicator for a great day ahead.

    Trailhead: 7836 ft / 2388 m
    Summit:   8906 ft / 2709 m
    Elev. gain: 1216 ft / 371 m
    Roundtrip: 2.3  mi / 3.7 km

    Compare this summit with my other activated summits

    How to get there:
    Take US34 from Loveland towards Estes Park through Big Thompson Canyon. Eagle Cliff Mountain is on the south-west side of Estes Park. Stay on US34 towards Rocky Mountain NP. turn left onto County Road 66 (or Tunnel Road), following the signs to the YMCA campus. The TH is right after you pass the ‘Dunraven Inn‘ on the right side of the road. There is a small dirt road with a metal-gate… you have to be very creative in finding a parking spot for your car (see Red Tape). If you pass the gate to the YMCA, you have gone too far.
    A better option (in terms of parking ) might be to take US-34 into RMNP, then continue towards Moraine Park and park on the Museum parking lot.

    Parking/Trailhead

    View Larger Map

    Red Tape:

    • Eagle Cliff Mtn. is within RMNP – therefore all their rules and regulations apply. RMNP is also a fee area. You don’t have to pay the fee when coming from CR-66 because you will be parking outside of the regular park entrance. If you choose to tackle the summit over the NW-slope, you have to go through the regular entrance and pay the day fee ($20.00).
    • Parking near/along CR66 (Tunnel road) is difficult. All the signs along the gravel strips on the right side of the road are indicating private property, and promise to tow your car.

    The Ascent:
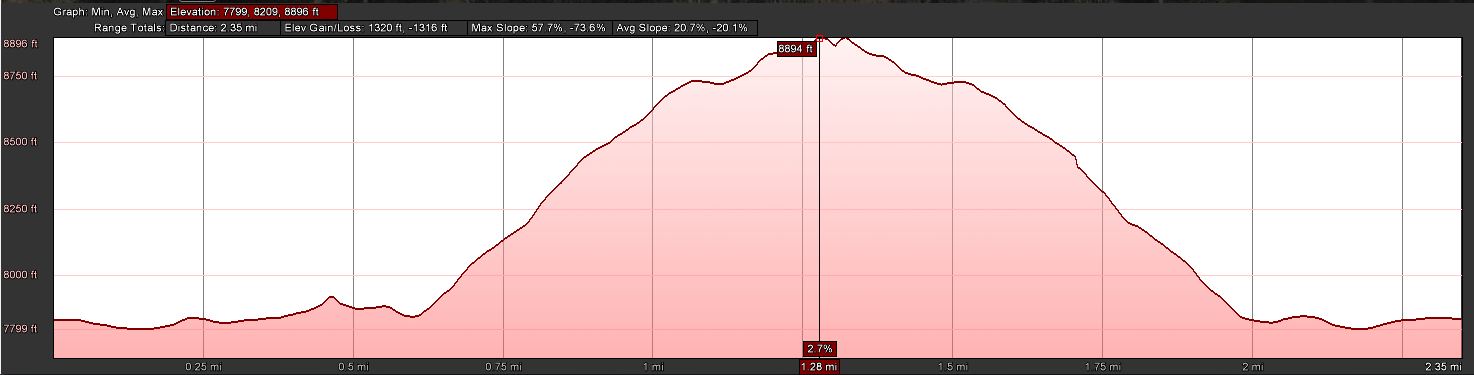
    EagleCliff Mtn – ElevationProfile
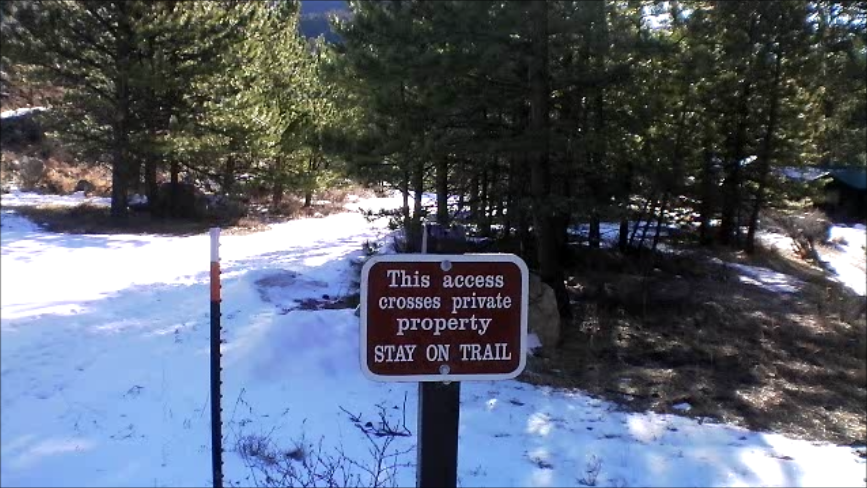
    EagleCliff – Sign

    From CR-66 I hiked west, passing the metal gate on the dirt-road. Two bridges lead over two creeks before the path intersects a trail leading into RMNP (Bear Lake Road). There is private property on your left and right, so make sure to respect the signs. As expected and hoped, most of the snow had already melted away and snow-shoes were not necessary. The ascent is straightforward, with hardly any challenges. You can (almost) see the summit from the base of the mountain and you just aim for it. Pick one of the faint trails through the grassy/brushy and steep slope – all of them seem to end up at the same slightly wooded area in the saddle just below the summit. I tried to stay more on the rocky-section of the mountain (south-west). There are a few rock-outcroppings you have to circumnavigate or, if you feel up to it, you can scramble/climb up with a few easy moves. This route provides mostly unobstructed views into RMNP all the way to the summit.

    The Summit:
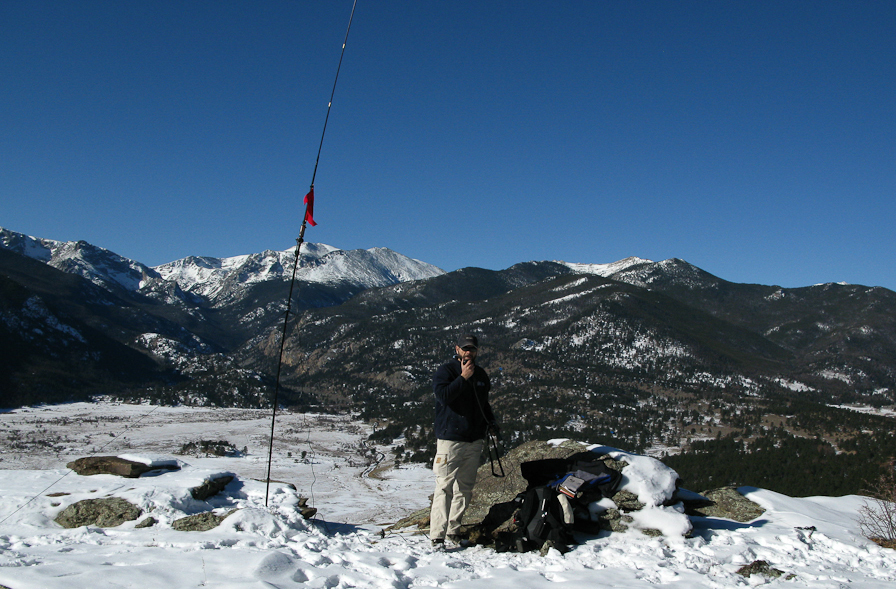
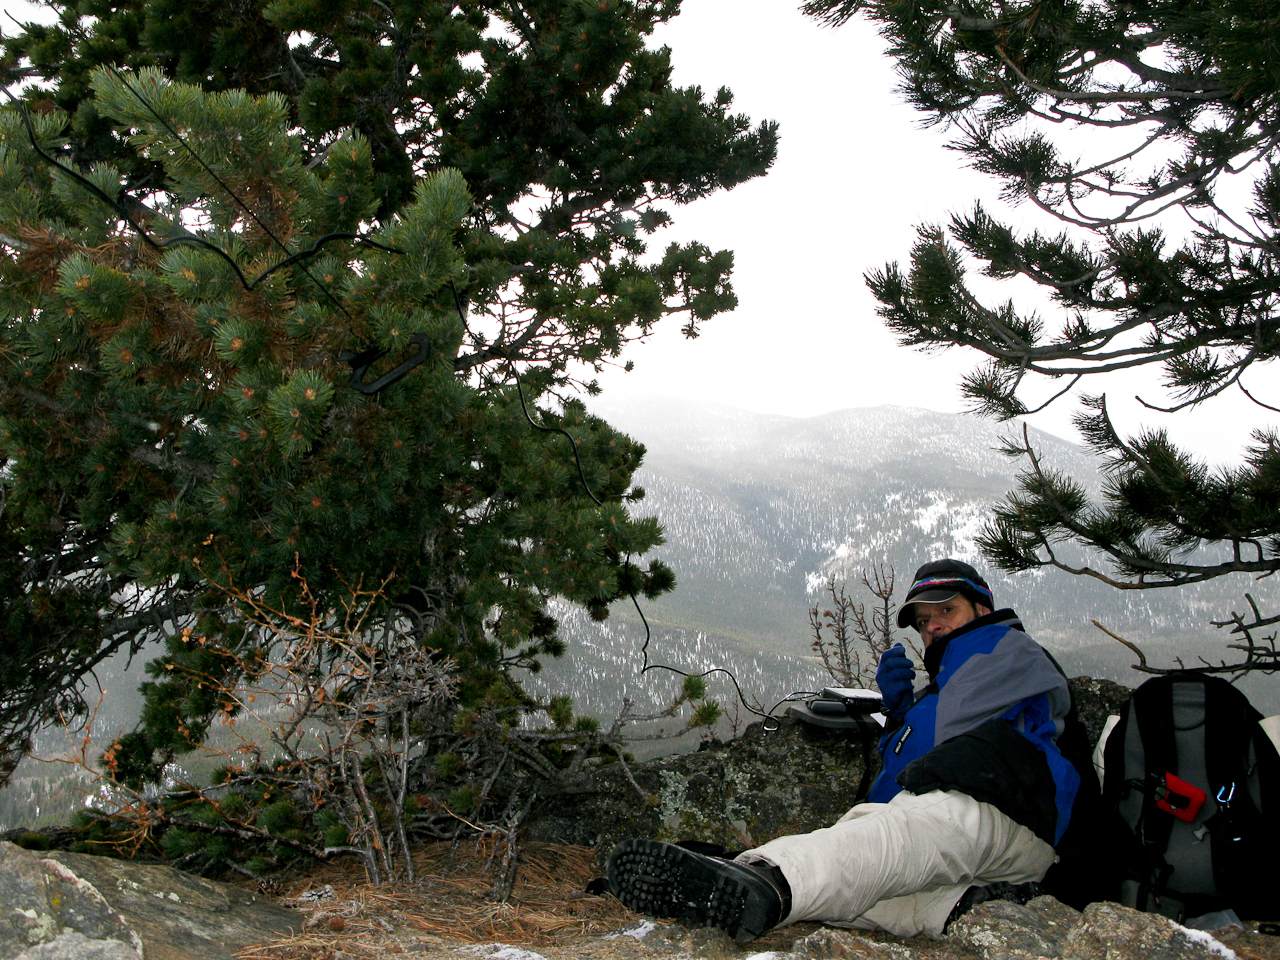
    EagleCliff Mtn. – Operating from the Summit

    There is a steep cliff (~60 feet / 20 m) on the north-side of the summit, giving you a great take-off angle. The views are really spectacular – I know… I say that a lot… and it is always true but in this case you can not only see the massive mountains of the Mummy Range, Never Summer Mountains etc. but you can also look down into the Moraine Park area of RMNP. A rather unique view, giving a great impression of the power of the ancient glaciers. There are plenty of rocks and trees to guy the antenna (and I needed a well guyed antenna due to the winds), and within a few minutes I was calling CQ. I logged my first QSO with Rick (N4EX) @ 1730 UTC. It was my first time on 15m and my Buddipole antenna (vertical Versatee) seemed to perform well on this band. In addition to my regular chasers, I met a few new SOTA chasers on this band. I changed to 20m a little later on, since not all of  my ‘regulars’ could copy me on 15m.

    The Descent:
    I took basically the same route back to the car, hoping that it hadn’t been towed.  The descent was very enjoyable and I went rather slow to enjoy the views.

    Some video impressions:

    httpvh://www.youtube.com/watch?v=nCHxwXusMvs

    If you would like to leave questions or comments, please do so through Youtube.


    ATTENTION !! WARNING !! There are old mountaineers, and bold mountaineers… there are no old-bold mountaineers. Hiking and mountain climbing are potentially hazardous activities particularly in Colorado with its extreme elevations. I am not accepting responsibility for any death or injury resulting from activations based on my trip reports. Proper training, experience, and personal capability assessment is required – enjoy!
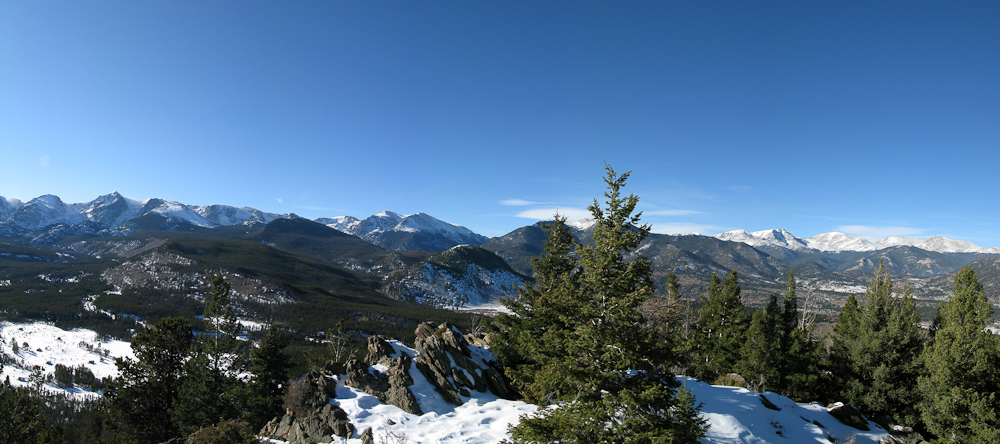
  • WØC/FR-Ø58 (Emerald Mountain) – 2810 M / 9237 ft – 2nd activation

    This was a re-activation for me. If you are looking for all the details on how to get there and other useful info, you can find the original trip-report with the necessary details right here. This post has only a few specifics from today’s activation.

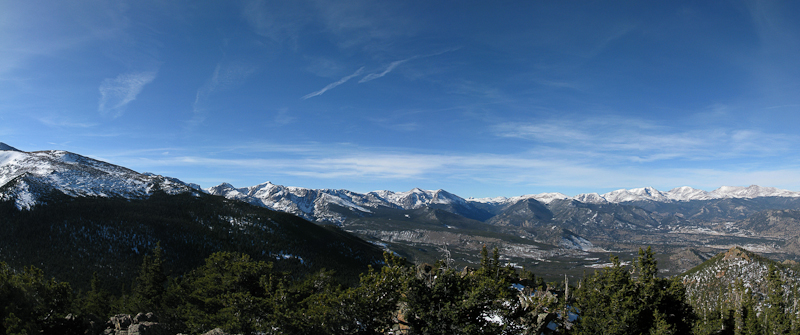
    Emerald Mtn. – View from the summit

    Today’s activation of Emerald Mtn. was my second summit of the day. Earlier I had activated Eagle Cliff Mtn. (WØC/FR-Ø58 ) on 15 and 20m (see separate trip-report) . Since Emerald Mtn. is just a few miles up the road and the weather was gorgeous, a double activation was an obvious choice. With my earlier acquired information about the trail-head and route, the ascent was a breeze. The south slope was almost snow free and snow-shoes were not required. Without the snow I could even find a small stone cairn on the trail to Glacier Basin campground. The cairn is just before you enter an Aspen grove and after a rock outcropping. That’s where I left the trail and headed towards the summit in an (almost) straight line. Distance and elevation gain is almost identical to Eagle Cliff Mountain, making today’s excursion a 4.5 mi (7.2 km) round-trip with a total of ~2500 ft (750 m) accumulated elevation gain.
    Luckily, the S8 noise I experienced last time on this summit was gone – making me believe that it was related to the approaching snow-storm. The winds however were quite strong – even stronger than last time and I had to guy the antenna really well. My extremities started to get cold thanks to the high winds and the fact that I was sitting in the snow  – even-though the sun was out. I packed-up my gear and went QRT after I did not get any further responses to my calls. It was indeed a wonderful day in the mountains.

    Some video impressions:

    httpvh://www.youtube.com/watch?v=pW6KmzYLnOc

    If you would like to leave questions or comments, please do so through Youtube.


    ATTENTION !! WARNING !! There are old mountaineers, and bold mountaineers… there are no old-bold mountaineers. Hiking and mountain climbing are potentially hazardous activities particularly in Colorado with its extreme elevations. I am not accepting responsibility for any death or injury resulting from activations based on my trip reports. Proper training, experience, and personal capability assessment is required – enjoy!
  • WØC/FR-Ø39 (Estes Cone) – 3348 m / 11006 ft – 2nd activation

    This was a re-activation for me. If you are looking for all the details on how to get there and other useful info, you can find the original trip-report with the necessary details right here. This post has only a few specifics from today’s activation.

    Estes Cone: View of RMNP from the summit

    After two days of high winds here in northern Colorado (I clocked 45 mph winds in my back yard – the news reported even higher winds in the mountains of up to 75 mph gusts) the weather forecast for today was excellent. I woke up to 17 degrees F (~minus 8 C) and blue skies. Since everybody in the family had the day off, I was joined by my wife and my daughter – making this a fun family affair. We left the house at nine o’clock with the goal of being at the trail-head of Estes Cone by 10, and on the air by noon local time (or 1900UTC). That’s how I announced my activation on SOTAwatch.org. Since today was a federal holiday, traffic was minimal and the mostly dry roads allowed me to pass through Big Thompson Canyon rather quickly. Nevertheless, we  arrived at the TH 15 minutes later  as expected because I underestimated the time it took to drive from Estes Park to the trail-head.

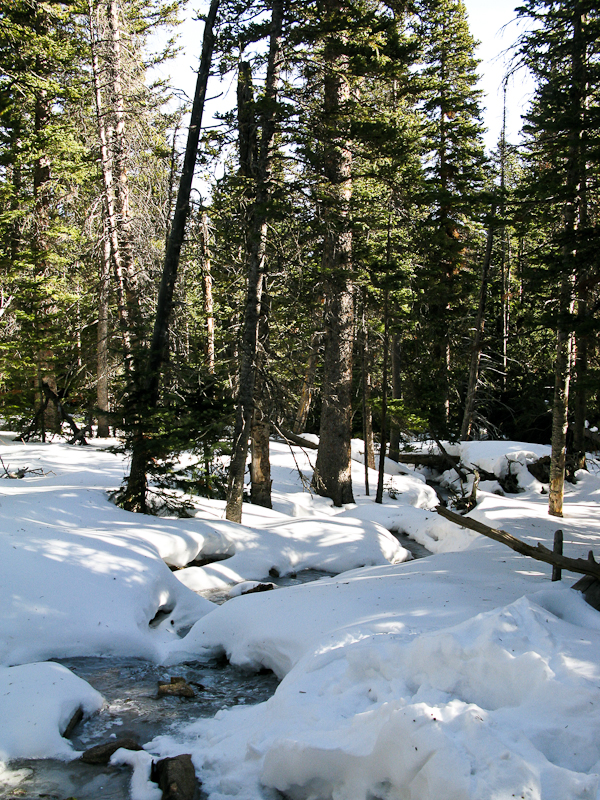
    Estes Cone: On the way up

    Determined to keep my ‘appointment’ on the summit, I shouldered my pack and headed towards the mountain – splitting up our ‘activation team’. My seven year-old cannot yet keep up with me in deep snow and we planned to re-join later somewhere on the trail after the activation.

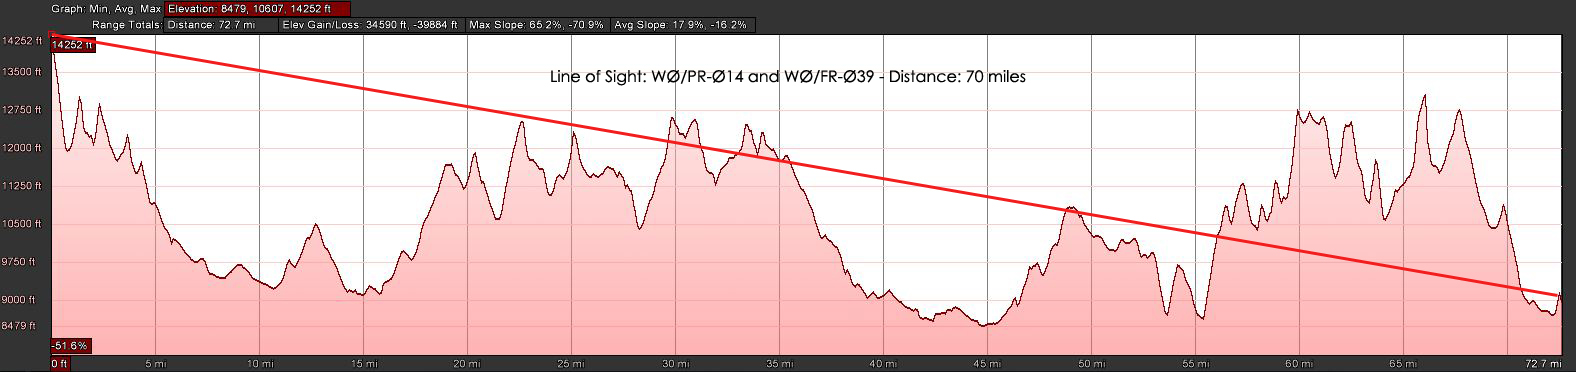
    There were two chances for an S2S contact today, one with VA2OTA on HF and the other with KF6LHX (Tim) who was activating WØC/PR-Ø14 near Breckenridge on VHF – that’s only 70 miles (~115 km), I covered larger distances on my HT before. On my way up, I was able to copy KT5E on 2m saying:”Your are Summits on the what?” and knew immediately that Tim was OTA. I was unable to contact him directly however. I was still in the valley and surrounded by trees and mountains.  I contacted KT5E and he relayed my message to Tim. By the time I arrived on ‘my’ summit he had already moved on – you can’t stay too long at 14236 ft (4339 m) in winter.

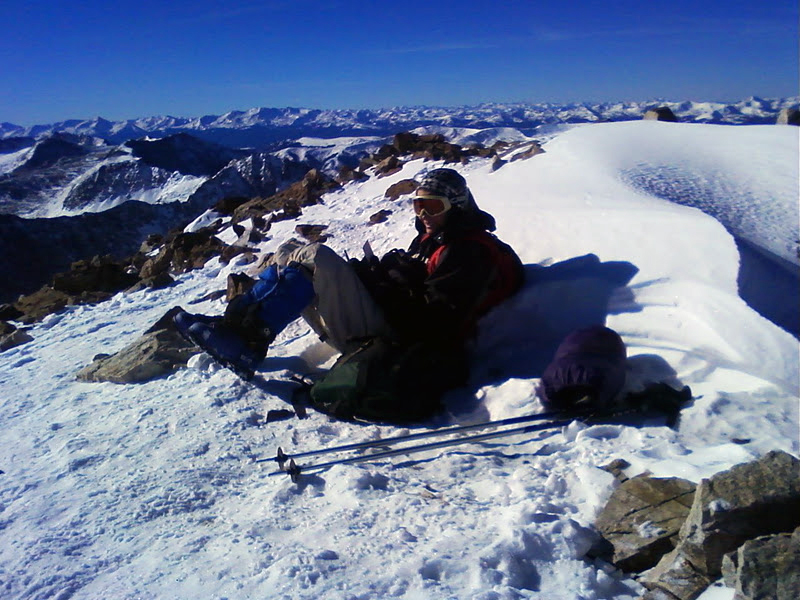
    Photo by Tim – KF6LHX

    You can find Tim’s trip-report on the SOTA reflector and see Tim’s PQL (Personal QSO Logger) shivering at high elevation on the right. Back home I learned that VA2OTA’s activation was cancelled due to bad weather – so that took care of all the S2S contacts possibilities for today.

    Today I looked a little closer at the topography between Quandary Peak and Estes Cone to see whether a contact would have been feasible… it does not look promising (see below):

    Estes Cone: LOS to Quandary Peak (click for larger view)

    It took me an hour and 45 minutes to hike the three miles (~4.5 km) and 2000 ft (~600 m) of elevation through about two feet of (mostly) packed snow. I reached the summit at 11006 ft (3348 m) on-time and logged my first QSO at 19:00 UTC. The wind was blowing pretty strongly and I setup my equipment under the same rock formation than last time – about 30 feet below the summit. That blocked my signal towards the East and South-East but made the high winds a lot more bearable. The views from up here are spectacular. Longs Peak (4344 m / 14255 ft ) and Mt.Meeker (4240 m / 13911 ft ) at a close range (~4 miles / 6.5 km as the crows fly) and the snow-covered Mummy Range with several 13000+ ft (~4000 m) summits towards  the NNW are all within view. On the other side, one can spot beautiful Lily Lake and in the distance Estes Park.

    I tuned the antenna for 17m and started calling CQ. N4EX (Rick) was the first who answered my call on HF and he spotted me as well (thanks Rick). I was forced to move to another frequency after my 12th QSO since some other HAM’s decided to settle on ‘my’ frequency – they did not react to any of my calls and I could not get any other contacts on 17m. Since my extremities started to feel cold, I was tempted to wrap it up and head out of the cold wind. Instead, I opted to give it a try on 20m and re-tuned the antenna, looked for a free frequency and started to announce my presence… no takers after five minutes on this band… time to pack-up and move my body to get warm.

    Estes Cone: In the woods

    I was pretty much running/sliding down the south-westerly facing route to catch-up with the rest of the family. I found them just below the saddle, singing Christmas songs while trudging through the trees on their snow-shoes.

    I was a perfect day in the mountains and it felt great to burn some of the calories which had accumulated around my waist over the holidays – too bad I could not reach Tim for a S2S.

    Some video Impressions:
    httpvh://www.youtube.com/watch?v=NFeMLIAqpdA

    If you would like to leave questions or comments, please do so through Youtube.


    ATTENTION !! WARNING !! There are old mountaineers, and bold mountaineers… there are no old-bold mountaineers. Hiking and mountain climbing are potentially hazardous activities particularly in Colorado with its extreme elevations. I am not accepting responsibility for any death or injury resulting from activations based on my trip reports. Proper training, experience, and personal capability assessment is required – enjoy!
  • WØC/FR-Ø58 (Emerald Mountain) – 2810 M / 9237 ft

    I got up at 6:00 AM this morning, facing a moderate 18 degrees F (approx. -8C) and clear skies outside – just a sliver of the moon and clouds over Longs Peak towards the west. A winter storm warning was issued for later in the day, but I thought I had enough time to activate WØC/FR-Ø58 (Emerald Mountain). The dogs were not too excited to go for a walk in the dark and at these freezing temperatures – but I guess they were relieved that they did not have to join me on the mountain.
    The drive up through Thomson Canyon followed the frozen river all the way up to Estes Park. Entering Estes Park through US34 always presents a perfect overview of the surrounding mountains. Even though I was still driving under clear skies, clouds were settling in the mountains in every direction – guess the weather forecast had not lying.

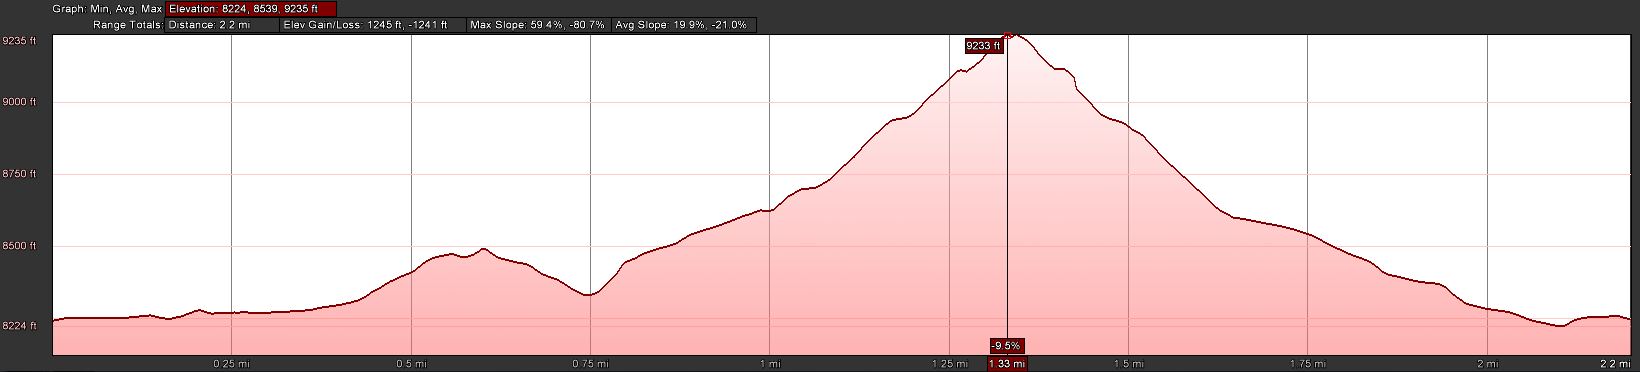
    Trailhead: 8244 ft / 2513 m
    Summit:   9237 ft / 2810 m
    Elev. gain: 1245 ft / 380 m
    Roundtrip: 2.2  mi / 3.5 km

    Compare this summit with my other activated summits

    How to get there:
    Take US34 from Loveland towards Estes Park through Big Thompson Canyon. Emerald Mountain is on the south-west side of Estes Park. Stay on US34 towards Rocky Mountain NP. Go left on County Road 66 (or Tunnel Road), following the signs to the YMCA campus. Follow the road all the way to the end. There is a campground at the very end – so is the East Portal of the Big Thompson Project Pipeline. Park your car at the loop of the road (there is room for about 10 cars on a gravel strip at the south side of the loop.

    Parking/Trailhead

    View Larger Map

    Red Tape:

    East Portal

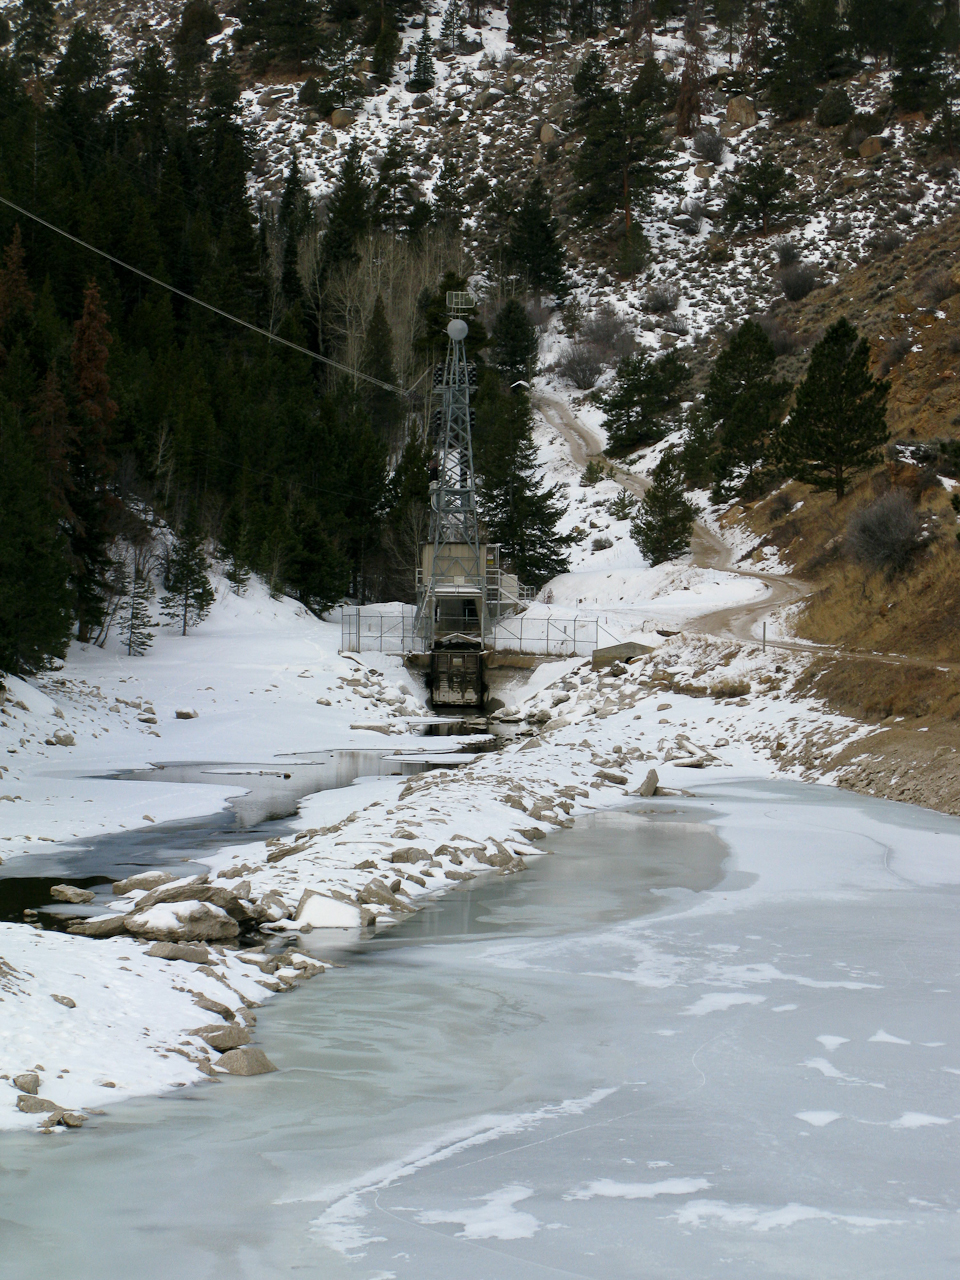
    At the East Portal of the Big Thompson Project Pipeline is a small (really small) reservoir – and the surrounding area is Federal property. You are not supposed to park, fish, boat, pee etc. within 100 yards of the dam – Homeland security and such. Emerald Mountain is – at least partially – within the RMNP, ergo it is a fee area and their rules apply (no dogs etc.) I am not sure about RMNP entry fees… since the trail starts outside of the park, I think you are not required to have a NP pass. I have a yearly pass anyway and did not investigate this aspect so far.


    The Ascent:

    Elevation Profile

    I selected the south face of the mountain for my ascent. It can be tackled from almost any side but I was hoping that the south would  have less snow compared to the other options. In addition, for part of the way I could use a trail going from the East Portal TH to the Glacier Basin campground in RMNP. I just passed the reservoir of the East Portal when I realized I forgot my camera in the car… so I turned around to get it. That is when I broke my sun-glasses… not that I needed them today but still… #$@%. Walking back to the reservoir, snow flurries started to fall and a stiff wind came up from the west. I continued the road uphills when a Jeep drove towards me, driving downhills but backwards? It was  Sam, a RMNP Ranger patrolling ‘his’ park. We talked for almost half an hour. He was very interested in SOTA and I was interested in his insider’s know-how of all the different routes to SOTA summits in the park and around Estes Park. We finally parted ways and I headed uphills in a (almost) straight line, trying to make up for lost time to keep my appointment on the summit. Luckily the south face was almost snow free – even better, the soil was frozen and I made good time. Every now and then, I could even see a faint trail going up the mountain.

    The Summit:
    The summit is rather small. I pretty much used up most of the space with my antenna guy-lines. It could host two small teams of activators. There are some rocks which can provide shelter from the wind – unfortunately the lee side was filled in with a deep snow drift. I had about six inches of snow on the top with some clear areas under (Christmas) trees – I claimed this spot immediately as my operating position.

    Operating position

    Setting up the equipment and antenna took a little longer than usual – fiddling with  Buddipole coil-taps with cold fingers is not easy. I did not want to drop one into the snow. Turned on the SWR analyzer and…. nothing… lets hope it is just an empty battery. So I had to use the internal meter of the FT-817. Turned on the radio on 20m and I experienced S8 noise throughout the band… I am used to S8-S9 noise at home but on a summit? No clue why… I had activated several summits nearby and never before had an issue on 20. Two adjustments to the counterpoise and I was on the air, calling CQ 20 minutes ahead of plan. The temperature was below freezing and the wind ~15-20 mph (guesstimate). There was a small blue cloud and the sun tried to peak out every now and then but finally gave up, overwhelmed.
    Thanks to the high noise level, I could only hear strong stations. After 12 contacts on 20m in 25 minutes I had to wrap it up. My feet and hands started to get uncomfortably cold and I was shivering.

    The Descent:
    Soon after leaving the summit it got warmer. Getting out of the wind and moving my body certainly felt good. I soon found a faint trail and followed it all the way down directly to the car – a route I would recommend to the next activator.

    Some video impressions:
    httpvh://www.youtube.com/watch?v=PcCG2f8j5og

    If you would like to leave questions or comments, please do so through Youtube.

    I activated this summit again on January 10th, 2012. You can find the trip-report right here.


    ATTENTION !! WARNING !! There are old mountaineers, and bold mountaineers… there are no old-bold mountaineers. Hiking and mountain climbing are potentially hazardous activities particularly in Colorado with its extreme elevations. I am not accepting responsibility for any death or injury resulting from activations based on my trip reports. Proper training, experience, and personal capability assessment is required – enjoy!
  • WØC/FR-Ø50 (Lily Mtn.) – 2977 m / 9786 ft

    On Tuesday we got a foot (~30 cm) of snow  down here in Fort Collins, and at least as much in the mountains.  The weather forecast predicted nice and sunny weather for Thursday and Friday, before a another chance of nasty weather for Saturday (typical Colorado fall weather). So for Friday, I picked Lily Mountain (WØC/FR-Ø50) – a short 4 mile (~6.5 km) round-trip – for my next activation.  This summit is right next door to last week’s activated Estes Cone (WØC/FR-Ø39), just a few miles outside Estes Park and the Rocky Mountain National Park (RMNP), and should provide some pretty nice views of the surrounding mountains, covered in fresh snow. I grabbed my snowshoes, Sorels, Pulka and other winter gear and headed to the mountains.

    Trailhead: 8799 ft / 2682 m
    Summit:   9786 ft / 2983 m
    Elev. gain: 1684 ft / 513 m
    Roundtrip: 3.4 mi / 5.5 km

    Compare this summit with my other activated summits

    How to get there:
    Take US34 from Loveland towards Estes Park through Big Thompson Canyon. In Estes Park, take Highway 7 (S St. Vrain Avenue) to the Lily Lake area (turn left). The trail-head is approximately at mile-marker 6, just after passing through some rock cuts made for the road. It is not well marked and in on the right side (west) of the road (coming from Estes Park). If you pass Lily Lake, you missed it – but make sure to take a look at the very scenic Lily Lake area to make the detour worth your while.

    Parking/Trailhead

    View Larger Map

    Red Tape:

    Lily Mountain TH

    The trail-head has only room for a few cars (approx. 5-6). There is more room further up in the Lily Lake area and you can walk back to the trail-head (~ half a mile). There are no facilities, water, maps or anything like that… just a sign indicating that you are indeed at the Lily Mtn. TH. Lily Mtn. is part of the Roosevelt National Forest and all their rules apply. It is one of the few trails near Estes Park which is not on NP land – it is therefore a popular hike for dog-owners. There is cell-phone coverage all the way up to the mountain… so make sure to turn it off for an undisturbed experience.

    The Ascent:

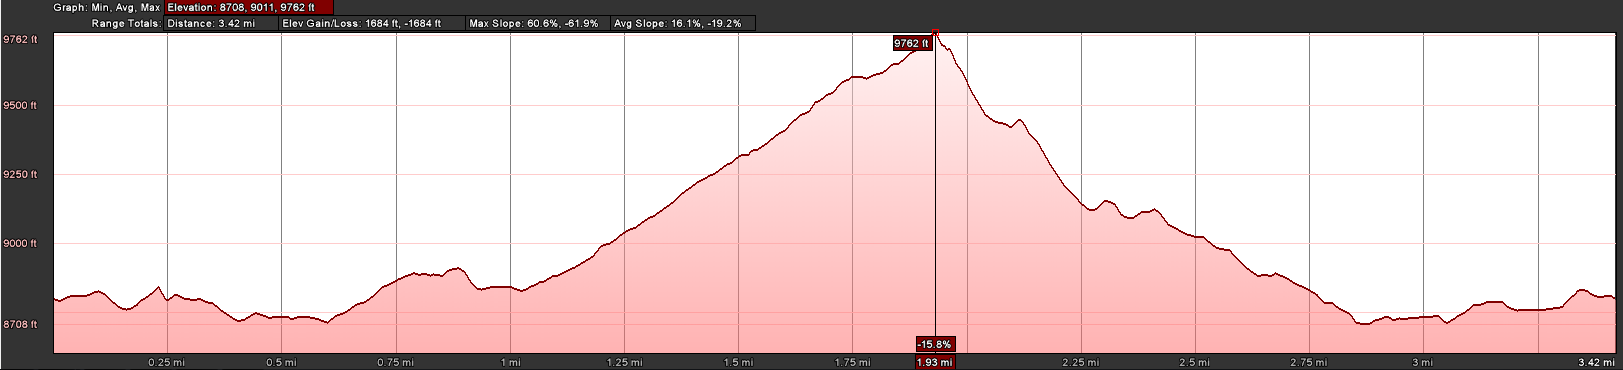
    The Elvation Profile

    Based on the snow situation at the trail-head, I opted for hiking boots/gaiters instead of Sorels and snowshoes. Even though the snow got deeper and deeper reaching higher elevations, I still think it was a good decision based on the terrain.  It was easy to follow the trail at first, I could even follow some tracks made by a hiker ahead of me until his tracks deviated too much from my plotted route to the summit. On the first half of the trail, I hardly gained any elevation – an indicator that it will get quite steep at some point (see elevation profile above). The trail parallels the highway which can be occasionally seen (and heard) until the trail turns sharply to the south-west. That’s where I got deeper in the woods, on steeper terrain and in deeper snow which made it hard and sometimes impossible to follow the trail. The GPS with the necessary way-points sure helped me find the way up to the top. The final several hundred feet to the summit requires the use of all of your extremities to get up and during the last ~30 ft (10m) of elevation you have to do some climbing moves to get to the top of the rock-outcropping where the summit is.

    The Summit:
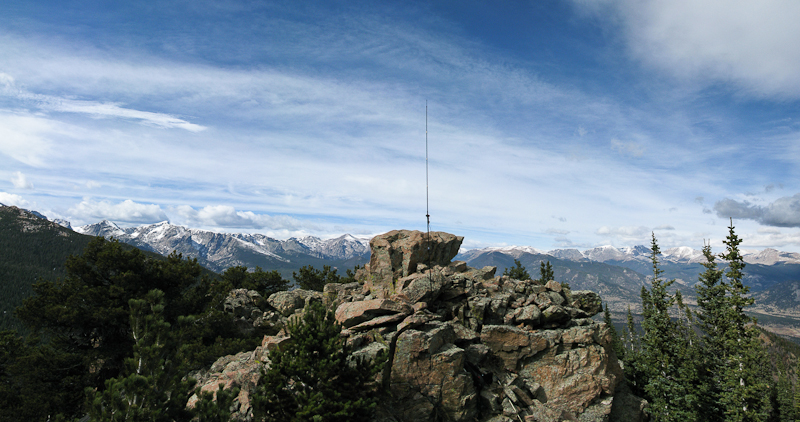
    The first thought was: “wow – what a view…” and the second was: “careful” – since the summit is not very large and the snow and ice on-top made it even smaller to move around safely.

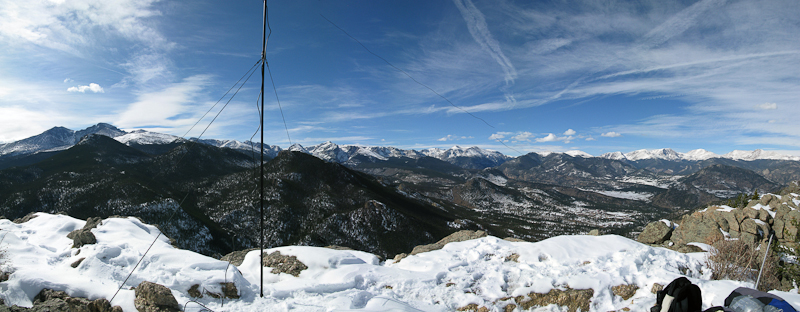
    Panoramic views from the summit

    The weather was cooperating very nicely, there was hardly any wind and the sun on my back warmed me up to a comfortable temperature, even without wearing all my jackets. First, I took some pictures and enjoyed a cup of hot tea, before setting up the equipment. The small size of the summit with the very steep cliff made it difficult to anchor the guy-lines properly. Nevertheless, I felt comfortable with the setup since there was only a light breeze. Naturally, that turned out to be a false sense of security… a sudden gust knocked down the antenna during my QSO with Tom (KZ7ZZ ) – and I lost him for a minute (sorry Tom).

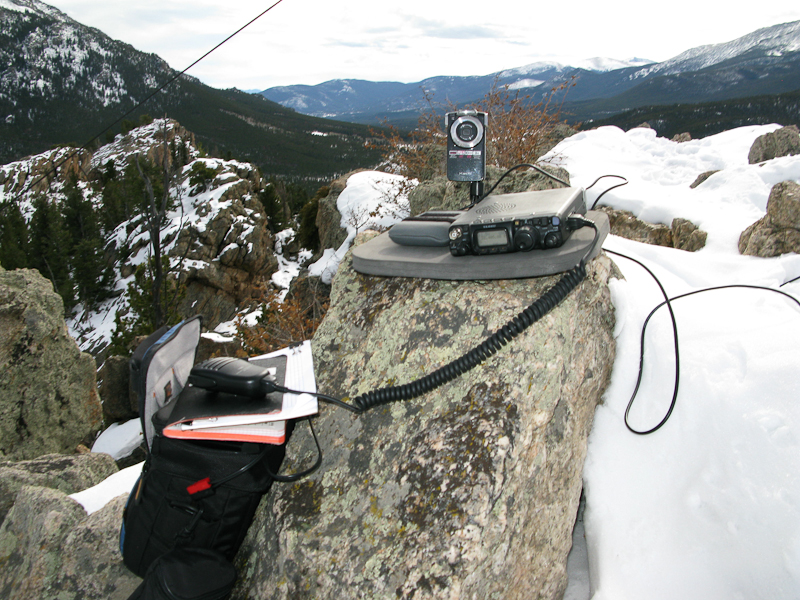
    FT-817ND on the summit

    Luckily I was able to catch the mast before it tumbled down the cliff. The fact that I was using a shock-corded whip (instead a ‘normal’ whip) for my vertical Buddipole saved me from buying a replacement whip (again). After rectifying my mistake, I not only had contacts with the regular SOTA chasers (thanks guys), but also talked to some folks who had never heard of SOTA before. Hopefully I sparked an interest for SOTA with these HAMs. I made contacts on 20m and 10m, the highlights certainly the QSOs with CM6FJJ (Javier in Cuba) and KP4/NØAX currently on a DXpedition in Puerto Rico (~4500 km), all with 5W into a BP.

    The Descent:

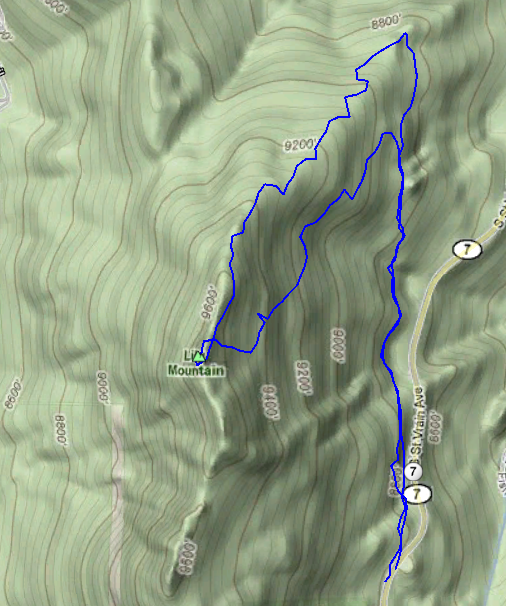
    The route I took

    I wanted to avoid to climb down the steep cliff I came up. Therefore I was looking for an alternate route down the summit. Unfortunately I missed my tracks at the bottom of the summit and had to bushwhack (snow-whack?) my way down to the TH, making it a much steeper route than planned (see route on the right). The snow and ice covered rocks and dead trees did make for a challenging descent.

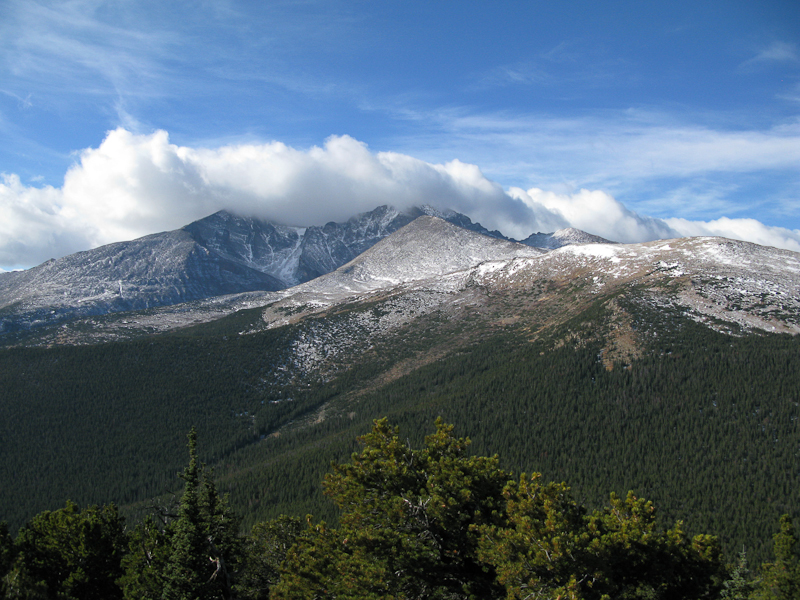
    Nevertheless, it was a great day to activate a summit – quite warm conditions, with incredible views into the snow covered mountains in and around the Rocky Mountain National Park.

    Some video impressions:
    httpvh://www.youtube.com/watch?v=xvbF-zQnYNk

    If you would like to leave questions or comments, please do so through Youtube.


    ATTENTION !! WARNING !! There are old mountaineers, and bold mountaineers… there are no old-bold mountaineers. Hiking and mountain climbing are potentially hazardous activities particularly in Colorado with its extreme elevations. I am not accepting responsibility for any death or injury resulting from activations based on my trip reports. Proper training, experience, and personal capability assessment is required – enjoy!
  • WØC/FR-Ø39 (Estes Cone) – 3348 m / 11006 ft

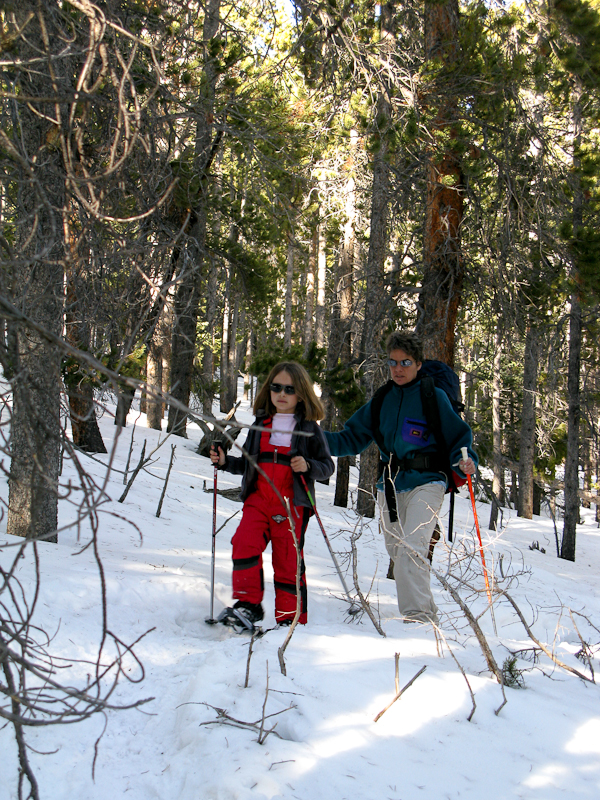
    It’s NA SOTA Day!  Since I just returned from an overseas trip the day before, I was looking for an activation which does not need a lot of planning. So I went out  to activate Estes Cone (WØC/FR-Ø39) which is located at the border of Rocky Mountain National Park (RMNP) and Roosevelt National Forest, just a few short miles south from Estes Park. The trail-head is shared with the Longs Peak trail-head. Due to the popularity of Longs Peak (WØC/FR-11Ø – 14259 ft / 4346 m) in summer, the parking lot fills up (very) quickly in the morning.  The weather forecast was calling for a sunny day. The freezing conditions at the TH combined with the altitude and winds  were an indicator for a chilly activation.

    Trailhead: 9537 ft / 2907 m
    Summit:   11006 ft / 3348 m
    Elev. gain: 2000 ft / 610 m
    Roundtrip: 6.0 mi / 9.7 km

    Compare this summit with my other activated summits

    How to get there:
    Take US34 from Loveland towards Estes Park through Big Thompson Canyon. In Estes Park, take Highway 7 (S St. Vrain Avenue) to the Lily Lake area. The nine mile drive is very scenic and represents the Estes Park area very well. Right at mile-marker 9, turn right (west) onto Longs Peak Road  and follow the road up the hill until the parking lot/trail-head/Ranger station. Everything is marked very clearly and it is easy to find.

    Parking/Trailhead

    View Larger Map

    Red Tape:
    There are no fees, even-though the trail is on RMNP area. No dogs are allowed on the trail. Parking lot fills up quickly in summer early fall due to the popular Longs Peak hike.

    The Ascent:

    Estes Cone as seen from the road

    From the trail-head, you follow the trail to Longs Peak. It’s well marked and the trail is in great shape. The moderate ascent leads you though mainly pine forest with very few openings. After approx. half a mile, it splits from the Longs Peak trail – keep right towards Estes Cone. The trail continues through conifers until you encounter a small creek. A wooden bridge is provided to keep your feet dry. On the opposite side of the creek is an old and abandoned gold mine (Eugenia Mine). Based on a sign on the remaining log cabin, it was not a very productive endeavor.
    Shortly after the mine you will reach the Moore Park back-country campsite at about 9730 feet (2966 m). The trail gets steeper and most of the net elevation gain is in the last 1.0 miles. You will notice the change in pace after the last split of the trail. Now it is not just steep, but also rocky and harder to navigate, since a clear trail is no longer visible. Just follow the stone cairns – there are a lot of them. Still, sometimes they are hard to spot.
    You can reach the very top of the cone by scrambling up a scree.

    The Summit:
    The 360-degree views from the top are stunning. Nearby Longs Peak and Mt. Meeker had a cloud cover and the wind was blowing hard from north-west, making it a chilling experience. I had to wear all of  the clothes I had carried up. I took a few quick photographs/videos ‘balancing’ at the top, when a strong gust blew  my baseball cap down into the trees – so much for leaving no trace. I decided to take advantage of the activation zone defined by the SOTA rules by climbing down ~25 feet, looking for a sheltered spot to setup my gear. I found a good spot on the lee side of the mountain. Perched like a bird, I sat under some big rocks which made the cold wind bearable.

    I was perched under these rocks to get out of the wind – Buddipole as high as possible

    The setup was made quickly, even-though it was quite steep and I had to make sure not to loose more equipment. I did not dare to get the solar panel out since the wind was still blowing at about 20-30 miles/h. I was joined by a chipmunk after a while – he was not shy at all and was running over my FT-817 and tried his teeth on the rubbery cord of the microphone. That’s when he crossed the line with me and I had to send him home to his tree. The wind died down a little after 12:00 o’clock making the experience a little warmer and nicer. Another hiker was quite interested in my activities. Overhearing my QSO with Ws1K in MA (~1800 mi / 2900 km), he was impressed to hear that this was possible with just 5 W.

    View of Longs Peak and Mount Meeker

    The Descent:
    After spending more than two hours under my rock, I felt kind of stiff and packed up my gear and headed down the same way I came up. I had been successful in activating a new summit (first activation) and collect my points.

    Some video impressions:
    httpvh://www.youtube.com/watch?v=6nFI1NCkRsc

    If you would like to leave questions or comments, please do so through Youtube.

    I activated this summit again on January 2nd, 2012. You can find the trip-report right here.


    ATTENTION !! WARNING !! There are old mountaineers, and bold mountaineers… there are no old-bold mountaineers. Hiking and mountain climbing are potentially hazardous activities particularly in Colorado with its extreme elevations. I am not accepting responsibility for any death or injury resulting from activations based on my trip reports. Proper training, experience, and personal capability assessment is required – enjoy!
  • WØC/FR-Ø37 (Twin Sisters Pk. East) – 11404 ft / 3476 m

    Twin Sisters Peak East (WØC/FR-Ø37) is located at the border of Rocky Mountain National Park (RMNP) and the Roosevelt National Forest, just a few short miles south from Estes Park. There is a new trail-head which is not marked on the relatively old USGS maps. The trail eventually joins the one on the map. The weather forecast was excellent (temps near record highs) – what a difference a week can make. During last week’s activation of Ypsilon Mountain (WØC/FR-ØØ9) in the same area we had single digits temperature (5-10 F or ~minus 20C) compared to upper 70s  (20-25 C) today. What made the trip even more enjoyable was the company of my wife.

    Trailhead: 9192 ft / 2386 m
    Summit:   11404 ft / 3476 m
    Elev. gain: 2939 ft / 896 m
    Roundtrip: 7.0 mi / 11.3

    Compare this summit with my other activated summits

    How to get there:
    Take US34 from Loveland towards Estes Park through Big Thompson Canyon. In Estes Park, take Highway 7 (S St. Vrain Avenue) to the Lily Lake area. The approx. seven mile drive is very scenic and represents the Estes Park area very well. Between mile-marker 6 and 7 (just across Lily Lake) take a left (east), bypass the visitor center and follow the dirt road up the mountain until the road ends. There is parking on the right side of the road only. Everything is marked very clearly and easy to find.

    Parking/Trailhead

    View Larger Map

    Red Tape:
    There are no fees, even-though the trail crosses RMNP area. No dogs are allowed on the trail.

    The Ascent:

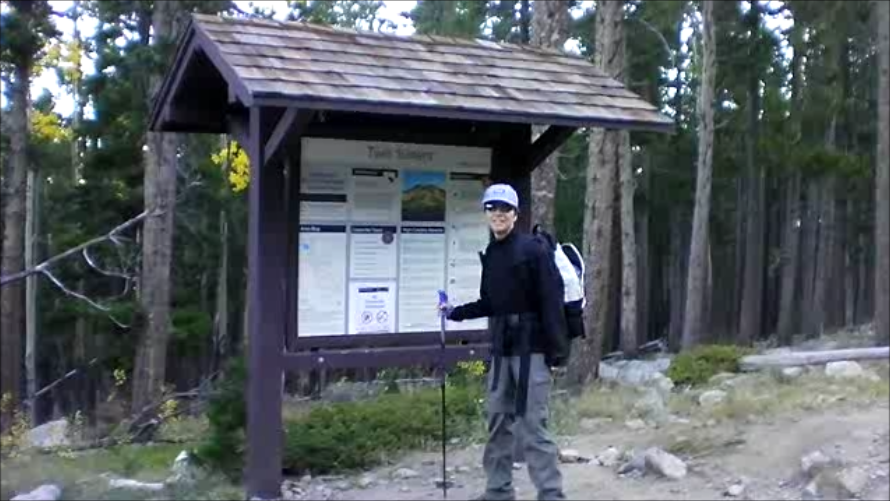
    The Trail-head

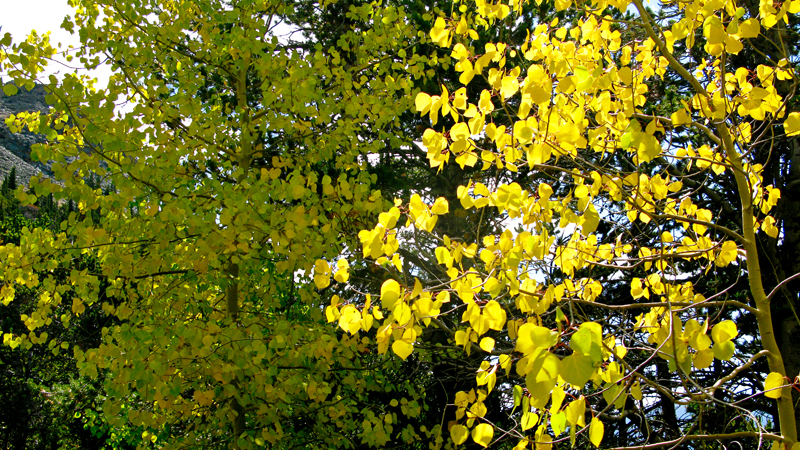
    The official trail-head is about 0.5 miles from the parking area on an old logging road with the usual trail-head signs and posters. From there, the well maintained trail leads in and out of NP land through a uniform (boring?) lodgepole forest with only scarce views of the surrounding mountains. The lodgepole pines are eventually replaced by  fir and spruce trees and patches of Aspens. Thanks to last week’s cold weather pattern, the leaves were already turning golden, creating a very

    Aspens in full fall colors

    nice contrasts in the early morning sun. The higher we climbed, the better the view of nearby Longspeak (14259 ft / 4346 m), Mt. Meeker (13911 ft / 4240 m) and Estes Cone (11006 ft / 3355 m). After reaching the treeline at approx 11000 ft / 3350 m, the Twin Sisters Peaks are visible for the first time. The trail above the treeline leads over a barren, exposed scree-laden path to the saddle between the West and East peak. Either summit can be easily reached. The last 30 ft elevation to the east peak requires some scrambling.

    The Summit:
    Besides the unobstructed views, the summit also provides comfortable  and wind-sheltered space to setup the equipment. There is ample space for several SOTA teams if necessary.

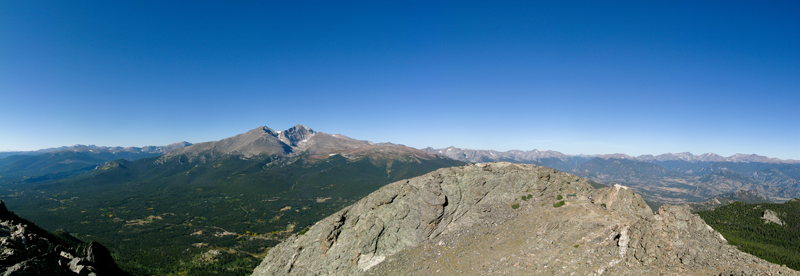
    View of Longspeak and Mt. Meeker from the summit

    We had the summit exclusively  for ourselves for about an hour. Then, the hikers started to come in thick and heavy. The number of established contacts was disappointing on 20m as well as 40m and 2m. I just made five contacts on the three bands even though the conditions were not bad at all.

    The Descent:
    After about two hours on the warm and sunny summit we descended the same way we came up.

    Some video impressions:

    If you would like to leave questions or comments, please do so through Youtube.


    ATTENTION !! WARNING !! There are old mountaineers, and bold mountaineers… there are no old-bold mountaineers. Hiking and mountain climbing are potentially hazardous activities particularly in Colorado with its extreme elevations. I am not accepting responsibility for any death or injury resulting from activations based on my trip reports. Proper training, experience, and personal capability assessment is required – enjoy!
  • WØC/FR-ØØ9 (Ypsilon Mountain) – 13514 ft / 4119 m

    Ypsilon Mountain (WØC/FR-ØØ9) is located in Rocky Mountain National Park (RMNP) and is part of the Mummy Range. The Mummy Range is a sub-range of the Front-Range of the Rocky Mountains and consists of six 13’ers (and a slew of lower ones). Starting with Mount Chapin in the south-west, it arcs to the north-east and ends with Signal Mountain. Some of the more prominent peaks are also SOTA summits. Ypsilon Mtn. was first activated about a month ago by N7UN (Guy) – here is his activation report.

    The trip was planned for Sunday and we got the first snow-fall of the season on the Wednesday before. Thus, the access road to the trail-head was closed by the Park-Service  on Thursday but re-opened on Friday. The weather forecast was great for Sunday, and even better – my wife was going to join me on this trip as well – all signs pointed towards a great trip.

    The original plan was to activate Fairchild Mountain (WØC/FR-Ø1Ø – 4115 m / 13502 ft) which is just a mile or two from Ypsilon Mountain. However, after reaching the steep ridge joining Ypsilon and Fairchild Mountain we reconsidered the plan for safety reasons. The amount of snow and ice on the ridge combined with the high winds (30-40 mi/h) made us abandon the plan and we climbed Ypsilon Mtn. instead.

    The first few peaks in the south-west of the Mummy Range can be reached from the Chapin Pass trail-head.

    Trailhead: 11041 ft / 3365 m
    Summit:   13514 ft / 4119 m
    Elev. gain: 3019 ft / 920 m
    Roundtrip: 7.34 mi / 11.8 km

    Compare this summit with my other activated summits

    How to get there:
    Take US34 from Loveland to Estes Park through Big Thompson Canyon. In Estes Park, stay on US34 and enter RMNP through Fall River Entrance Station. Just after Sheep Lakes, take a right onto Old Fall River Road – a one way dirt road going all the way up to the RMNP Alpine Visitor Center. The dirt road is in pretty good shape but be careful in some of the switchbacks if you do not have a high-clearance vehicle. Around mile-marker six, the trail-head is on the right side of the road and the car can be parked across the road. Space is limited to 10-12 cars max.

    Parking/Trailhead

    View Larger Map

    Red Tape:

    • RMNP charges an entrance fee of $20/car (valid for seven consecutive days). The usual passes are accepted as well. For details check their website.
    • Old Fall River road is a one-way dirt road which is often closed due to adverse weather conditions. You can check the road conditions on this website.
    • Few parking spots – you have to be early to claim your spot at the TH.
    • It is high country… weather conditions can change really fast. Afternoon lightning storms are not uncommon in summer.

    The Ascent:
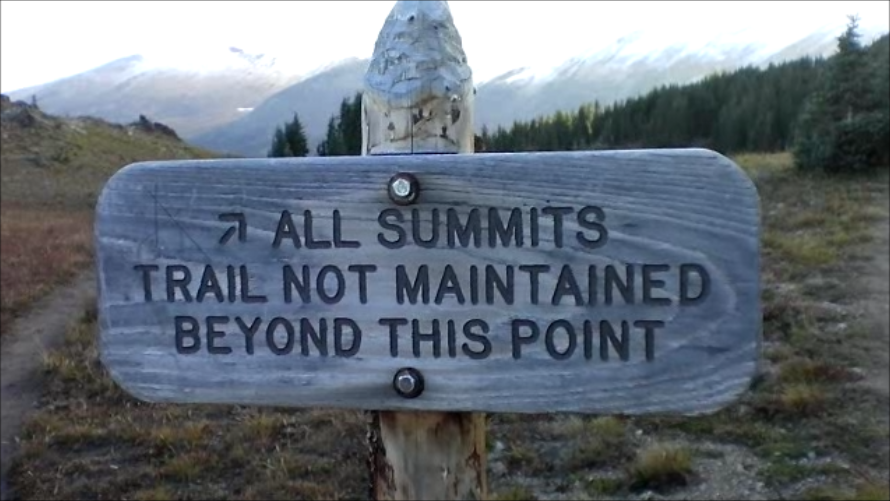
    The first section of the trail leads through large and mature pine trees. The trail is well established and clearly marked by NP signs. After reaching the treeline, a last sign  indicates

    To all summits

    the direction to reach ALL SUMMITS and the fact that the trail is not maintained beyond the sign. Nevertheless, it is quite easy to follow the rock-slide area to the saddle between Chapin (3795 m/12454 ft) and Chiquita Mountain ( 3983 m/13069 ft). Here we experienced the first snow on the ground and extreme winds on the saddle. We followed the trail up to the fake summit of Ypsilon Mtn. Walking upright and in a straight line was rough at times – the icy, howling wind felt like a thousand needles in the face and the summit was engulfed in blowing snow and ice crystals. It felt, sounded and looked more like an ascent to Nanga Parbat – but the GPS confirmed that we are still in Colorado. We tried to stay on the contour line leading directly to the ridge between Ypsilon and Fairchilk Mountain to avoid unnecessary elev gain/loss. A trail was no longer available/visible. The rocky and barren surface was covered by wind-pressed snow and ice. On several occasions I sank into deep snow-drifts well above my knees. However, the route is easy to pick – there are no obstacles to navigate.

    The Summit:
    The summit offers incredible views in all directions. It also provides two stone wind-shelters which were filled with drifting snow and could unfortunately not be used at all – leaving us exposed to the howling winds.

    Panoramic view from the summit

    Under normal circumstances the summit provides ample space to set up the equipment – however, the low temperatures (~10 to 15 F [-12 to -15 C] ) and high winds (~30-40 mi/h) made my teeth chatter (literally), and taking off the gloves was not something I was looking forward to either. Setting up the equipment for 15-20 minutes under this conditions was just not an option. In order to still be able to activate the summit and claim my SOTA points I used my HT on 146.52 MHz to quickly get some QSO’s. I wrapped it up within 5 minutes on the summit, took a few snapshots, put my gloves back on (trying to get the blood flowing in my fingers again ) and we headed downhills with the wind now in our face.

    The Descent:
    It was a quick retreat against the wind, following basically the same route. We had not had an opportunity yet to eat lunch, and we were looking for sheltered space. There was nothing until we reached the treeline – it was still cold but getting out of the wind after more than 5 hours was a nice change.
    To get back to Estes Park, we had to follow the Old Fall River Road up to the Alpine Visitors Center of the RMNP. From there we took Trail Ridge Road east – a quite scenic drive through the heart of the Rockies.

    Some video impressions:
    The weather conditions were not ideal to take a lot of photo/video shots. I only have a few clips when the wind was not too bad.
    httpvh://www.youtube.com/watch?v=-K1YZeKOido

    If you would like to leave questions or comments, please do so through Youtube.


    ATTENTION !! WARNING !! There are old mountaineers, and bold mountaineers… there are no old-bold mountaineers. Hiking and mountain climbing are potentially hazardous activities particularly in Colorado with its extreme elevations. I am not accepting responsibility for any death or injury resulting from activations based on my trip reports. Proper training, experience, and personal capability assessment is required – enjoy!