SOTA outings by KØMOS and contributors

Tag: mountain

  • OE/VB-494 (Hochälpele) – 1464 M / 4803 ft

    After yesterdays activation of the ‘Galinakopf’ (OE/VB-287) under perfect conditions, I selected a less challenging summit for this Sunday. The dart I threw at the map landed closest to ‘Hochälpele’ or OE/VB-494 – a summit close to the previously activated ‘Geißkopf’. The ‘Hochälpele ’ is also part of the ‘Bödele‘, the landmark mountain of Dornbirn, the largest city in the state of Vorarlberg (Austria). The weather forecast was promising and called for a sunny day.

    Trailhead: 3800 ft / 1158m
    Summit:   4803 ft / 1464 m
    Elev. gain: 1010 ft / 308 m
    Roundtrip: 3.0 mi / 4.8 km

    Compare this summit with my other activated summits

    How to get there:
    Take the ‘Bödele-Strasse’ (or L48 ) from Dornbirn or take the Bus line 38 (Dornbirn -Bödele – Schwarzenberg – Bezau) which leaves every 30 minutes, starting at the Dornbirn Railway Station. Park or get out of the Bus at the ‘Bödele Passhöhe‘. The trail starts about 100 yards (100 m) south of the parking lot.

    Parking/Trailhead

    Red Tape:
    This area is a very popular local recreation area and finding a parking spot might be difficult, specially on week-ends and/or during sunny weather. Since it was a Sunday and a sunny day after several days of the rain and fog that is typical for the region at that time of the year… you can imagine the number of cars and people. It was a real zoo up there. The parking fee depends on how long you are staying at the lot, if I remember correctly it is about 1 Euro per hour. The parking lot has exactly one machine where you can pay your parking-fee… I waited approx. 20 minutes in single file to get to the machine when I came back from the summit. The good news… it accepts bills as well as coins.

    The Ascent:
    The ascent has no challenges. Just follow all the other people… no, seriously, the trail is hard to miss and is mostly moderate in steepness. The only challenge was the fact that it was incredibly muddy due to the heavy rain-falls we experienced over the last week. The first part leads through a few vacation homes (beautiful old Chalets), then by a Restaurant (in case you need some fuel before attempting the ascent). From there the trail is over grassy (muddy) terrain along a small ski-lift all the way to a ridge. At this point I made most of the elevation gain for this trip and I followed the south-easterly ridge all the way to the summit. The only challenge was to avoid the deep mud-puddles, which was sometimes difficult with all the foot-traffic.

    The Summit:
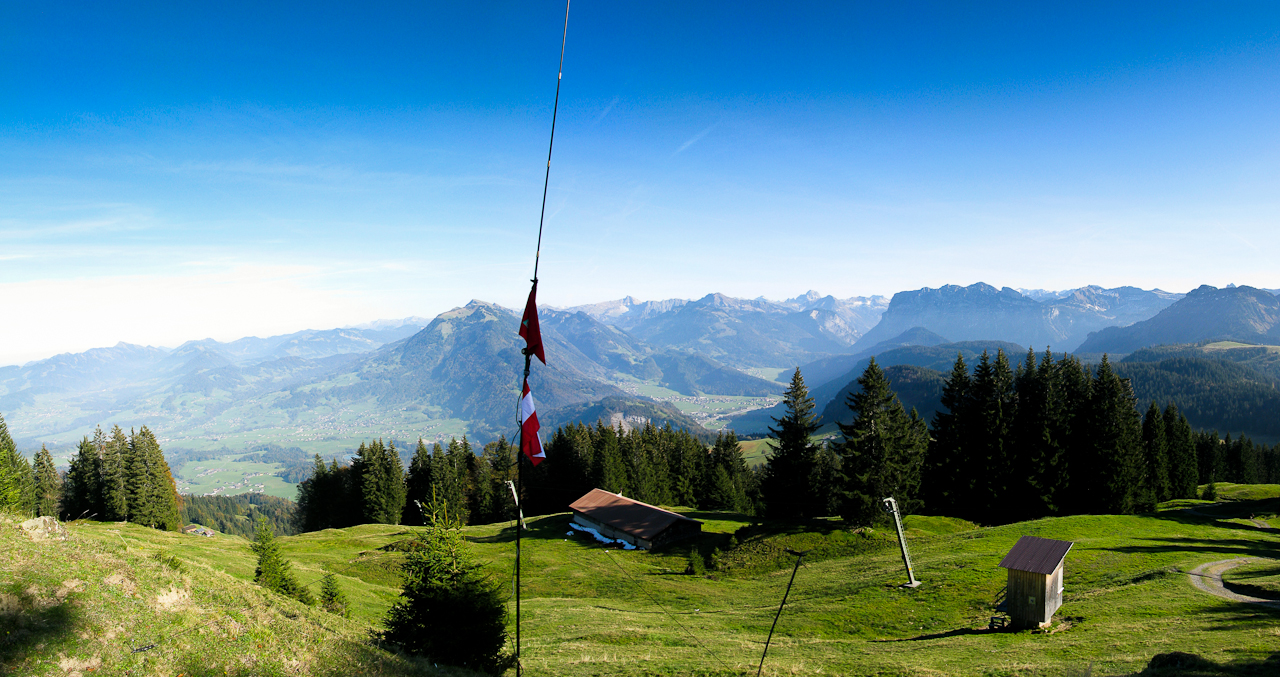
    View from the summit


    At the summit – you guessed it – is another restaurant and a ‘Gipfelkreuz‘, a wooden cross. To find a good spot for setting up an antenna is not so easy. For one, there were a lot of people up there and the other ‘problem’ is that the summit is an elongated ridge which drops off steeply in both directions. So in order to get good propagation in all direction, I was looking for a spot very close to the top of the ridge which also coincides with the trail. I tuned the antenna for 10m, hoping for similar results than on the days before. But it was wishful thinking … my CQ calls did not get out well. I was wearing headphones to cancel out some of the noise on the summit (and from the nearby restaurant when I suddenly heard Alpenhorn sounds through my headphones. “I am having a sunstroke” I thought but the sun was not shining that hard and I was wearing a hat… I took the headphones off and turned my head, that’s when I realized that somebody set up their Alpenhorn about 6 feet (~1.8m) behind me… and he was puffing his lungs out. I am as fond of Alpenhorn sounds as the next guy but this was a bit much… as polite as possible I asked him whether it would be possible to move his instrument to another, more distant location. I tried to explain to him what I was doing… maybe he had not realized in light of my ~20 mast/antenna with all the guy-lines and counterpoise? I could not even finish my sentence when he got red all over the face and started lecturing me that this was a free country and that I cannot force him to move – yikes. It was pretty obvious that there was no way that sane arguments could convince this guy to stop or move. His wife/partner/companion tried to mediate the situation and coax him into moving, being obviously careful not to further upset him. In the end, I  turned back to my radio and head-phones, ignoring his further rants.

    What seems funny to me is, that no matter the country and culture, people always try to justify their unconsidered and/or rude actions with the argument that we are in a free country – go figure.

    The first contact with FR/DJ7RJ (Willie) was certainly the highlight. A DX contact of more than 5500 mi (~9000 km) on 5 W. Apart from that, band seemed to favor east-Europe and I made most of my very few contacts with Russia. After my fifth contact I packed up, feeling a little disappointed about this mountain.

    The Descent:
    I went down the same slippery/muddy route to the parking-lot… waiting patiently in-line to pay the fees and get ‘my’ car.

    Some video impressions (no Alpenhorn sounds though):
    Since the trip felt more like traveling on an interstate, I have only very limited footage.
    httpvh://www.youtube.com/watch?v=kvEYUOcWy3g

    If you would like to leave questions or comments, please do so through Youtube.


    ATTENTION !! WARNING !! There are old mountaineers, and bold mountaineers… there are no old-bold mountaineers. Hiking and mountain climbing are potentially hazardous activities particularly in Colorado with its extreme elevations. I am not accepting responsibility for any death or injury resulting from activations based on my trip reports. Proper training, experience, and personal capability assessment is required – enjoy!
  • OE/VB-5Ø4 (Geißkopf) – 1198 m / 3930 ft

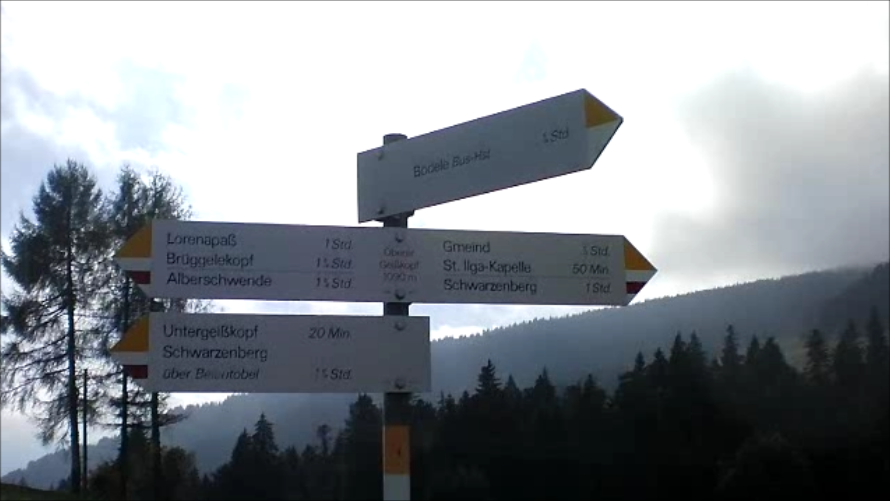
    The weather forecast for today was not too good. Therefore I was looking for another SOTA peak nearby. The ‘Geißkopf’,or OE/VB-5Ø4, fit the bill. The ‘Geißkopf’ is part of the ‘Bödele‘, the landmark mountain of Dornbirn, the largest city in the state of Vorarlberg (Austria). There is a great public transportation system which can get you up there. Since SOTA rules demand that I get to the summit human powered (at least the last 150 ft of elvation), I started out well before the ‘Bödele Pass – 3789 ft / 1155 m‘. Even-though there is a bus stop at the pass, that might not result in the required elevation gain from here. Three bus stops (Dornbirn Langwies) before the pass seemed to be a good fit and served as my trail-head. From here it is possible to hike through the woods for the most part and avoid the busy road. Due to the foggy weather, I have only limited pictures/videos.

    Trailhead: 3030 ft / 924 m
    Summit:   3930 ft / 1198 m
    Elev. gain: 1447 ft / 441 m
    Roundtrip: 4.2 mi / 6.7 km

    Compare this summit with my other activated summits

    How to get there:
    As mentioned earlier you have choices, take a car or take public transportation.

    Just follow the signs

    Take the ‘Bödele-Strasse’ (or L48 ) from Dornbirn or take the Bus line 38 (Dornbirn -Bödele – Schwarzenberg – Bezau) which leaves every 30 minutes, starting at the Dornbirn Railway Station. Park or get out of the Bus at ‘Dornbirn Langwies‘. The trail you are looking for is just a few feet behind the bus-stop – leading south and finally parallels the road.

    Parking/Trailhead

    View Larger Map

    Red Tape:
    This area is a popular local recreation area and finding a parking spot might be difficult, specially on week-ends and/or sunny weather.

    The Ascent:
    There is not a lot to report. It’s a very moderate trail leading directly to the Bödele-Pass (yes, there is a Restaurant). Cross the road to the parking lot. On the north side starts the trail down through a moor and then up through some settlements to the Geißkopf (which you can see from the parking lot). There are no challenges along the way, its a well established trail and there are no doubts when it comes to navigating the area.

    The Summit:
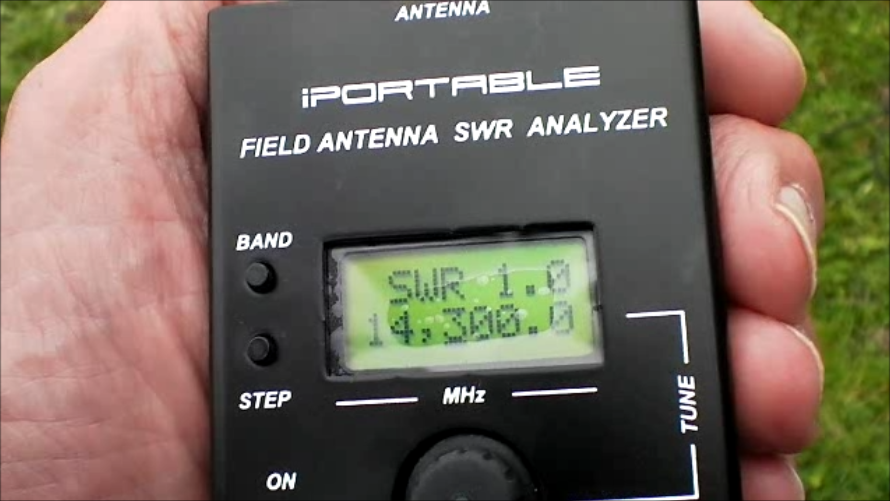
    There is a wooden cross at the highest point (as on most summits in this area) with a wooden bench. Nice for a picnic or to setup your radio. Since the weather was kind of foggy/cloudy (hard to say where the fog stopped and the clouds started) nobody else claimed the summit or the bench. Setting up the antenna for 20 m was easy with the soft, grassy ground (for the pegs) and the available topography. There is enough space for several antennas, in case you are looking for joint activation. Shortly after the antenna was

    Perfect SWR

    up and tuned, the fog rolled in heavily, resulting in chilly temperatures. The scarce sun-rays could not penetrate the fog anymore. My first QSO was DH3RB (Ruediker), a station at the Danish/German border, using a Buddipole configuration as well. Apparently he had seen some of my Youtube videos before and was quite excited to catch me on the air. The remaining QSO’s were with stations in Austria, Greece, England, Bulgaria, Finland and Spain. After 16 QSOs in ~30 minutes, I was happy go pack up my gear due to the chilly temperatures. I am not used to this kind of cold in high humidity.

    The Descent:
    It was a quick descent down the same trail, through the moor and to a nearby parking lot where I had a pick-up shuttle, getting me down to the valley for a nice glass (or two) of ‘Glühwein‘ and cookies.

    Some video impressions:

    httpvh://www.youtube.com/watch?v=2nLgDlCQtbM

    If you would like to leave questions or comments, please do so through Youtube.


    ATTENTION !! WARNING !! There are old mountaineers, and bold mountaineers… there are no old-bold mountaineers. Hiking and mountain climbing are potentially hazardous activities particularly in Colorado with its extreme elevations. I am not accepting responsibility for any death or injury resulting from activations based on my trip reports. Proper training, experience, and personal capability assessment is required – enjoy!
  • OE/VB-512 (Pfänder) – 1064 m / 3491 ft

    I visited Europe for a couple of weeks and took my radio equipment with me to do some SOTA activations. The next few trip-reports summarize my Austrian SOTA activations. BTW, clicking onto a picture included in this trip-report will show you a larger version.

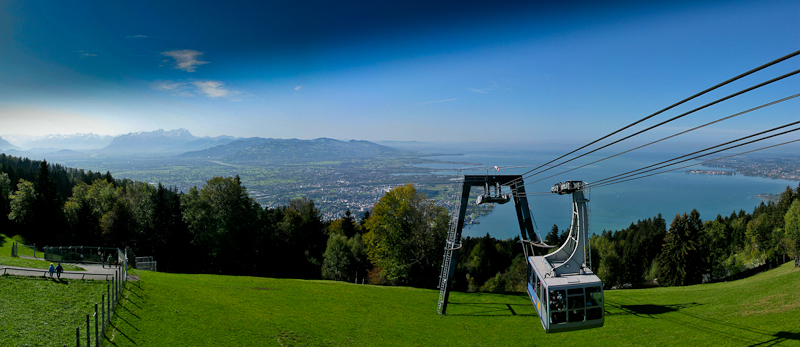
    For my first activation, I was looking for a summit with easy access. I wanted to make sure I have everything with me before heading into the mountains. I found the perfect SOTA summit for my requirements during my time in Austria/Vorarlberg. OE/VB-512 was just a few miles from my temporary QTH and there even is a gondola going from Bregenz (the capital of Vorarlberg) to the very top. Bregenz is delightfully located on the shore of Lake Constance (one of Europes largest lakes) and is probably most famous for it’s summer music festival that features an opera on a open-air /floating stage. Even James Bond could not resist to visit the opera in his quest to rescue the world, in his movie ‘Quantum of Solace‘.

    I decided to take the gondola – which leaves close to the lake shore – and take a short detour downhills in order to satisfy SOTA rules, instead of hiking all the way up.

    Trailhead: 1374 ft / 419 m
    Summit:   3491 ft / 1064 m
    Elev. gain: 2117 ft / 645 m
    Roundtrip: 5.5 mi / 8.9 km

    Compare this summit with my other activated summits

    How to get there:
    Goto the harbour in Bregenz. There is a roundabout with a sign directing you to the base station of the Gondola. If you arrive by train, it’s a short 15 minute walk from the train-station.

    Parking/Trailhead

    View Larger Map

    Red Tape:
    The Pfänder cable car operates daily from 8 AM to 7 PM. It is closed however for an annual audit, so make sure you check their website or call ahead. There is a fee of about € 11.00 for a round-trip. You can check their rates on their website also.

    The Ascent:
    Since I took the easy way up, there is not a lot to report. The ride to the top lasts about six minutes in a large gondola with panoramic views. Make sure to get the to the window (lake facing) quickly to get the best view on your ride up the mountain.

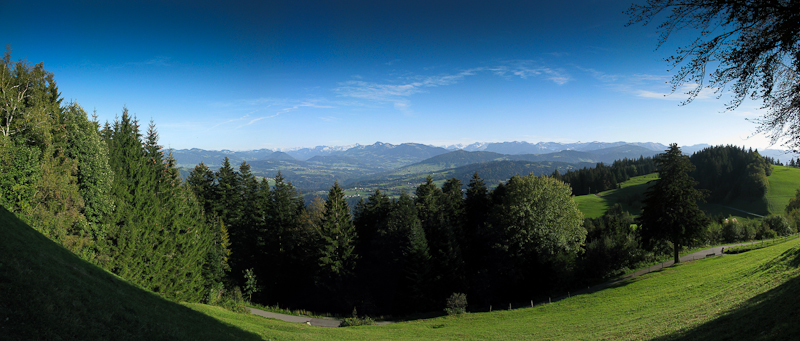
    View from the Summit

    The summit:
    First of all I had to hike downhills for a while to be in line with SOTA regulations. After coming back up to the gondola station, it is a another few minutes to the very top of the Pfänder. This is not a good location for setting up the radio equipment due to its size and popularity with all the tourists/visitors. It does however provide stunning views across Lake Constance, the Swiss, Austrian, German and Lichtenstein alps (assuming clear weather). Even-though it was a week-day, it was very crowded and I started to miss the solitude of the Rocky Mountains.

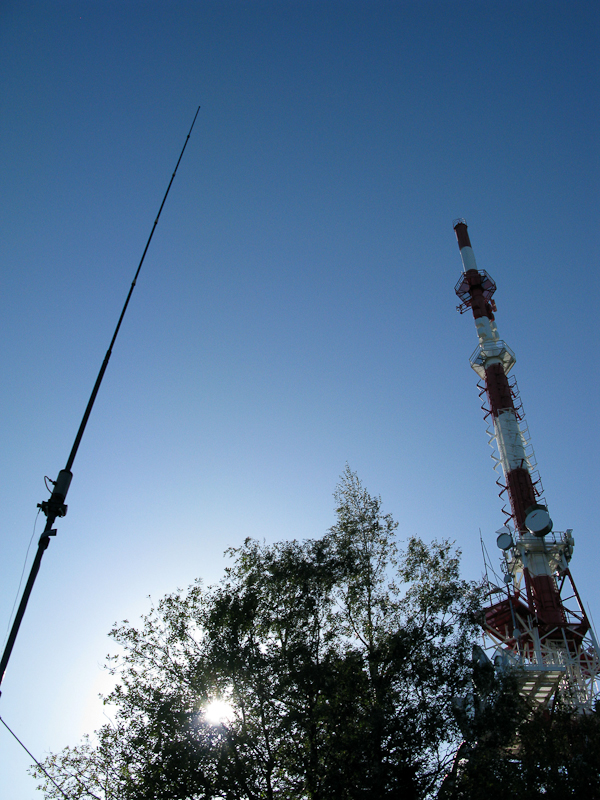
    My Buddipole competing with the Radiotower

    The summit is quite large, providing several restaurants within a few minutes of walking and a huge radio tower!!! I started to setup my equipment about 60 m from the tower and was wondering whether all the RF flying around would even give me a chance to get out. My back-up plan was an activation on 2m and I had my little HT programmed with the Pfänder repeater frequencies to announce my presence. Unfortunately I was not able to open the repeater, which seemed strange to me at such a short distance (I learned later that the repeater was out of order). It took me unusually long  to get the antenna and radio up and ready. For the first time I carried a small antenna analyzer (IP30) with me to get the antenna resonant… but no matter what I tried I could not even get close to an SWR acceptable for transmission – at least that is what the analyzer indicated. I finally ignored the analyzer and hooked up my FT-817, which was quite happy with the antenna. I guess the RF cloud from the radio tower overwhelmed the IP30.

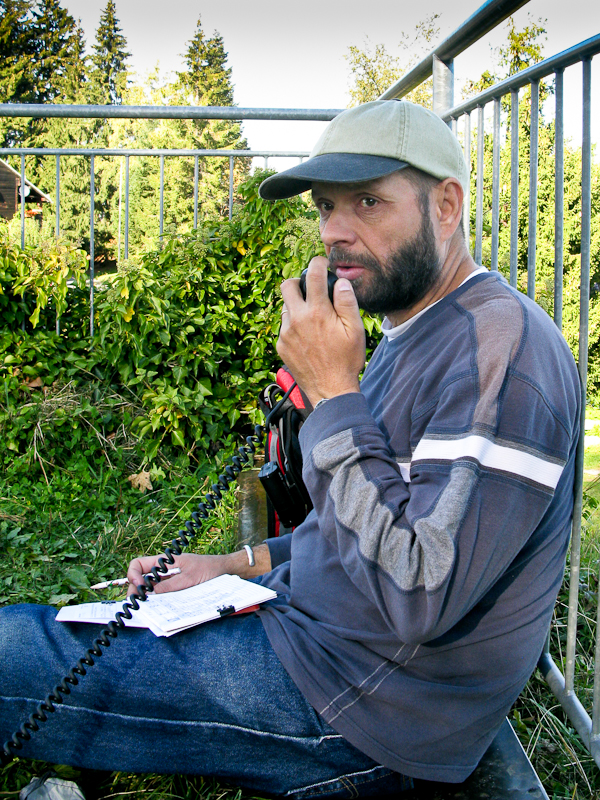
    KØMOS/OE calling CQ on 20m

    My first response to my CQ SOTA on 20m came from OE9HRV (Herbert) and my second contact was OE9GWI (Gerhard), both residents of Bregenz – a whopping 3 miles from my current location. As is turns out, both of them are very active SOTA activators / chasers. Both contacts turned into very reliable chasers during my time in Austria and Herbert was a very knowledgeable source for all SOTA summits ‘im Ländle‘ Vorarlberg. He even invited me to a very memorable activation of the Galinakopf (OE/VB-287) – report/video will follow. The remaining contacts were to Austria (no surprise), England, Greece, Spain and Canada (VE1WT) – 3413 mi / 5493 km on 20m with 5W into my Buddipole – not bad for the first day. I was quite happy with the results and the activation. Since the sun was slowly setting, I was packing up to take more photographs and to catch the last gondola.

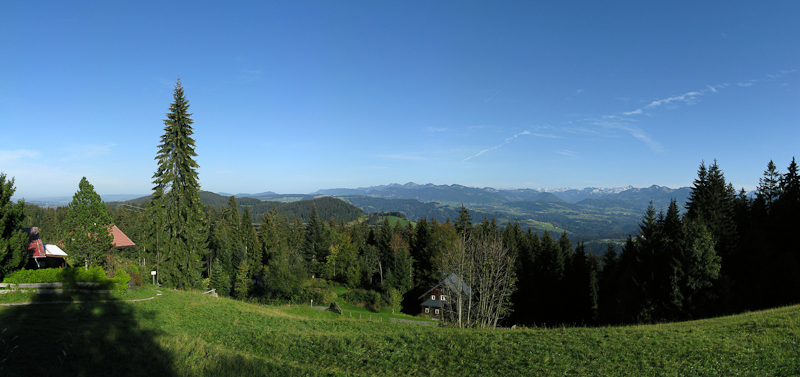
    The view to the east
    Another view from the summit

    The Descent:
    The descent in the gondola was certainly a treat – great views across the lake and Bregenz for six minutes :)

    Some video impressions:
    httpvh://www.youtube.com/watch?v=uN4Bl-6NyGw

    If you would like to leave questions or comments, please do so through Youtube.


    ATTENTION !! WARNING !! There are old mountaineers, and bold mountaineers… there are no old-bold mountaineers. Hiking and mountain climbing are potentially hazardous activities particularly in Colorado with its extreme elevations. I am not accepting responsibility for any death or injury resulting from activations based on my trip reports. Proper training, experience, and personal capability assessment is required – enjoy!
  • WØC/FR-Ø37 (Twin Sisters Pk. East) – 11404 ft / 3476 m

    Twin Sisters Peak East (WØC/FR-Ø37) is located at the border of Rocky Mountain National Park (RMNP) and the Roosevelt National Forest, just a few short miles south from Estes Park. There is a new trail-head which is not marked on the relatively old USGS maps. The trail eventually joins the one on the map. The weather forecast was excellent (temps near record highs) – what a difference a week can make. During last week’s activation of Ypsilon Mountain (WØC/FR-ØØ9) in the same area we had single digits temperature (5-10 F or ~minus 20C) compared to upper 70s  (20-25 C) today. What made the trip even more enjoyable was the company of my wife.

    Trailhead: 9192 ft / 2386 m
    Summit:   11404 ft / 3476 m
    Elev. gain: 2939 ft / 896 m
    Roundtrip: 7.0 mi / 11.3

    Compare this summit with my other activated summits

    How to get there:
    Take US34 from Loveland towards Estes Park through Big Thompson Canyon. In Estes Park, take Highway 7 (S St. Vrain Avenue) to the Lily Lake area. The approx. seven mile drive is very scenic and represents the Estes Park area very well. Between mile-marker 6 and 7 (just across Lily Lake) take a left (east), bypass the visitor center and follow the dirt road up the mountain until the road ends. There is parking on the right side of the road only. Everything is marked very clearly and easy to find.

    Parking/Trailhead

    View Larger Map

    Red Tape:
    There are no fees, even-though the trail crosses RMNP area. No dogs are allowed on the trail.

    The Ascent:

    The Trail-head

    The official trail-head is about 0.5 miles from the parking area on an old logging road with the usual trail-head signs and posters. From there, the well maintained trail leads in and out of NP land through a uniform (boring?) lodgepole forest with only scarce views of the surrounding mountains. The lodgepole pines are eventually replaced by  fir and spruce trees and patches of Aspens. Thanks to last week’s cold weather pattern, the leaves were already turning golden, creating a very

    Aspens in full fall colors

    nice contrasts in the early morning sun. The higher we climbed, the better the view of nearby Longspeak (14259 ft / 4346 m), Mt. Meeker (13911 ft / 4240 m) and Estes Cone (11006 ft / 3355 m). After reaching the treeline at approx 11000 ft / 3350 m, the Twin Sisters Peaks are visible for the first time. The trail above the treeline leads over a barren, exposed scree-laden path to the saddle between the West and East peak. Either summit can be easily reached. The last 30 ft elevation to the east peak requires some scrambling.

    The Summit:
    Besides the unobstructed views, the summit also provides comfortable  and wind-sheltered space to setup the equipment. There is ample space for several SOTA teams if necessary.

    View of Longspeak and Mt. Meeker from the summit

    We had the summit exclusively  for ourselves for about an hour. Then, the hikers started to come in thick and heavy. The number of established contacts was disappointing on 20m as well as 40m and 2m. I just made five contacts on the three bands even though the conditions were not bad at all.

    The Descent:
    After about two hours on the warm and sunny summit we descended the same way we came up.

    Some video impressions:

    If you would like to leave questions or comments, please do so through Youtube.


    ATTENTION !! WARNING !! There are old mountaineers, and bold mountaineers… there are no old-bold mountaineers. Hiking and mountain climbing are potentially hazardous activities particularly in Colorado with its extreme elevations. I am not accepting responsibility for any death or injury resulting from activations based on my trip reports. Proper training, experience, and personal capability assessment is required – enjoy!
  • WØC/FR-ØØ9 (Ypsilon Mountain) – 13514 ft / 4119 m

    Ypsilon Mountain (WØC/FR-ØØ9) is located in Rocky Mountain National Park (RMNP) and is part of the Mummy Range. The Mummy Range is a sub-range of the Front-Range of the Rocky Mountains and consists of six 13’ers (and a slew of lower ones). Starting with Mount Chapin in the south-west, it arcs to the north-east and ends with Signal Mountain. Some of the more prominent peaks are also SOTA summits. Ypsilon Mtn. was first activated about a month ago by N7UN (Guy) – here is his activation report.

    The trip was planned for Sunday and we got the first snow-fall of the season on the Wednesday before. Thus, the access road to the trail-head was closed by the Park-Service  on Thursday but re-opened on Friday. The weather forecast was great for Sunday, and even better – my wife was going to join me on this trip as well – all signs pointed towards a great trip.

    The original plan was to activate Fairchild Mountain (WØC/FR-Ø1Ø – 4115 m / 13502 ft) which is just a mile or two from Ypsilon Mountain. However, after reaching the steep ridge joining Ypsilon and Fairchild Mountain we reconsidered the plan for safety reasons. The amount of snow and ice on the ridge combined with the high winds (30-40 mi/h) made us abandon the plan and we climbed Ypsilon Mtn. instead.

    The first few peaks in the south-west of the Mummy Range can be reached from the Chapin Pass trail-head.

    Trailhead: 11041 ft / 3365 m
    Summit:   13514 ft / 4119 m
    Elev. gain: 3019 ft / 920 m
    Roundtrip: 7.34 mi / 11.8 km

    Compare this summit with my other activated summits

    How to get there:
    Take US34 from Loveland to Estes Park through Big Thompson Canyon. In Estes Park, stay on US34 and enter RMNP through Fall River Entrance Station. Just after Sheep Lakes, take a right onto Old Fall River Road – a one way dirt road going all the way up to the RMNP Alpine Visitor Center. The dirt road is in pretty good shape but be careful in some of the switchbacks if you do not have a high-clearance vehicle. Around mile-marker six, the trail-head is on the right side of the road and the car can be parked across the road. Space is limited to 10-12 cars max.

    Parking/Trailhead

    View Larger Map

    Red Tape:

    • RMNP charges an entrance fee of $20/car (valid for seven consecutive days). The usual passes are accepted as well. For details check their website.
    • Old Fall River road is a one-way dirt road which is often closed due to adverse weather conditions. You can check the road conditions on this website.
    • Few parking spots – you have to be early to claim your spot at the TH.
    • It is high country… weather conditions can change really fast. Afternoon lightning storms are not uncommon in summer.

    The Ascent:
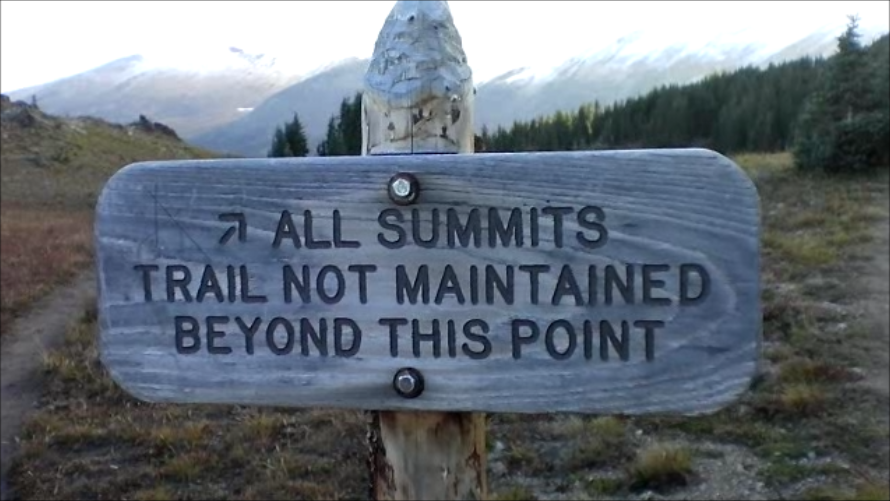
    The first section of the trail leads through large and mature pine trees. The trail is well established and clearly marked by NP signs. After reaching the treeline, a last sign  indicates

    To all summits

    the direction to reach ALL SUMMITS and the fact that the trail is not maintained beyond the sign. Nevertheless, it is quite easy to follow the rock-slide area to the saddle between Chapin (3795 m/12454 ft) and Chiquita Mountain ( 3983 m/13069 ft). Here we experienced the first snow on the ground and extreme winds on the saddle. We followed the trail up to the fake summit of Ypsilon Mtn. Walking upright and in a straight line was rough at times – the icy, howling wind felt like a thousand needles in the face and the summit was engulfed in blowing snow and ice crystals. It felt, sounded and looked more like an ascent to Nanga Parbat – but the GPS confirmed that we are still in Colorado. We tried to stay on the contour line leading directly to the ridge between Ypsilon and Fairchilk Mountain to avoid unnecessary elev gain/loss. A trail was no longer available/visible. The rocky and barren surface was covered by wind-pressed snow and ice. On several occasions I sank into deep snow-drifts well above my knees. However, the route is easy to pick – there are no obstacles to navigate.

    The Summit:
    The summit offers incredible views in all directions. It also provides two stone wind-shelters which were filled with drifting snow and could unfortunately not be used at all – leaving us exposed to the howling winds.

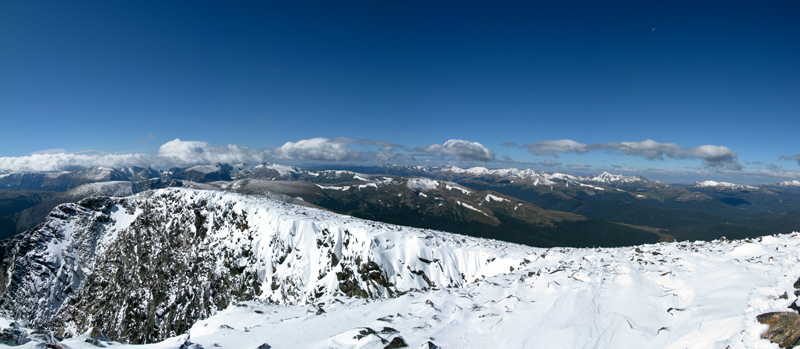
    Panoramic view from the summit

    Under normal circumstances the summit provides ample space to set up the equipment – however, the low temperatures (~10 to 15 F [-12 to -15 C] ) and high winds (~30-40 mi/h) made my teeth chatter (literally), and taking off the gloves was not something I was looking forward to either. Setting up the equipment for 15-20 minutes under this conditions was just not an option. In order to still be able to activate the summit and claim my SOTA points I used my HT on 146.52 MHz to quickly get some QSO’s. I wrapped it up within 5 minutes on the summit, took a few snapshots, put my gloves back on (trying to get the blood flowing in my fingers again ) and we headed downhills with the wind now in our face.

    The Descent:
    It was a quick retreat against the wind, following basically the same route. We had not had an opportunity yet to eat lunch, and we were looking for sheltered space. There was nothing until we reached the treeline – it was still cold but getting out of the wind after more than 5 hours was a nice change.
    To get back to Estes Park, we had to follow the Old Fall River Road up to the Alpine Visitors Center of the RMNP. From there we took Trail Ridge Road east – a quite scenic drive through the heart of the Rockies.

    Some video impressions:
    The weather conditions were not ideal to take a lot of photo/video shots. I only have a few clips when the wind was not too bad.
    httpvh://www.youtube.com/watch?v=-K1YZeKOido

    If you would like to leave questions or comments, please do so through Youtube.


    ATTENTION !! WARNING !! There are old mountaineers, and bold mountaineers… there are no old-bold mountaineers. Hiking and mountain climbing are potentially hazardous activities particularly in Colorado with its extreme elevations. I am not accepting responsibility for any death or injury resulting from activations based on my trip reports. Proper training, experience, and personal capability assessment is required – enjoy!
  • WØC/FR-127 (Signal Mountain) – 11262 ft / 3432 m

    Signal Mountain (WØC/FR-127) can be reached from the Dunraven trailhead from the south, or from Pingree Park Road from the north. If you are lucky enough to have a shuttle driver, it makes a great 11+ mile hike from the north fork of the Big Thompson River all the way to the Poudre River. The peak is located at the north-east end of the Mummy Range  in the Comanche Peak  Wilderness which is part of the Roosevelt National Forest. The summits of Signal Mountain – as well as nearby West Signal – are pushing well above the treeline and thus provide unobstructed 360 degree views. The weather forecast was excellent (it cooled down quite a bit) and I was joined by my best trail-buddy, friend and wife – making this a great anniversary hike.

    Trailhead: 7828 ft / 2386 m
    Summit:   11262 ft / 3432 m
    Elev. gain: 4064 ft / 1239 m
    Roundtrip: 11.7 mi / 18.8 km

    Compare this summit with my other activated summits

    How to get there:
    Take US34 from Loveland towards Estes Park through Big Thompson Canyon. When you pass through Drake, take a right on CR43 along the north-fork (scenic). Take a right on Dunnraven Glade Road (dirt road) which follows the north-east flank of Triangle Mountain. You can’t miss the parking lot since it is the end of the (public) road. A private road continues behind a locked gate all the way to Trails End Ranch.

    Parking/Trailhead

    View Larger Map

    Red Tape:
    Nothing comes to mind – rules of the Roosevelt National Forest apply.

    The Ascent:
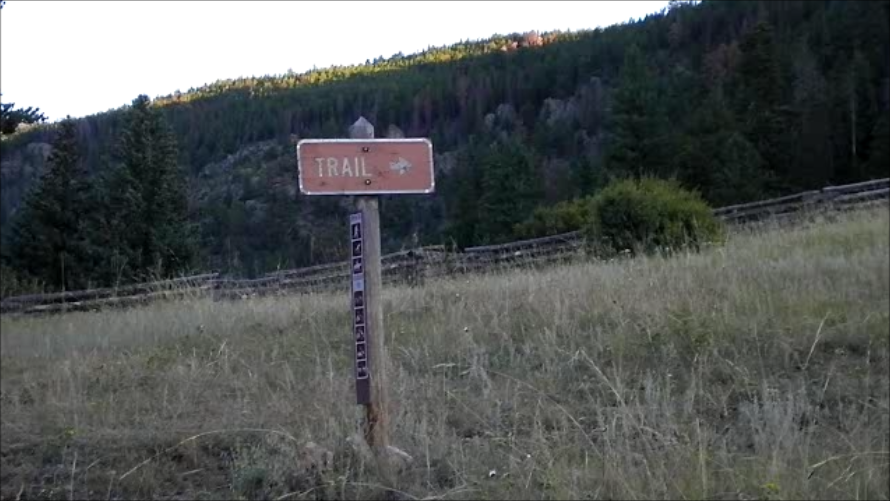
    The official trail-head is about half a mile from the parking lot, following the fairly steep

    Sign to trail-head

    private road after a locked gate towards Trails End Ranch. Shortly before you enter the ranch, the trail-head is clearly marked on your right side with the usual map/posters etc. From here, the trail climbs up the steep hillside to Bulwark Ridge through open terrain. After reaching the ridge, you have some good views to several nearby SOTA peaks such as Triangle Mountain (WØC/FR-Ø82), Crosier Mountain (WØC/FR-Ø57), West Crosier (WØC/FR-Ø64) and even more looking towards Estes Park and the Rocky Mountain National Park (RMNP). Shortly after, the trail intersects with the Indian and Miller Fork trails. Taking the north-west route – following Bulwark Ridge – will lead to Signal Mountain through mostly forested area over a very well established trail. The treeline will be reached after about 3.5 miles, offering great views towards north/north-east.

    Just above the treeline

    The Summit:

    On the summit

    The summit can be reached by crossing over the fragile tundra-like flora from the trail at the highest point before it leads back down on the other side towards Pingree Park. It is a large, barren, rocky and wind-swept summit with a small stone shelter at the very top where the summit-register is ‘hidden’. The summit is large enough for several SOTA teams if necessary… luckily nobody else was encountered during the whole trip. The views are unobstructed and stunning in all directions.

    View from Signal Mtn.
    Did I mention that it was windy?

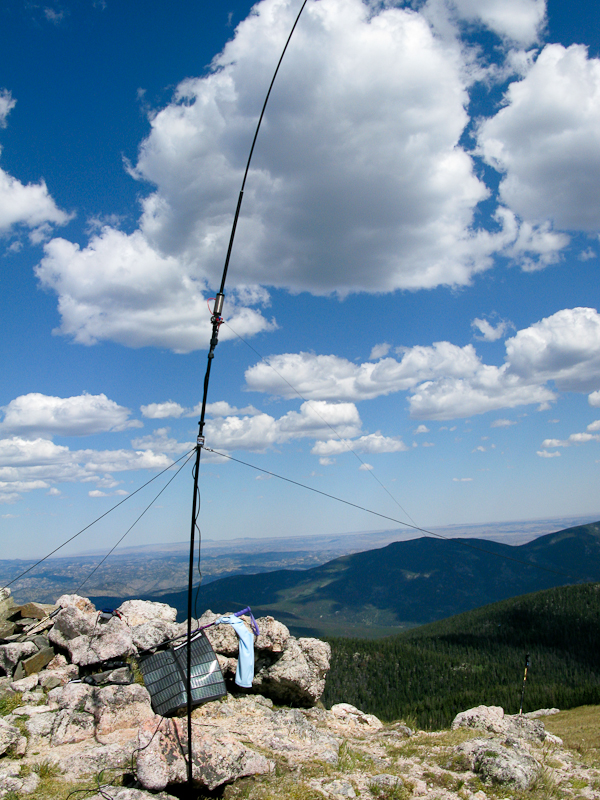
    The weather was just perfect, with a few white and puffy clouds which provided a nice contrast on the blue sky. The setup was easy since space was not an issue and all the rocks lying around helped me with guying the mast in this windy environment . It was my first time with the newly acquired shock-corded mast from Buddipole. I really like the reduced weight of it but it requires a different technique to set it up and to change bands. All the ‘training’ in my backyard helped and I was on the air in no time. It was my first week-end activation and getting QSOs was definitely easier than on all my prior outings, even-though the propagation conditions were not necessarily better than before – at least that is my theory and I am sticking to it.

    The Descent:
    If you arranged for a shuttle in Pingree Park, you might enjoy a different route, but for us it was the same route back to the car.

    Some video impressions:

    If you would like to leave questions or comments, please do so through Youtube.

    I activated this summit again on May 5th, 2012. You can find the trip-report right here:


    ATTENTION !! WARNING !! There are old mountaineers, and bold mountaineers… there are no old-bold mountaineers. Hiking and mountain climbing are potentially hazardous activities particularly in Colorado with its extreme elevations. I am not accepting responsibility for any death or injury resulting from activations based on my trip reports. Proper training, experience, and personal capability assessment is required – enjoy!
  • WØC/FR-Ø57 (Crosier Mountain) – 9232 ft / 2814 m

    Crosier Mountain (WØC/FR-Ø57) is part of the Front Range of the Rocky Mountains – close to Estes Park, a popular gateway to the Rocky Mountain National Park (RMNP). According to my knowledge, there are three trails going up to the summit from three separate trail-heads along CR43.

    1. Garden Gate trail-head: Is located closest to the village of Drake. It is just before mile-marker  13 and hardly visible from the road. You will find a gravel patch on the south side of the road with some sign of a wooden gate. It is a 5.1 mile trail to the summit of Crosier. The trail leads through some grassy meadows and continues via switch-backs though trees. There was a large wildfire (Bobcat Fire) in 2000 and the trail goes in and out through the burned area.
    2. Rainbow trail-head: Located between mile-marker 10 and 9, a large gravel-pit on the left side of the road (coming from Drake) is the parking lot for the trail just across a wooden gate. It is marked as Crosier Rainbow Trail No. 981. The early trail ascends through aspens, pines and spruce trees. It will eventually lead to an 4-way intersection of all the trails coming from the valley and the trail coming from the summit. The overall length to the summit is about 4.0 miles.
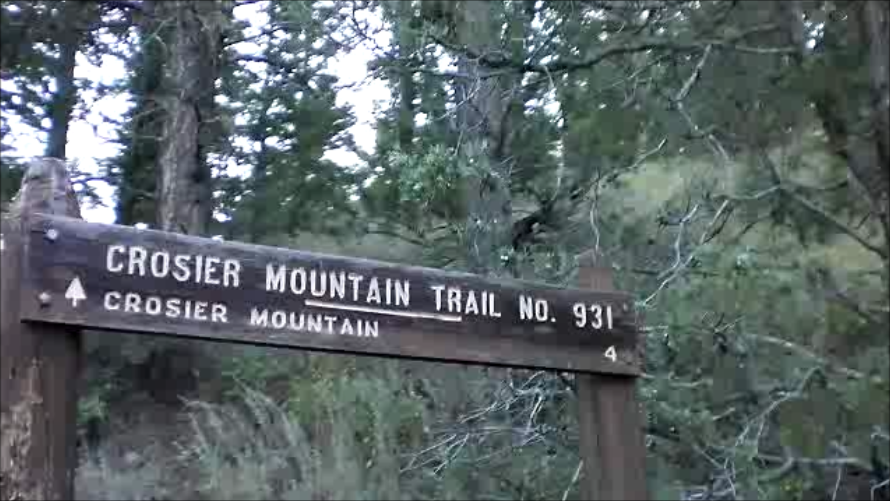
    3. Glen Haven trail-head (No. 931-2) : I have chosen this 4.1 mi trail (see description below) because it crosses Piper Meadows – a very scenic place – and it also provides a nice view on a previously activated SOTA summit – Triangle Mountain (WØC/FR-Ø82)

    Trailhead: 7254 ft. / 2211 m
    Summit: 9232 ft. / 2814 m
    Elev. gain: 1928 ft / 588 m
    Roundtrip: 8.0 mi / 12.9 km

    Compare this summit with my other activated summits

    How to get there:
    Take US34 from Loveland towards Estes Park through Big Thompson Canyon. Take CR43 in Drake all the way to Glen Haven. It’s a scenic drive along the north fork of Big Thompson River. Going through Glen Haven (don’t blink) you will find a red barn on the left side of the road. The TH is just behind the stable and a gravel strip is located on the right side of the road – providing space for several cars.

    Parkinglot/Trailhead

    View Larger Map

    Red Tape:
    Several signs indicate that the locals do not like when you park the car in Glen Haven or in their driveway. Make sure to park on the gravel strip indicated above. The trail borders to private land, indicated through a barbed-wire fence.

    The Ascent:

    The Trail-head

    The trail-head is just across the street of the parking lot where you will find the first brown trail sign . The first few yards (~150) lead you up a dirt road through an area with private homes. The amount and size of the signs pitched in their driveways  are an indication of the numbers of unconsiderate hikers who seem to park wherever they see fit. It’s a rocky trail going uphills to an opening (~0.8 mi) with a nice view (specifically early in the morning) and two trails splitting off to the south and north-east. the main trail continues down through a small canyon before climbing up again to Piper Meadow.

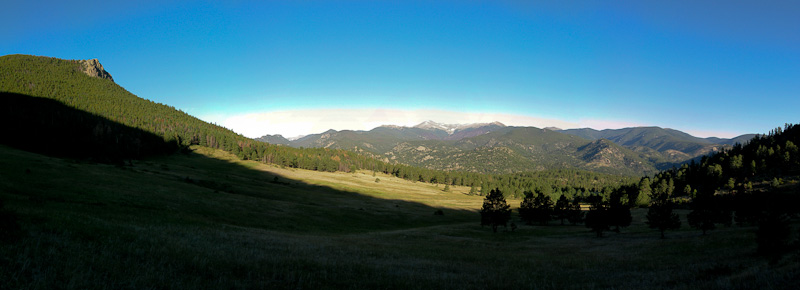
    Piper Meadow

    Apparently Henry Piper operated a dairy farm up here from 1913 into the 1930s. You can clearly identify some foundation walls along the way. The trail follows the meadow on the north side until it sharply bends to the north-east, going uphills with several switch-back to a ridge (with a nice view to Piper Meadow and Triangle Mountain) and finally to the Rainbow Trail junction. The next one and a half mile is a dull hike through very dense Lodgepole pines on a well established trail. The trail takes you all the way around the summit and the final ascent is from the east. About half a mile before the summit you will encounter the Garden Gate Trail intersection.

    The Summit:

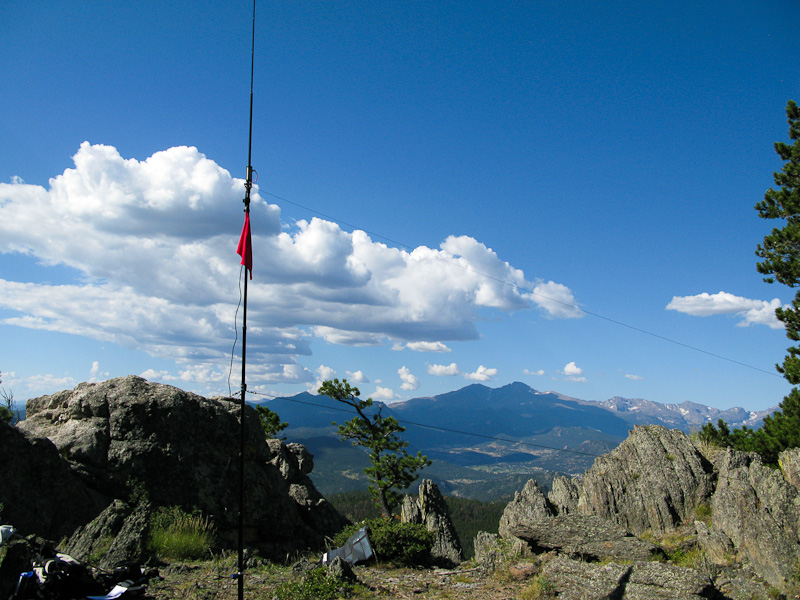
    Setup on the Summit

    The trail ends at a steep cliff to the south with a spectacular view into RMNP and Estes Park. The summit is quite large, providing ample space to setup the antenna and even to set up an overnight camp in the woods if you wish to do so. Trees and rocks give plenty of opportunities to guy the mast and also allow a comfortable and shady place during operations.

    View from Crosier Mountain

    The Descent:
    Since West Crosier (WØC/FR-Ø64) is only about one mile from the summit (as the crow flies), I planned to bush-whack my way down to the saddle between the two summits. Going downhills, the thick stand of Lodgepole pines made it very difficult to keep my bearing and to navigate in general.  You never see the saddle or the summit and the trees are so close together that I had to pick my route carefully to fit between the trees. I did not realize a big thundercloud moving in, since it was very dark to begin with – sunlight had a difficult time to find its way all the way to the ground. I only realized the upcoming thunderstorm when the first thunder rolled through the valley. I decided to abort my quest to cross to the other summit and headed north-east instead, trying to find the trail down to the car. I finally stepped out of the trees when the first rain started to fall and the cadence of thunder increased. It was an unexpected and surprising morning thunderstorm (it was only 11:00 AM) which drove me down the mountain. The rain cooled me off on my way to the car and I joined a guy from the phone company who also waited for the thunderstorm to pass before climbing back on the poles to take some slack out of the phone line.

    Some video impressions:
    httpvh://www.youtube.com/watch?v=nELv-FOZ10s

    If you would like to leave questions or comments, please do so through Youtube.


    ATTENTION !! WARNING !! There are old mountaineers, and bold mountaineers… there are no old-bold mountaineers. Hiking and mountain climbing are potentially hazardous activities particularly in Colorado with its extreme elevations. I am not accepting responsibility for any death or injury resulting from activations based on my trip reports. Proper training, experience, and personal capability assessment is required – enjoy!
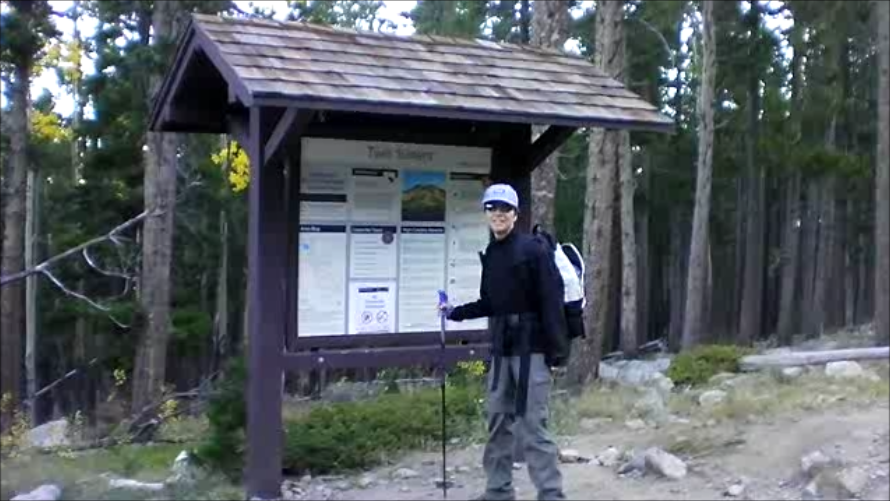
  • WØC/PR-124 (Bull Mountain) – 9708 ft / 2959 m

    Bull Mountain is part of the Park Range of the Rocky Mountains, just west of the continental divide. It is located within the State Forest State Park, a popular place for hunters, fishermen and ATV activities. The park is also a good starting point to climb SOTA WØC/PR-001, Clark Peak – 3940 M / 12951 ft.
    I parked the car at the North Michigan Reservoir and hiked up the 4WD road into the forest (one of two options to get to the summit).

    Trailhead: 8945 ft / 2726 m
    Summit: 9708 ft  / 2959 m
    Elev. gain: 763 ft / 233 m
    Roundtrip: 3.1 mi / 5.2 km

    Compare this summit to my other activated summits

    How to get there:
    Driving on CO14 (driving west coming from Fort Collins or east from Walden) take CO41 (going east) for about half a mile until you hit the State Park entrance toll  booth. Continue on CO41 (dirt road). It will split soon after – take the left arm of CO41 until the about the middle of the reservoir. There is a big parking lot with some larger group cabins on the lake shore.

    Trailhead/Parking lot:

    View Larger Map

    Red Tape:
    State Forest State Park requires an entry fee [$8]. It is NOT allowed to swim in the reservoir (bummer, no way to freshen up after the hike). Staff was unable to explain the reasons to me.

    The Ascent:
    As far as I know, there are two options . There is the 4WD road I took from the Reservoir and there is a hiking trail approaching Bull Mountain from the North. Since my allotted time for this one was limited, I did not want to continue for another 20-30 minutes on the dirt road to get to the hiking trail.
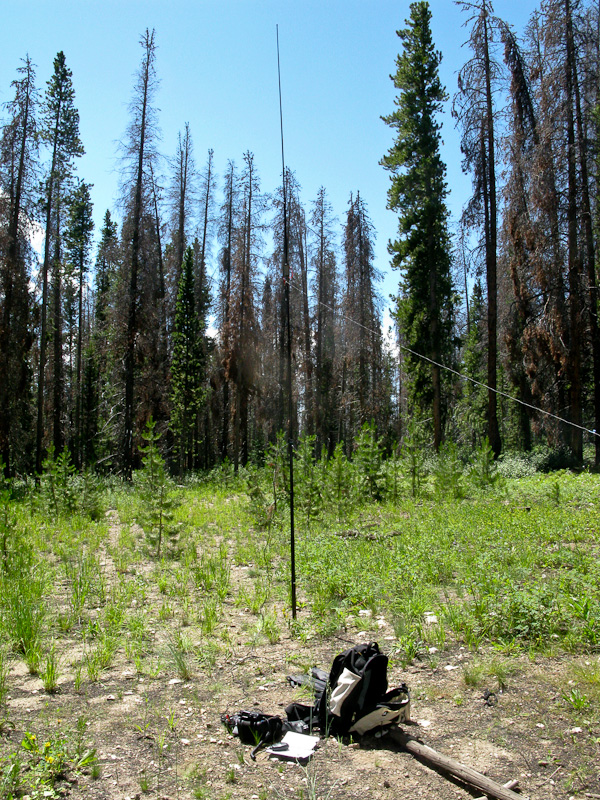
    I encountered two ATVs during my hike through heavily forested area; the trail does not have any outlooks or other scenic features. The entire area is suffering from a bark beetle infestation with tons of dead trees – a very sad sight. When paying the entrance fee, you will get a crude map of the area. Despite the lack of details it was easy to determine which 4WD road to take on the three intersections. It’s a very gradual climb with no challenges.

    The Summit:

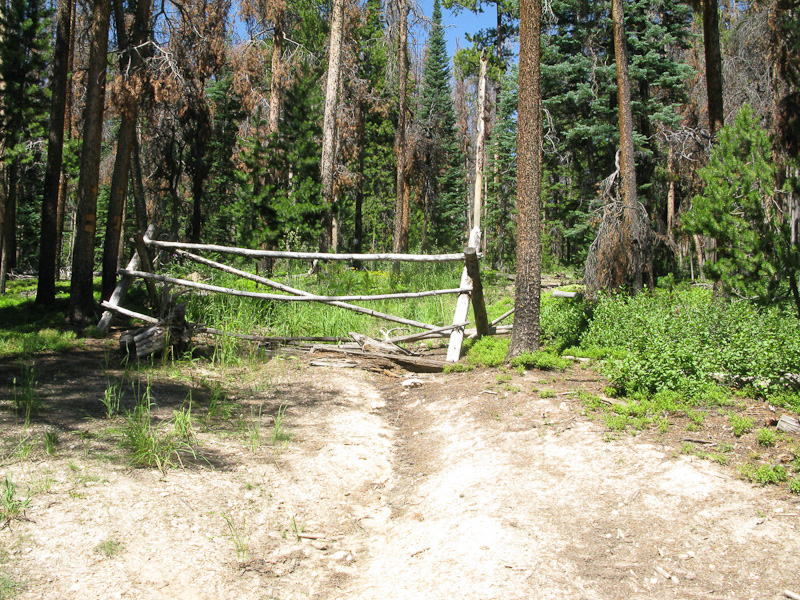
    Abandoned 4WD road to the summit

    It is not easy to determine the highest point. There is no rock outcrop or any other prominent feature at the top – it is just heavily forested. There is however an old abandoned 4WD road going off to your right.
    I was lucky and followed the general  direction and arrived at the summit after about 100-200 yards (verified by GPS). A little frustrated about the non-scenic location I set up my equipment and started to call CQ…. it was hot, mosquitoes and flies were plentiful with nothing to do but buzzing me. Propagation was pretty bad too and I did not hear a soul on 20m SSB. Finally, after 50 minutes I got my fourth required QSO with WB9WHQ (thanks Dan). I packed up my gear and ran down the mountain to the car – happy to leave this summit.

    Buddipole on the summit

    Final Remarks:
    If you are in for an outdoor experience I suggest you skip on this one. It was probably the dullest hike I ever took (except for hitchhiking on an Interstate).  I am certainly glad I did not drive all the way out there just for this activation. If you are out for just the SOTA points, this one gives you easy points (if you can live with the mosquitos/flies/heat).

    Video Summary:
    httpvh://www.youtube.com/watch?v=kFU3BARCPH4

    If you would like to leave questions or comments, please do so through Youtube.


    ATTENTION !! WARNING !! There are old mountaineers, and bold mountaineers… there are no old-bold mountaineers. Hiking and mountain climbing are potentially hazardous activities particularly in Colorado with its extreme elevations. I am not accepting responsibility for any death or injury resulting from activations based on my trip reports. Proper training, experience, and personal capability assessment is required – enjoy!
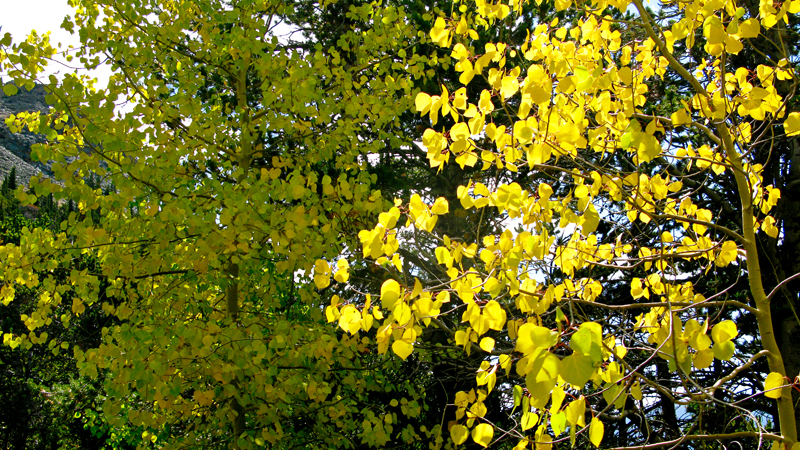
  • WØC/PR-Ø12 (Mount Werner) – 10565 ft / 3220 m

    Mount Werner is located in the Park Range of the Rocky Mountains in Routt County and is part of Routt National Forest. It is a popular winter destination, since it is getting some of the highest levels of snowfalls in all of Colorado. At the base of the Mountain is Steamboat Springs and the Mountain is operated by Steamboat Ski Resort Corporation (which has a long term lease from the National Forest I believe).

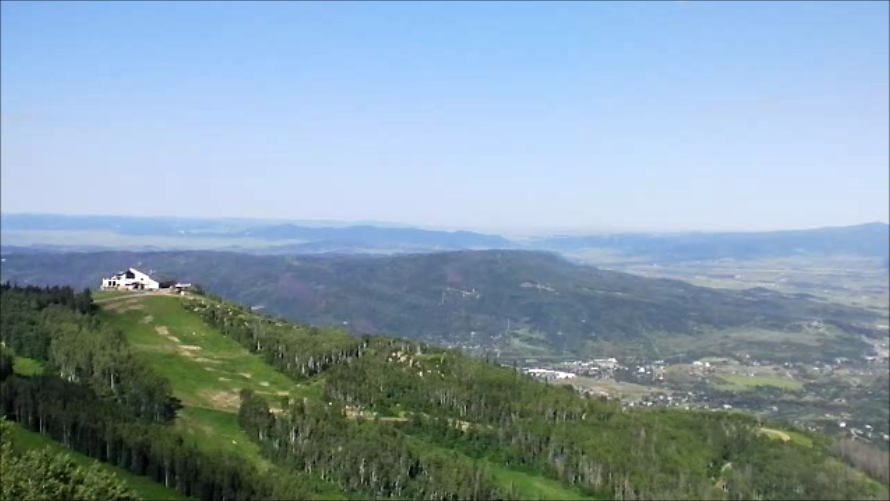
    Thunderhead Station and Steamboat Springs at the base of Mt. Werner

    In summer the main activity seems to be Mountain-biking. A ski resort in summer is never an attractive sight. Hiking trails are scarce due to the fact that the resort makes most of their money with Bikers (just an assumption). If you want to do some nice hiking in this area, try Rabbit Ears Pass instead, you will not be disappointed. During my hike to Mount Werner,  I could never get the feeling to be in a remote location and was unable to connect to nature on this disturbed and heavily scared mountain.

    Trailhead: 6900 ft / 2103 m (Gondola Base) or  9080 ft / 2768 m (Thunderhead)
    Summit: 10565 ft / 3220 m
    Elev. gain: 3665 ft / 1117 m (from base)  or 1485 ft / 453 m (from Thunderhead)
    Roundtrip: 10.4 mi / 16.7 km (from base) or 7.2 mi / 11.6 km (from Thunderhead)

    Compare this summit to my other activated summits

    I took the Gondola to Thunderhead (about $20 for a ticket if I remember correctly – you can use the ticket all day long) and hiked up to the summit on the hiking trails (really just a dirt road) indicated on the official resort map.

    How to get there:
    The Gondola base is impossible to miss if you are in Steamboat Springs.  The base-station of the Gondola is the heart of the Resort.

    Gondola Basestation

    View Larger Map

    Red Tape:
    The whole mountain is managed/controlled by the Steamboat Ski Resort Corporation and the rules of the National Forest do not apply here. According to the official resort map and the info I received locally by talking to their staff, it is not allowed to hike up to the highest point. The  trails above Four Points Hut are reserved for Mountain-bikes only!!! In order to comply with SOTA rules I went up on a day where they had a mountain race (runners) and they changed the trail assignments to accommodate the racers. Optionally you could rent a mountain-bike or go up there in winter (you can go up all the way with Gondola and Ski-lifts and have an easy traverse to the Mt. Werner summit).

    The Ascent:
    It is pretty straight forward. It is a maintenance dirt-road from the Gondola station all the way to the highest point. You will get some nice views of Steamboat Springs and the valley. I always had to keep an eye on all the MBs coming downhills – not all are in complete control of their equipment.

    The Summit:
    The summit is very extensive and hosts several huge antenna installations.  The views in easterly direction are undisturbed and were definitely the best feature on this trip.

    View from the top of Mt. Werner (10565 ft / 3220 m)

    The Descent:
    You are limited to the same route back, either to the Gondola station or you could hike all the way down.

    Video Impressions:
    httpvh://www.youtube.com/watch?v=mSLBl6AOp2s

    If you would like to leave questions or comments, please do so through Youtube.


    ATTENTION !! WARNING !! There are old mountaineers, and bold mountaineers… there are no old-bold mountaineers. Hiking and mountain climbing are potentially hazardous activities particularly in Colorado with its extreme elevations. I am not accepting responsibility for any death or injury resulting from activations based on my trip reports. Proper training, experience, and personal capability assessment is required – enjoy!
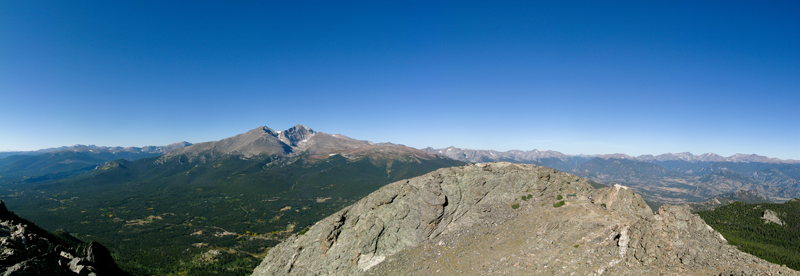
  • WØC/FR-Ø82 (Triangle Mtn.) – 8415 ft / 2565 m

    Triangle Mountain (WØC/FR-Ø82) is part of the Front Range of the Rocky Mountains and within a one hour drive from my home QTH.

    Overview from the first ridge

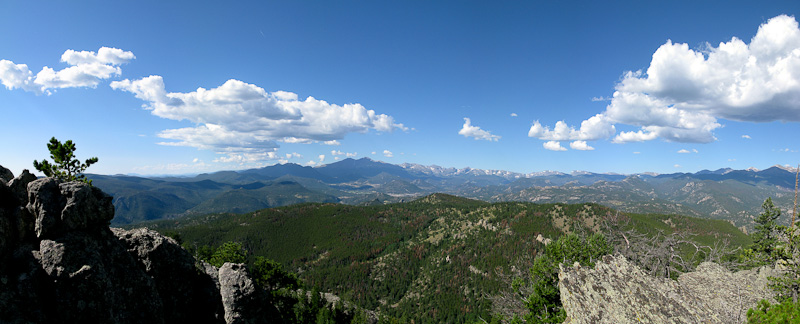
    The summit is located within the Roosevelt National Forest and ranked 147th tallest peak in Larimer County. There is no established trail that goes all the way to the top (so don’t look for one on a map), but it seems to be climbed regularly by visitors from nearby Estes Park (a popular gateway to Rocky Mountain National Park [RMNP]). A clearly visible trail goes about about half-way up the mountain, before it fades out. Be prepared to use your map and compass. I certainly needed my navigation equipment on my way down. There are some steep cliffs on the south-west side of the summit which you should definitely avoid. The summit provides some very scenic views into the nearby Mummy Range and some impressive 14ers in the heart of the Rockies.

    Trailhead: 7020 ft. / 2140 m
    Summit: 8415 ft. / 2565 m
    Elev gain: 1987 ft. / 606 m
    Roundtrip: 3.5 mi / 5.6 km

    Compare this summit to my other activated summits

    The trail-head is a very close to a picnic area at the north-fork of Big Thompson River. The drive up the canyon from Loveland is quite scenic.

    How to get there:
    Take US34 from Loveland towards Estes Park through Big Thompson Canyon. When you pass through Drake, take a right on CR43 along the north-fork. Park at the Lower North Fork picnic area on the left side of the road. There is space to park about five cars.

    Parking/Trailhead

    View Larger Map

    Red Tape:

    Not everybody makes it to the top

    The east side of Triangle Mountain is private property. The trail follows the fence line closely at some points. Since you have to bushwhack part of the way, you will find out that most of the flora has some sort of poky, prickly and/or thorny part. Make sure to stay away from the steep cliffs on the south-west side.

    The Ascent:
    Look directly across the street from the picnic area where a faint trail leads up the steep hillside. The trail becomes more prominent until a grassy  area where the trail becomes faint but marked with some stone cairns. Follow the ridge line and climb across the rock outcroppings. The south-west side is private property and your route might get very close to it.

    The Summit:

    Antenna on the summit

    The summit is on a nice rock-outcropping and gives you unobstructed views in all directions. Most spectacular are the views into the nearby RMNP and Crosier Mountain (another SOTA summit). Is is a rather small area and a larger group cannot setup on the summit. More space is available a few feet below the actual summit (without the breathtaking views).

    The Descent:
    Basically you go back the same way, following the ridge. Unfortunately I made some unplanned detours, exploring the cliffs on the south-west side – not recommended. Map and compass brought me back to the ridge and finally to the trail-head.

    Some video impressions:
    httpvh://www.youtube.com/watch?v=JJn_HwEeyUs

    If you would like to leave questions or comments, please do so through Youtube.


    ATTENTION !! WARNING !! There are old mountaineers, and bold mountaineers… there are no old-bold mountaineers. Hiking and mountain climbing are potentially hazardous activities particularly in Colorado with its extreme elevations. I am not accepting responsibility for any death or injury resulting from activations based on my trip reports. Proper training, experience, and personal capability assessment is required – enjoy!