Antenna Pole Tips by KX0R
For activating summits without trees, we usually need to bring a support for an HF antenna. The most common tool is a collapsible fiberglass pole. There are many types of poles available, and they have their pros and cons.
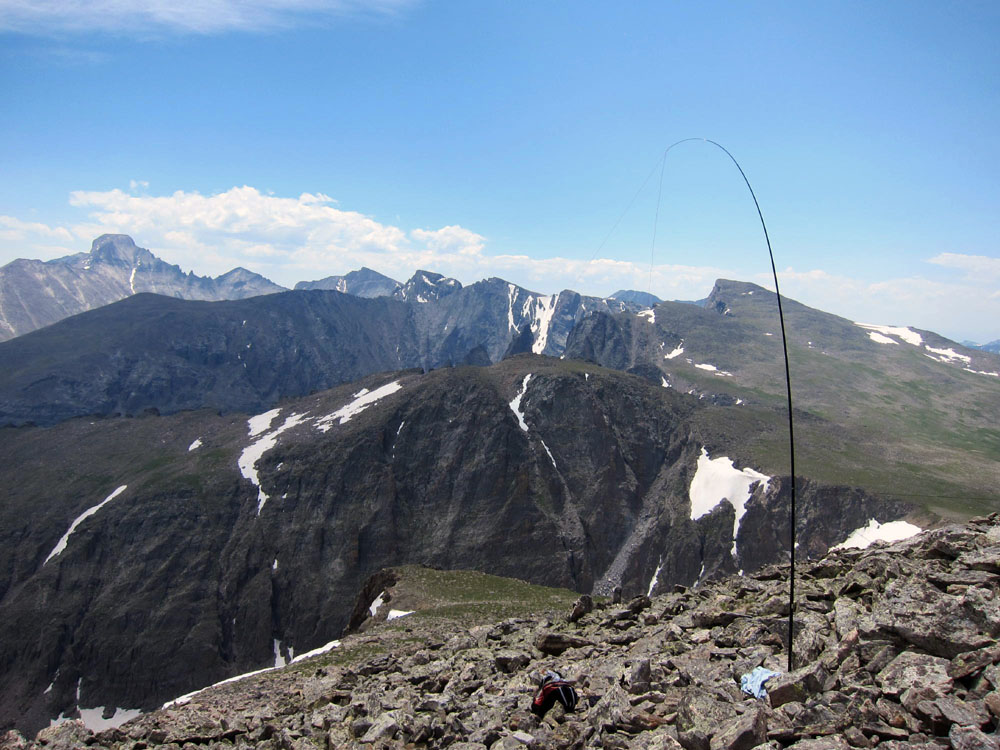
1) Tall, strong poles are available, but they are heavy and impractical in high winds
2) Inexpensive large fishing poles and banner poles are practical, but they are long when collapsed and may be awkward to carry in difficult terrain
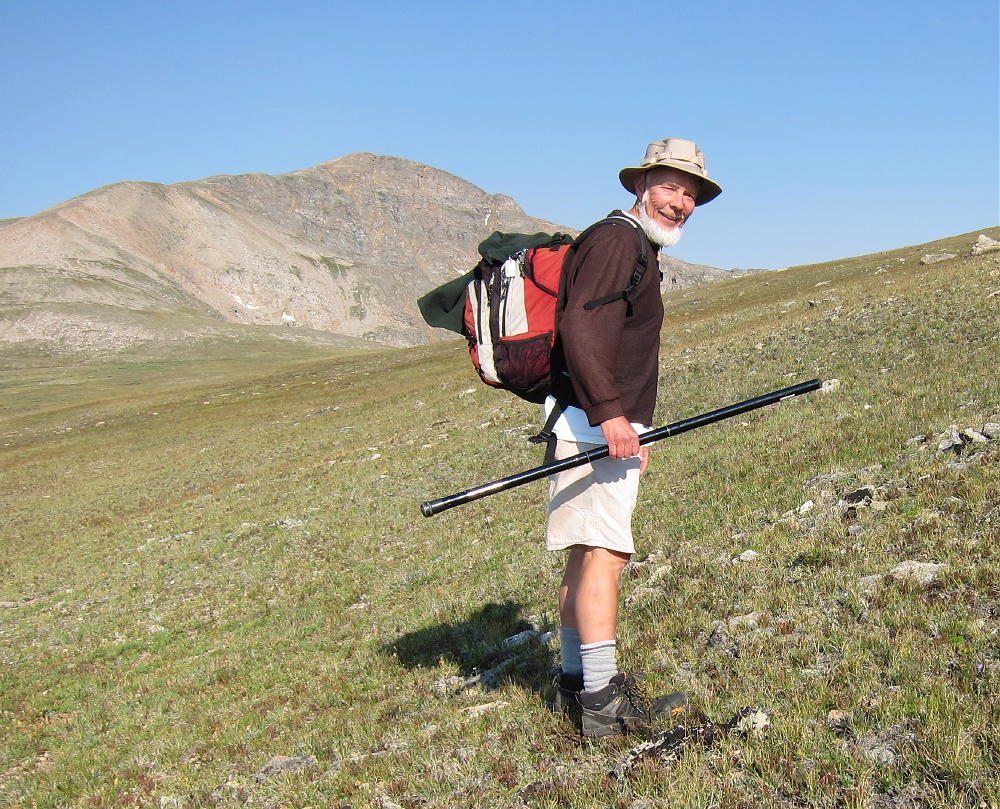
3) Carbon-fiber (graphite) poles are shorter when collapsed and easy to carry in rough country; but they are expensive and easily damaged, and they work best with very thin wire
There are many ways to support an antenna pole. The tips here will work on most high summits.
My simple guying “system” started when I did summits like Green Mountain south of
Golden, and various high alpine peaks, where there may not be big rocks to lean a pole against. Small ropes don’t hold the slick pole well, unless they’re at a
right angle to the pole…which is not always possible.
A tight rubber band or two are put on below the first or second pole joint, so that the lines can hold the pole, even when they come down at an acute angle to the pole.
Each time I try this set-up I learn a little more.
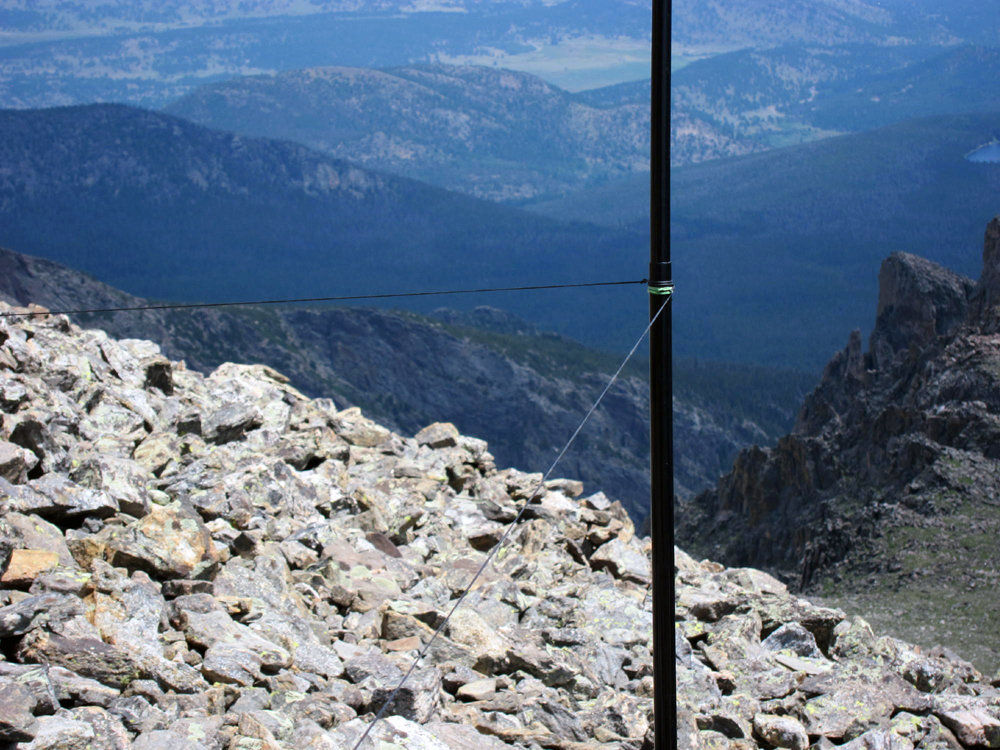
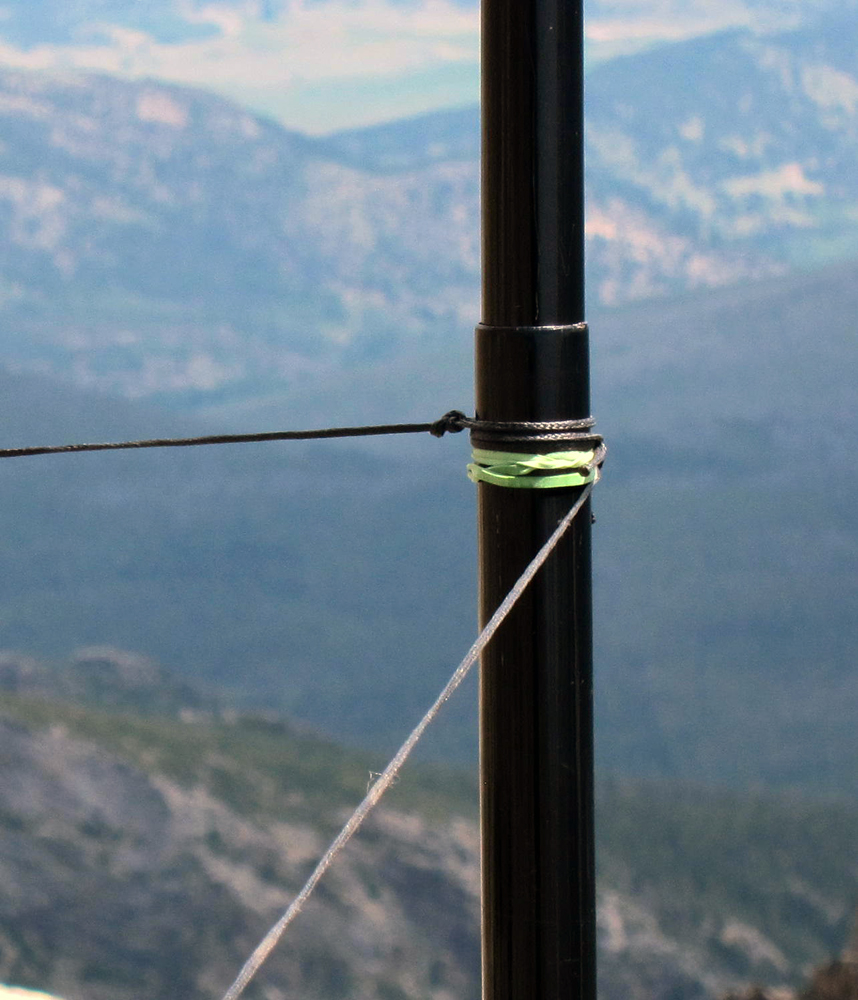
It is essential that the bottom of the pole be in a hole, or surrounded by
rocks, so that it cannot flip up when the pole is under stress from wind and
the wire. The wire at the top tries to pull the bottom of the pole up. The
two guy lines are the fulcrum of a lever – the top of the pole tries to
pivot around the attachment point and flip up at the bottom, if the tension on the top
of the pole is high.
Make sure the bottom of the pole is sufficiently secure. It must be in a depression, or confined by rocks. The tension on the pole must not be excessive.
The beautiful part is that when the pole is up, it can be taken down in
seconds just by lifting it a couple of inches, so the bottom comes up,
rotating the entire pole around the fixed point where the two guy ropes are
tied, and then laying it on the ground. The top lies in the direction of
the far end of the wire.
Now here’s the real secret: If the pole can be taken down in seconds, it
can be raised in seconds just the same way. Here’s how to set it up:
1) The guy ropes are located first. A good spot for the bottom of the pole
is chosen, and rocks for tying the guy ropes are selected.
2) The collapsed pole is placed sideways, the rubber bands are put on below the first or second joint, and the two guy lines are tied on. The attachment point for the lines is located above the spot where the pole bottom will be.
3) The lines are pre-adjusted so they will be tight at the right spot
horizontally when the pole is raised; it is possible to get them almost right.
4) The pole is extended horizontally. The antenna wire is attached to the tip of the pole. It helps if the top of the pole points away from the guy lines – so the wire
lies on the ground, below where it will eventually fly.
5) If the antenna wire has a loop tied at the apex point, there’s no
fooling with the length.
6) If the wire is going to slide freely through the top of the pole, the
bottom if the wire (the feedpoint) needs to be tied to something so it
doesn’t fly up into the air when the pole is raised. If the wire is fixed
to the top of the pole, which I usually do, it can be tied off later.
7) The pole is raised, and the bottom is fixed in place so it won’t move
around or flip out.
8) While holding the pole up, I grab the far end of the wire, put some
tension on the pole – it curves – and let go of it while I walk away,
keeping it curving under tension from the wire.
9) I walk to the end of the wire, which has about 50 feet of small line
attached, and continue out until I come to something to
tie to. Once the line is tied off, the system is usually stable.
10) Minor changes are made with the pole up. The guys can be adjusted,
the bottom of the pole can be shifted, or the direction of the wire can be adjusted somewhat.
11) Just by lifting the base of the pole, the pole can be tipped over toward the far end of the wire, with the guys acting as a fulcrum, and the wire will drop. A link in the wire can be connected or opened, and then the system can be raised back to normal height in seconds.
12) My 33 foot wire is really easy to get up, since about half of it is
vertical. There’s not much wire and line lying around to get caught in the
rocks. It’s fast and easy.
13) A 67 foot wire with the long dacron line is more tricky – it gets caught
on rocks, trees, or bushes, so stringing it out can take a few tries,
and it covers much more space on the mountain. The higher the far end the
better – often I use standing trees, dead tree trunks as poles, or large rocks to raise the far end. I have used a 6-foot fishing pole for a far-end support. I have run the wire up at a high angle with good results, or down the slope with OK results. Small wire is preferred, because it flies higher without bending the pole too much.
14) I use small spools for the wire. A variety of options are available.
15) Twisted wire can be prevented by winding the wire onto the spool in an alternating manner – 10 turns one way, 10 turns the other way, etc. Wire must not be unspoiled off the end of the spool, unless it was originally wound onto the spool in the reverse manner. Twisted wire causes kinks, and kinks are not acceptable.
16) Sometimes an antenna pole can be just wedged in the rocks, but a gust of wind
can take it down. A guyed system is more robust.
17) On summits with trees, I usually tie the pole to a limb. A tree several feet high is often enough to support the system. If the base of the pole is secured by a rock or a branch, just one quick tie about 4 feet up will hold it. Otherwise use two well-spaced ties to the tree. If winds are strong, guys may be needed even with a tree or rock support.
73
KX0R
 !! WARNING !! There are old mountaineers, and
bold mountaineers… there are no old-bold mountaineers.
Hiking and mountain climbing are potentially hazardous activities particularly in Colorado with its extreme elevations. I am not accepting responsibility for any death or injury resulting from activations based on my trip reports. Proper training, experience, and personal capability assessment is required – enjoy!
!! WARNING !! There are old mountaineers, and
bold mountaineers… there are no old-bold mountaineers.
Hiking and mountain climbing are potentially hazardous activities particularly in Colorado with its extreme elevations. I am not accepting responsibility for any death or injury resulting from activations based on my trip reports. Proper training, experience, and personal capability assessment is required – enjoy!